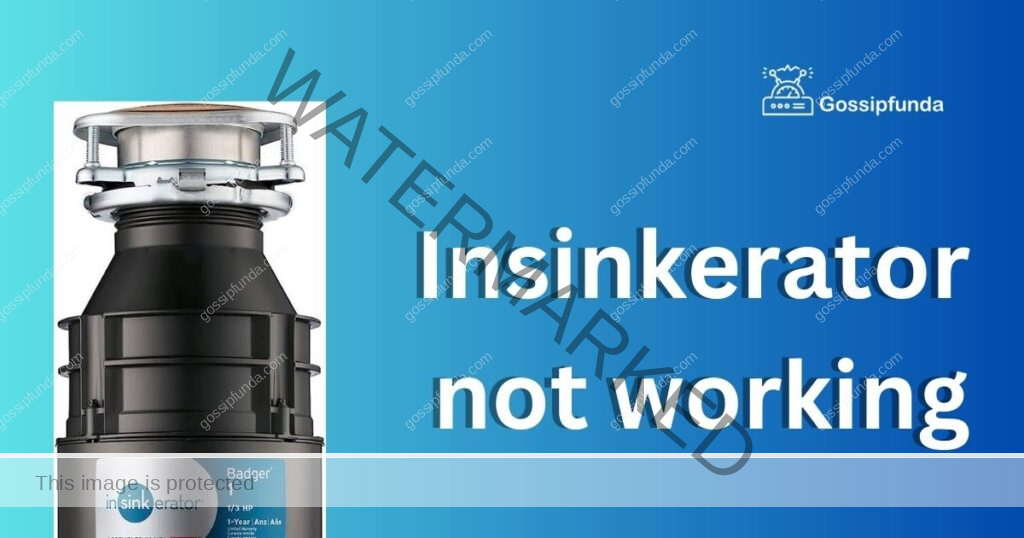
Is your kitchen’s trusty Insinkerator garbage disposal acting up, leaving you with a pile of food waste and frustration? Don’t worry; you’re not alone. An Insinkerator not working can be a common issue, but fortunately, many problems have simple solutions. In this comprehensive guide, we’ll walk you through the most common reasons why your Insinkerator might be malfunctioning and how to fix it with step-by-step procedures.
Common reasons behind an Insinkerator not working
- Insufficient Power Supply: An unplugged or faulty electrical outlet can result in the Insinkerator not receiving power, leading to its malfunction.
- Jammed or Clogged Disposal: Large food particles, bones, or other debris can obstruct the blades of the disposal, causing it to stop working.
- Resetting the Overload Protector: Overloading the disposal with excessive food waste can trigger the internal circuit breaker or overload protector, shutting down the unit.
- Faulty Motor: Continuous usage or electrical issues can lead to a worn-out or damaged motor, preventing the Insinkerator from functioning correctly.
- Leakage: Loose connections, damaged pipes, or worn-out seals can result in water leakage, causing the disposal to cease operation.
How to fix Insinkerator not working?
Fix 1: Insufficient Power Supply
If your Insinkerator is not working and shows no signs of life, such as the motor not running or the blades not spinning, the problem could be due to an insufficient power supply. Follow these steps to resolve this issue:
1. Check the Power Cord and Outlet:
- Unplug the Insinkerator from the electrical outlet.
- Inspect the power cord for any visible damages or cuts. If you notice any, replace the power cord before proceeding further.
- Carefully plug the Insinkerator back into the electrical outlet, ensuring it fits snugly and securely.
2. Test the Outlet:
- To determine if the electrical outlet is functioning correctly, plug in another small appliance, such as a toaster or a blender, into the same outlet.
- If the second appliance also doesn’t work, the problem is likely with the electrical outlet, not the Insinkerator. In this case, you may need to call a qualified electrician to inspect and fix the outlet.
3. Reset the GFCI (Ground Fault Circuit Interrupter):
- Some kitchens have GFCI outlets, which have a built-in safety feature that trips and cuts off power if there is an electrical fault.
- Locate the GFCI outlet in your kitchen, which typically has two buttons labeled “Test” and “Reset.”
- Press the “Reset” button firmly to restore power to the outlet. Then, try running the Insinkerator to see if it works.
4. Check the Circuit Breaker:
- If the Insinkerator is connected to a circuit breaker, go to your home’s electrical panel.
- Look for the circuit breaker labeled “Kitchen” or “Garbage Disposal” and ensure it is in the “ON” position. If it has tripped, switch it off and then back on to reset it.
5. Call an Electrician:
- If you’ve checked all the above steps, and the Insinkerator is still not receiving power, the issue might lie in the electrical wiring or connections.
- In such cases, it’s best to contact a licensed electrician to identify and fix the electrical problem professionally.
By following these steps and ensuring a stable power supply, you can eliminate insufficient power as the cause of your Insinkerator not working and get it back up and running efficiently.
Read more: Onstream movie app not working
Fix 2: Jammed or Clogged Disposal
If you hear a humming noise from your Insinkerator but there is no grinding sound, the disposal might be jammed or clogged. This can happen when large food particles, bones, or other debris obstruct the blades from spinning. Follow these steps to fix a jammed or clogged disposal:
1. Turn Off the Power:
- Disconnect the power to the Insinkerator to prevent any accidents while attempting to clear the jam.
2. Inspect the Disposal:
- Shine a flashlight into the disposal to get a clear view of the obstruction.
- Using tongs or pliers, carefully remove any visible objects that are causing the jam. Avoid using your hands to prevent injury.
3. Use an Allen Wrench:
- Most Insinkerator models come with an Allen wrench (also known as a hex key) that fits into a slot on the bottom of the unit.
- Insert the Allen wrench into the slot and manually rotate it back and forth. This action should help to dislodge any jammed objects.
4. Rotate the Impellers:
- If you don’t have an Allen wrench, use a wooden broomstick or a long-handled spoon.
- Insert the handle into the disposal through the sink opening, and try to rotate the impellers manually. This can help to free any lodged items.
5. Reset the Overload Protector:
- After clearing the jam, restore power to the Insinkerator.
- Locate the reset button on the bottom of the unit, which is usually red or black.
- Press the reset button firmly to restore power to the disposal.
6. Test the Disposal:
- Turn the power back on and run water into the sink.
- Switch on the Insinkerator and see if it is now working properly. Avoid overloading the disposal in the future to prevent further jams.
Remember to be cautious when attempting to fix a jammed disposal and always disconnect the power before inspecting or working on it. If you cannot resolve the jam using these steps, or if the disposal still doesn’t work, it’s best to contact a professional plumber who can diagnose and fix the issue safely and effectively.
Fix 3: Resetting the Overload Protector
If your Insinkerator suddenly stops working after disposing of a large amount of food waste or tough items, the overload protector might have tripped. The overload protector is a safety feature that shuts off the disposal when it becomes overloaded to prevent damage to the motor. To fix this issue, follow these steps to reset the overload protector:
1. Turn Off the Power:
- Switch off the power to the Insinkerator by unplugging it from the electrical outlet or turning off the circuit breaker connected to it.
2. Locate the Reset Button:
- The reset button is usually located on the bottom or side of the Insinkerator unit.
- Look for a red or black button on the bottom of the disposal.
3. Press the Reset Button Firmly:
- Press the reset button firmly using your finger or a small tool like a screwdriver.
- You may feel a slight resistance, but avoid using excessive force to prevent any damage.
4. Wait for a Few Minutes:
- Wait for about five minutes to give the motor time to cool down and reset properly.
5. Test the Disposal:
- After the waiting period, restore power to the Insinkerator by plugging it back in or turning on the circuit breaker.
- Run water into the sink, switch on the Insinkerator, and see if it is working correctly now.
6. Run in Short Bursts:
- To prevent overloading the disposal again, run the Insinkerator in short bursts rather than continuously feeding large amounts of food waste.
If the overload protector keeps tripping frequently, it could indicate a more significant issue. In such cases, avoid resetting the overload protector repeatedly and instead, contact a professional technician to inspect and diagnose the underlying problem. Attempting to fix electrical issues without proper knowledge and tools can be hazardous and might void the warranty if applicable. A qualified technician will be able to determine if any repairs or replacements are needed to ensure your Insinkerator works reliably again.
Fix 4: Addressing Leakage
A leaking Insinkerator can not only lead to its malfunction but also cause water damage and potential mold growth under your sink. If you notice any water seeping from the disposal or pooling under the sink, follow these steps to address the leakage:
1. Turn Off the Power:
- As a safety measure, disconnect the power to the Insinkerator by unplugging it or switching off the circuit breaker connected to it.
2. Inspect the Connections:
- Check all the connections between the Insinkerator and the sink’s plumbing for any signs of leaks or loose fittings.
- Ensure that the mounting assembly is securely attached to the sink’s flange and that there are no gaps or visible damage in the seals.
3. Tighten Loose Connections:
- If you identify any loose connections, use a wrench to tighten them carefully.
- Make sure not to overtighten, as it may cause damage to the components or create new leaks.
4. Check the Disposal’s Body and Drain Pipe:
- Inspect the disposal’s body for any cracks or fractures that could be causing the leakage.
- Also, examine the drain pipe connected to the disposal for any visible damage or signs of wear.
5. Replace Worn-out Seals or Parts:
- If you notice any worn-out or damaged seals, they will need to be replaced promptly.
- Follow the manufacturer’s instructions or consult the Insinkerator’s manual to find the correct replacement parts.
6. Apply Plumber’s Putty or Silicone:
- If the leakage persists even after tightening the connections and replacing damaged parts, you can use plumber’s putty or silicone caulk as a temporary fix.
- Apply a thin layer of plumber’s putty or silicone around the flange of the mounting assembly to create a watertight seal.
7. Reassemble and Test:
- Reassemble the components after completing the repairs or replacements.
- Turn on the power and run water into the sink to check for any remaining leaks.
8. Seek Professional Help:
- If the leakage persists despite your attempts to fix it, or if you’re unsure about performing repairs, it’s best to seek professional help.
- A licensed plumber can accurately diagnose the cause of the leakage and provide a proper and long-lasting solution.
Addressing leaks promptly is crucial to prevent further damage and ensure the safe operation of your Insinkerator. Regularly inspecting and maintaining your disposal can help prevent leaks and extend its lifespan, keeping your kitchen clean and functional.
Fix 5: Dealing with a Faulty Motor
If you’ve checked the power supply, reset the overload protector, and cleared any jams or clogs, but your Insinkerator is still not working, the problem might lie with the motor. Over time, motors can wear out due to constant use or suffer from electrical issues. Here’s how to deal with a faulty motor:
1. Confirm Motor Issue:
- Before assuming it’s a motor problem, double-check that there are no jams, clogs, or power supply issues causing the malfunction.
- If you’re certain those are not the problems, proceed with diagnosing the motor.
2. Professional Assessment:
- Fixing a faulty motor is not a DIY task, and attempting to do so may cause further damage and void any existing warranty.
- Contact a professional technician who specializes in garbage disposals to inspect and diagnose the motor issue.
3. Replacement Options:
- Depending on the severity of the motor damage, the technician will suggest either repairing the motor or replacing it entirely.
- They will provide you with the best course of action and, if needed, recommend high-quality replacement parts.
4. Follow Manufacturer Guidelines:
- If the technician replaces the motor, ensure they use genuine manufacturer-approved parts.
- Adhering to the manufacturer’s guidelines ensures the longevity and proper functioning of your Insinkerator.
5. Preventive Maintenance:
- Once the motor issue is resolved, implement preventive maintenance to prolong its life.
- Avoid overloading the disposal with large amounts of food waste or disposing of non-food items to prevent future motor problems.
6. Regular Inspections:
- Schedule regular inspections with a professional technician to identify any potential motor issues early on and avoid sudden breakdowns.
7. Proper Usage:
- Educate yourself and your household members on the correct usage of the Insinkerator to prevent unnecessary strain on the motor.
By addressing a faulty motor promptly and following preventive measures, you can extend the life of your Insinkerator and keep it operating efficiently for years to come. Remember, seeking professional assistance for motor-related problems is essential to ensure safety and avoid further damage.
Fix 6: Handling Persistent Foul Odors
Sometimes, an Insinkerator may be in working condition, but you might notice persistent foul odors emanating from the sink area. These odors can be unpleasant and can spread to your kitchen and beyond. Here’s how to handle foul odors from your Insinkerator:
1. Clean the Disposal:
- Turn off the power to the Insinkerator by unplugging it or switching off the circuit breaker connected to it.
- Thoroughly clean the disposal by using a mixture of baking soda and vinegar. Pour half a cup of baking soda into the disposal, followed by half a cup of vinegar. Allow the mixture to sit for a few minutes before rinsing it with hot water.
2. Use Citrus Peels:
- Citrus peels, like those from lemons, limes, or oranges, have natural deodorizing properties.
- After cleaning the disposal, toss a few citrus peels into it, and run it with cold water. The fresh aroma will help eliminate odors.
3. Ice Cubes and Salt:
- Place a handful of ice cubes and a tablespoon of rock salt into the disposal.
- Turn on the disposal and run it with cold water. The ice and salt will help dislodge any debris and remove foul-smelling residues.
4. Flush with Hot Water:
- After using any of the methods mentioned above, flush the disposal with hot water to ensure any remaining debris is washed away.
5. Avoid Disposer Abuse:
- Refrain from disposing of oily, greasy, or fibrous food items, as they can lead to unpleasant odors.
- Dispose of small amounts of food waste at a time and run the water for a few seconds after using the Insinkerator to prevent residue buildup.
6. Use Commercial Cleaners:
- If the foul odors persist, you can use commercial garbage disposal cleaners following the manufacturer’s instructions.
- Ensure the cleaner is compatible with your specific Insinkerator model.
7. Regular Maintenance:
- Incorporate regular cleaning and maintenance of your Insinkerator into your kitchen routine to prevent the recurrence of odors.
8. Seek Professional Help:
- If the foul odors persist despite your efforts, there might be underlying issues that require professional attention.
- Contact a licensed plumber or Insinkerator technician to identify and fix any significant problems.
By following these steps and implementing preventive measures, you can keep your Insinkerator smelling fresh and clean, making your kitchen a more pleasant space for cooking and socializing. Proper care and maintenance not only eliminate odors but also enhance the overall efficiency and lifespan of your garbage disposal.
Fix 7: Silence Unusual Noises
An Insinkerator that produces strange or unusual noises during operation can be concerning. These noises can range from grinding or rattling sounds to high-pitched squeals. Identifying and addressing these noises promptly can help prevent further damage and potential breakdowns. Here’s how to silence unusual noises from your Insinkerator:
1. Turn Off the Power:
- Before inspecting the disposal, disconnect the power by unplugging it or switching off the circuit breaker connected to it.
2. Check for Foreign Objects:
- Look inside the disposal to ensure there are no foreign objects causing the unusual noises.
- Use tongs or pliers to carefully remove any visible debris or foreign items that might be obstructing the blades.
3. Run Water During Operation:
- Turn on the Insinkerator and run water into the sink while it’s running.
- Adequate water flow during operation can help reduce grinding noises and improve the disposal’s performance.
4. Tighten Loose Mounting Screws:
- Inspect the mounting assembly to ensure all screws are securely tightened.
- Loose screws can cause the disposal to vibrate excessively, resulting in strange noises.
5. Check for Damaged or Worn-out Parts:
- Inspect the disposal’s components, including the blades, impellers, and bearings for any signs of damage or wear.
- If you notice any issues, consider replacing the faulty parts with genuine manufacturer-approved replacements.
6. Use Insulation:
- If the Insinkerator is making a lot of vibrations and noise, you can use rubber or foam insulation to dampen the sound.
- Place the insulation around the disposal’s mounting assembly to minimize vibrations.
7. Lubricate Moving Parts:
- Lubricate the disposal’s moving parts using a food-grade lubricant to reduce friction and noise.
- Follow the manufacturer’s recommendations for lubrication intervals.
8. Avoid Overloading:
- Avoid overloading the disposal with large amounts of food waste, as this can strain the motor and result in unusual noises.
- Feed the disposal with small amounts of waste at a time and allow it to grind the food gradually.
9. Seek Professional Assistance:
- If the unusual noises persist or you’re unsure about performing any repairs, contact a professional technician.
- A qualified technician can diagnose the problem accurately and make necessary adjustments or replacements.
By addressing unusual noises promptly and following these preventive measures, you can keep your Insinkerator running smoothly and silently. Regular maintenance and care can extend the life of your garbage disposal and help maintain a peaceful and functional kitchen environment.
Fix 8: Dealing with Persistent Clogs
If your Insinkerator is frequently getting clogged, it can lead to inefficiency and even cause the unit to stop working. Addressing persistent clogs is crucial to ensure your garbage disposal functions optimally. Follow these steps to deal with persistent clogs in your Insinkerator:
1. Turn Off the Power:
- As always, disconnect the power to the Insinkerator to avoid any potential accidents while clearing the clog.
2. Avoid Chemical Drain Cleaners:
- Avoid using chemical drain cleaners as they can be harsh on the disposal’s components and may not effectively clear the clog.
3. Try the Plunger Method:
- If you have a sink plunger, fill the sink with enough water to cover the bottom of the plunger and place it over the drain.
- Pump the plunger up and down vigorously to create suction and dislodge the clog.
4. Use a Bent Wire Hanger:
- Straighten a wire coat hanger and bend one end into a hook shape.
- Insert the hooked end into the disposal through the sink drain and carefully fish out any debris causing the clog.
5. Utilize a Disposal Tool:
- Many hardware stores sell specialized disposal cleaning tools designed to dislodge clogs.
- Follow the tool’s instructions to use it effectively and safely.
6. Run Cold Water:
- Run cold water into the sink while operating the disposal to help flush away debris and prevent clogs.
7. Try Baking Soda and Vinegar:
- As mentioned earlier, a mixture of baking soda and vinegar can be useful in breaking down organic matter causing the clog.
- Pour half a cup of baking soda into the disposal, followed by half a cup of vinegar. Let it sit for a few minutes before running cold water and the disposal.
8. Grind Ice Cubes and Rock Salt:
- Grinding ice cubes and rock salt helps to clean the disposal and remove any grease or debris that might be contributing to the clog.
9. Avoid Overloading:
- To prevent future clogs, avoid overloading the disposal with large amounts of food waste at once.
- Feed the disposal gradually with small amounts of waste and run cold water during operation.
10. Schedule Regular Maintenance:
- Regular maintenance by a professional technician can help identify potential clog-causing issues and address them before they become severe.
11. Seek Professional Help:
- If persistent clogs continue to be a problem despite your efforts, or if you encounter more complex clogs, it’s best to seek professional help.
- A licensed plumber or garbage disposal technician can use specialized tools to clear stubborn clogs safely and efficiently.
By following these steps and adopting preventive measures, you can keep your Insinkerator free from persistent clogs and ensure it operates smoothly and efficiently, making your kitchen clean-up a breeze.
Preventing Insinkerator issues: Tips for long-term efficiency
- Use Cold Water: Always run cold water into the sink while operating the Insinkerator. Cold water helps solidify grease and prevents it from sticking to the disposal’s blades and pipes, reducing the risk of clogs.
- Avoid Overloading: Feed the disposal gradually with small amounts of food waste rather than trying to dispose of large quantities at once. Overloading the disposal can strain the motor and lead to frequent jams.
- Dispose of Proper Items: Only dispose of food waste in the Insinkerator. Avoid disposing of non-food items, fibrous materials, or hard substances like bones, shells, or metal objects.
- Cut Waste into Small Pieces: To make it easier for the disposal to grind up waste, cut food into small pieces before putting it down the drain.
- Regular Cleaning: Clean the disposal regularly using baking soda and vinegar or specialized disposal cleaning products to remove residues and odors.
- Run Cold Water After Use: After using the Insinkerator, continue running cold water for a few seconds to flush out any remaining debris and prevent lingering odors.
- Avoid Harsh Chemicals: Refrain from using chemical drain cleaners as they can damage the disposal’s components and lead to further issues.
- Schedule Professional Maintenance: Schedule regular maintenance with a professional technician to identify and address potential problems before they escalate.
- Practice Caution: Be cautious when working on the disposal yourself. Always disconnect the power before inspecting or performing any repairs.
- Read the Manual: Familiarize yourself with the manufacturer’s guidelines and recommendations for your specific Insinkerator model. Adhere to the instructions for proper usage and maintenance.
- Use Citrus Peels: Periodically toss citrus peels into the disposal to naturally freshen it up and combat odors.
By following these preventive tips, you can ensure the long-term efficiency of your Insinkerator, prevent common issues, and reduce the risk of breakdowns. Regular care and proper usage will keep your garbage disposal running smoothly, making your kitchen clean-up routine hassle-free.
Conclusion
With proper care and maintenance, you can keep your Insinkerator running smoothly and efficiently. Follow these preventive tips to avoid common issues and ensure a hassle-free kitchen experience. Keep the garbage disposal clean, avoid overloading, and seek professional help when needed. With these measures, you can enjoy a fresh and functional kitchen for years to come.
FAQs
Check power supply, reset overload protector, or call an electrician if needed.
Turn off power, use tongs to remove debris, or manually rotate impellers.
Press reset button, avoid overloading, or seek professional help if the issue persists.
Check connections, tighten loose parts, or replace faulty seals and parts.
Clean with baking soda and vinegar, use citrus peels, or run cold water during operation.
Check for foreign objects, tighten mounting screws, or seek professional assistance.
Prachi Mishra is a talented Digital Marketer and Technical Content Writer with a passion for creating impactful content and optimizing it for online platforms. With a strong background in marketing and a deep understanding of SEO and digital marketing strategies, Prachi has helped several businesses increase their online visibility and drive more traffic to their websites.
As a technical content writer, Prachi has extensive experience in creating engaging and informative content for a range of industries, including technology, finance, healthcare, and more. Her ability to simplify complex concepts and present them in a clear and concise manner has made her a valuable asset to her clients.
Prachi is a self-motivated and goal-oriented professional who is committed to delivering high-quality work that exceeds her clients’ expectations. She has a keen eye for detail and is always willing to go the extra mile to ensure that her work is accurate, informative, and engaging.


