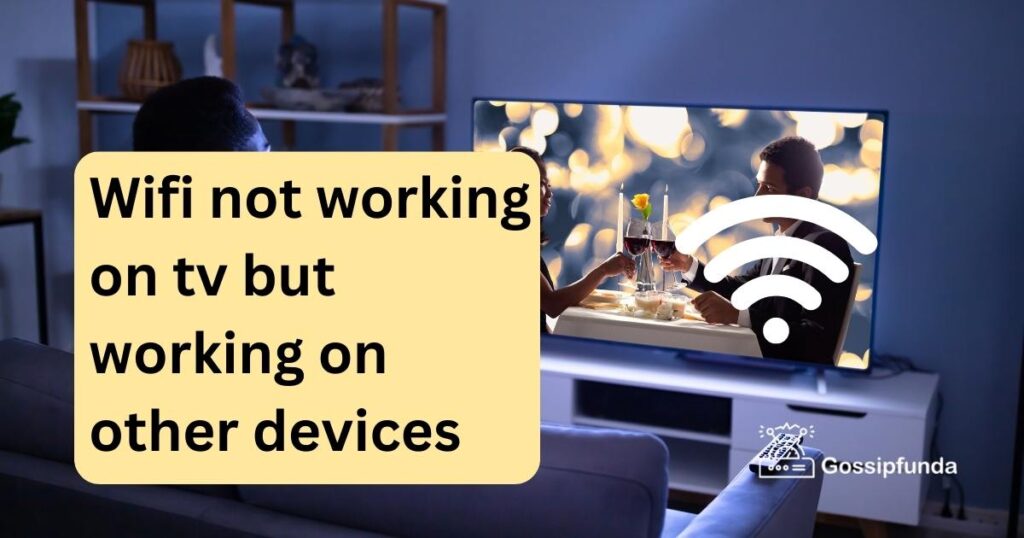
In our connected world, streaming content on TV has become an essential part of our entertainment. But what if you encounter the frustrating situation where your WiFi works perfectly fine on other devices, yet your TV refuses to cooperate? Don’t fret, as we’re here to unravel this conundrum for you. In this comprehensive guide, we’ll delve into the reasons behind this perplexing issue and provide step-by-step solutions to get your TV back online. From network settings to connectivity checks, we’ve got you covered. So, let’s dive in and bring that seamless streaming experience back to your television!
Common Causes of WiFi Connectivity Issues on TV
- Interference: Nearby electronic devices, cordless phones, microwaves, or even physical obstructions like walls can interfere with WiFi signals, affecting the TV’s connection.
- Outdated Firmware: TV firmware that hasn’t been updated can lead to compatibility issues with the WiFi network, causing connectivity problems.
- Signal Range Limitations: If the TV is located far from the WiFi router or is obstructed by walls, it might receive a weak signal, resulting in intermittent or no connection.
- DNS Configuration: Incorrect Domain Name System (DNS) settings on the TV can prevent it from accessing the internet, even if it’s connected to WiFi.
- Bandwidth Congestion: Too many devices connected to the same WiFi network can lead to bandwidth congestion, affecting the TV’s connection quality.
- Network Overload: If multiple devices are streaming or downloading simultaneously, the network might become overloaded, impacting the TV’s ability to connect.
- WiFi Extender Issues: If you’re using a WiFi extender, it could be experiencing problems, leading to inconsistent connectivity on the TV.
- IP Address Conflict: An IP address conflict occurs when multiple devices on the network have the same IP address, causing network confusion.
- Security Settings: Incorrect security settings, such as the wrong encryption type or WiFi password, can prevent the TV from connecting.
- Router Problems: If the router is malfunctioning, not properly configured, or needs a reboot, it can affect the TV’s ability to connect to WiFi.
- ISP Issues: Sometimes, the problem might not be with your devices but with your Internet Service Provider (ISP), experiencing outages or technical glitches.
- Network Congestion: Network congestion during peak hours can affect the TV’s connectivity, especially if the TV isn’t prioritized for network access.
- MAC Address Filtering: If your router has MAC address filtering enabled and the TV’s MAC address isn’t whitelisted, it won’t be able to connect.
- Static IP Configuration: Incorrectly configured static IP settings on the TV can lead to connectivity problems.
- Power Saving Settings: Some TVs have power-saving settings that might interfere with WiFi connections if not configured properly.
By understanding these potential reasons for WiFi connectivity issues on your TV, you can narrow down the problem and implement the appropriate solutions to regain seamless streaming capabilities.
How to fix wifi not working on tv but working on other devices?
Fix 1: Check Your Network Connection
When facing WiFi connectivity problems on your TV, the first step is to ensure that your network connection settings are correctly configured. Follow these detailed steps to check and rectify any potential issues:
- Access Network Settings: Navigate to your TV’s settings menu. Look for the “Network” or “Internet” option, usually located under the “Settings” or “Setup” section.
- Select Wireless Connection: Choose the wireless connection option. If you’re currently connected to a wired network, switch to the wireless connection mode.
- Check SSID and Password: Confirm that the correct WiFi network name (SSID) is displayed. Check if the password is correctly entered. Pay attention to capitalization and avoid any typos.
- Re-enter WiFi Password: If you suspect a typing error, re-enter the WiFi password. Sometimes, a single wrong character can prevent the TV from connecting.
- Save and Connect: After confirming the SSID and password, select the “Save” or “Connect” option. The TV will attempt to establish a connection to the WiFi network.
- Test Connectivity: Once connected, test the connection by opening a streaming app or a browser. If the content loads without issues, your TV’s network connection is now fixed.
By meticulously checking and reconfiguring your TV’s network settings, you can eliminate potential errors that might have been preventing your TV from connecting to the WiFi network. This fix often resolves minor connectivity glitches and ensures your TV is ready for uninterrupted streaming.
Read more: Intel Wifi 6 ax201 not working
Fix 2: Update Firmware for Compatibility
Outdated firmware can often lead to compatibility issues with your TV’s WiFi connectivity. To address this problem, follow these comprehensive steps to update your TV’s firmware:
- Identify TV Model: Find out the exact model of your TV. This information is usually available on the back of the TV or in the user manual.
- Visit Manufacturer’s Website: Using a computer or a smartphone, visit the official website of the TV manufacturer. Look for the “Support” or “Downloads” section.
- Download Firmware Update: Search for the firmware update specific to your TV model. Download the latest firmware version onto a USB flash drive. Make sure to format the flash drive to ensure compatibility.
- Insert USB Drive: Insert the USB flash drive into one of the TV’s USB ports.
- Access TV Settings: Turn on the TV and access the settings menu. Navigate to the “System” or “About” section. Look for an option like “Software Update” or “Firmware Update.”
- Select USB Update: Choose the option that allows you to update the firmware using a USB drive. Follow the on-screen instructions to initiate the update process.
- Select Update File: The TV will detect the firmware update file on the USB drive. Select the file and confirm that you want to proceed with the update.
- Start Update: The TV will start the firmware update process. Do not turn off the TV or unplug it during this process, as it could damage the TV.
- Wait for Completion: The update may take several minutes. Once the update is complete, the TV will automatically restart.
- Test Connectivity: After the TV restarts, access the network settings and reconnect to your WiFi network. Test the connection by accessing streaming apps or websites.
Updating your TV’s firmware ensures that it is equipped with the latest software enhancements, bug fixes, and compatibility improvements. This can potentially resolve WiFi connectivity issues stemming from outdated firmware and help your TV connect seamlessly to your network once again.
Fix 3: Check Signal Strength and Placement
Weak WiFi signals and improper placement of your TV can contribute to connectivity problems. Follow these steps to assess signal strength and optimize your TV’s placement for better WiFi reception:
- Check Signal Bars: On your TV, navigate to the network settings or WiFi settings. Look for the signal strength indicator, often represented by bars. This will give you an idea of the signal quality your TV is receiving.
- Move Closer to Router: If the signal strength is low, try moving your TV closer to the WiFi router. Physical obstructions like walls and furniture can weaken signals, so finding a more direct line of sight to the router can improve connectivity.
- Avoid Interference: Keep the TV away from electronic devices that emit interference, such as cordless phones, baby monitors, and microwave ovens. These devices can disrupt WiFi signals and cause connectivity issues.
- Avoid Walls and Obstructions: Ensure that there are minimal walls and obstacles between the TV and the WiFi router. Walls, especially those with metal components, can significantly weaken signals.
- Consider WiFi Extenders: If your TV is located far from the router, consider using WiFi extenders or repeaters. These devices amplify signals and extend the range of your WiFi network, improving connectivity in distant areas of your home.
- Use 5GHz Band: If your router supports both 2.4GHz and 5GHz bands, connect your TV to the 5GHz band. This band offers faster speeds and is less susceptible to interference.
- Optimize Router Placement: Ensure your WiFi router is placed in a central location within your home. Elevated positions, away from walls and obstructions, can help distribute signals evenly.
- Adjust Router Antennas: If your router has adjustable antennas, position them vertically and at different angles to enhance signal coverage.
- Check Other Devices: Confirm that other devices connected to the same WiFi network are also receiving a stable connection. If they are not, the issue might be with the router or the network itself.
- Reconnect and Test: After adjusting placement and optimizing the signal, reconnect your TV to the WiFi network. Test the connection by streaming content to ensure stable performance.
By optimizing the signal strength and placement of your TV, you can mitigate the impact of weak signals and physical barriers that hinder WiFi connectivity. Following these steps will help ensure that your TV receives a strong and stable WiFi connection for uninterrupted streaming and online activities.
Fix 4: Configure DNS Settings for Reliable Connection
Incorrect Domain Name System (DNS) settings can prevent your TV from accessing the internet, even when connected to WiFi. Here’s how you can fix this issue by configuring DNS settings:
- Access Network Settings: Navigate to the network settings menu on your TV. This is typically found in the settings or setup section.
- Choose Network Connection: Select the wireless network connection option. If your TV is currently connected via Ethernet, switch to WiFi.
- Find DNS Settings: Look for an option labeled “DNS Settings” or “Custom DNS.” This is where you’ll make the necessary changes.
- Choose Manual Configuration: If the DNS settings are set to automatic, switch to manual configuration.
- Enter DNS Addresses: Use reliable DNS server addresses such as Google DNS (8.8.8.8 and 8.8.4.4) or OpenDNS (208.67.222.222 and 208.67.220.220). Enter the primary and secondary DNS addresses in the appropriate fields.
- Save Changes: After entering the DNS addresses, save the changes and exit the settings menu.
- Restart TV: Restart your TV to apply the new DNS settings. This step ensures that the changes take effect.
- Test Connectivity: Once the TV restarts, test the internet connectivity by launching a streaming app or browsing a website. If the content loads smoothly, the DNS configuration is likely fixed.
- Clear Cache (if needed): In some cases, clearing the cache of the TV’s apps or browser might be necessary to ensure proper connection to the internet.
- Monitor Performance: Keep an eye on the TV’s connectivity over the next few days. If the issue is resolved, your DNS configuration was likely the culprit.
By configuring DNS settings correctly, you can eliminate connectivity issues arising from incorrect domain name resolution. This fix ensures a stable and reliable internet connection for your TV, allowing you to enjoy uninterrupted streaming and online activities.
Fix 5: Disconnect Other Devices and Optimize Bandwidth
Experiencing WiFi connectivity issues on your TV might be due to excessive bandwidth consumption by other devices. Follow these steps to manage device connections and optimize bandwidth for your TV:
- Identify Connected Devices: Access your WiFi router’s settings page. This can usually be done by typing the router’s IP address into a web browser. Look for a section that displays connected devices.
- Review Connected Devices: Identify devices that are currently connected to your WiFi network. Pay attention to devices that might be using a significant amount of bandwidth, such as laptops, smartphones, or gaming consoles.
- Disconnect Unused Devices: If there are devices listed that you’re not actively using, disconnect them from the WiFi network. This can free up bandwidth for your TV.
- Prioritize TV’s Connection: Some routers allow you to prioritize specific devices for network access. Locate the QoS (Quality of Service) settings in your router and prioritize your TV’s MAC address for better performance.
- Limit Background Tasks: On devices that are using the WiFi network, limit background tasks like automatic updates, cloud backups, and large downloads. This prevents them from hogging the available bandwidth.
- Schedule Downloads: If you have large downloads or updates to perform, schedule them during off-peak hours when you’re not using the TV for streaming.
- Check Router Settings: Some routers have a “Guest Mode” or “Guest Network” feature. If enabled, this can create a separate network for guests, reducing the load on the main network.
- Monitor Network Usage: Some routers provide tools to monitor network usage. Keep an eye on which devices are using the most bandwidth and manage their activity accordingly.
- Restart Router: After making changes to device connections and settings, restart your router to ensure the changes take effect.
- Test TV Connectivity: Once the router is back online, reconnect your TV to the WiFi network and test its connectivity. Stream content to check for improvements in performance.
By managing and optimizing device connections and bandwidth usage, you can prevent network congestion and ensure that your TV receives the necessary bandwidth for seamless streaming and online activities. This fix helps distribute network resources more efficiently, allowing all devices, including your TV, to function smoothly.
Fix 6: Reset Network Settings on Your TV
If none of the previous fixes have resolved the WiFi connectivity issue on your TV, resetting the network settings can often provide a fresh start. Here’s how to reset the network settings on your TV:
- Access TV Settings: Go to your TV’s settings menu. This is usually represented by a gear or wrench icon on the remote control.
- Navigate to Network Settings: Look for the “Network” or “Internet” section within the settings menu.
- Reset Network Settings: Within the network settings, you should find an option to reset or restore network settings. This might be labeled as “Reset to Default,” “Factory Reset,” or “Network Reset.”
- Confirm Reset: When prompted to confirm the reset, review the message and make sure you understand that this action will erase all saved WiFi networks and configurations.
- Execute Reset: Proceed with the reset by selecting the option. Your TV will initiate the reset process.
- Reconnect to WiFi: After the TV restarts, navigate back to the network settings. Choose your WiFi network and enter the password to reconnect.
- Test Connectivity: Once reconnected, test the connection by launching a streaming app or browsing the internet. Verify that the TV is now able to connect without issues.
- Check Other Settings: After resetting the network settings, you might need to revisit other settings such as display settings or app logins that were affected by the reset.
- Update Apps (if needed): Some apps might require updates after the network reset. Visit the app store on your TV and update any relevant apps.
- Monitor Performance: Keep an eye on the TV’s performance over the next few days to ensure that the issue has been effectively resolved.
Resetting network settings can often clear any lingering configuration issues that might have been causing the connectivity problem. While this fix might require you to re-enter WiFi passwords and settings, it’s a useful step to take if all else fails to restore your TV’s WiFi connectivity.
Fix 7: Reboot Your Router for Improved Connection
If your TV’s WiFi connectivity issue persists, it might be related to your router. Rebooting the router can refresh its settings and connections, potentially resolving the problem. Here’s how to do it:
- Locate Your Router: Find the physical location of your WiFi router. It’s usually placed in a central area of your home.
- Power Off the Router: Locate the power button on the router or simply unplug it from the power source. Wait for about 10-15 seconds to ensure that the router fully powers down.
- Disconnect Modem (if applicable): If your router is connected to a modem, consider disconnecting the modem from its power source as well.
- Plug in the Router: Plug the router back into the power source. Wait for all the lights on the router to stabilize, which indicates that it’s fully powered up and operational.
- Reconnect Modem (if applicable): If you disconnected the modem, plug it back in and wait for its lights to stabilize as well.
- Wait for Connections: Allow a few minutes for the router and modem to establish connections with your Internet Service Provider (ISP).
- Restart TV: While the router is rebooting, restart your TV as well. This ensures that the TV’s network settings are refreshed.
- Reconnect to WiFi: Access the network settings on your TV and reconnect to your WiFi network using the correct password.
- Test Connectivity: Open a streaming app or a browser on your TV to test the connection. Ensure that the issue has been resolved.
- Monitor Stability: Keep an eye on the TV’s WiFi stability over the next few days to confirm that the problem has been effectively addressed.
Router reboots can often resolve connectivity issues caused by temporary glitches or configuration problems within the router itself. By performing this simple yet effective fix, you can give your WiFi network a fresh start and provide your TV with a stable and reliable connection for seamless streaming and online activities.
Fix 8: Contact Your Internet Service Provider (ISP)
If none of the previous fixes have successfully resolved the issue of WiFi not working on your TV while it works on other devices, it might be time to reach out to your Internet Service Provider (ISP). Here’s how to proceed:
- Gather Information: Before contacting your ISP, make sure you have all the necessary information. This includes your account details, the exact nature of the issue, and any troubleshooting steps you’ve already taken.
- Customer Support Contact: Find the customer support contact details for your ISP. This could be a phone number, email address, or live chat option available on their website.
- Describe the Issue: When contacting customer support, clearly describe the problem you’re facing. Mention that the WiFi works on other devices but not on your TV.
- Follow Their Guidance: The ISP’s customer support will likely guide you through specific troubleshooting steps relevant to their network and services.
- Check for Network Outages: Ask if there are any ongoing network outages or maintenance in your area that could be affecting your TV’s connection.
- Technical Assistance: If the customer support representative determines that the issue is on their end, they might provide technical assistance to resolve it.
- Schedule Technician Visit: If the problem persists and it’s determined to be a hardware or technical issue, your ISP might schedule a technician visit to your location.
- Document Interaction: Keep a record of your interaction with the ISP, including the date, time, name of the representative, and the steps they advised you to take.
- Follow Up: If the issue isn’t resolved within a reasonable time frame, don’t hesitate to follow up with the ISP for updates on the progress.
- Monitor After Resolution: Once the issue is resolved, monitor your TV’s connectivity to ensure that it remains stable.
In some cases, the problem might be related to your ISP’s network or services, and their technical support team can provide the necessary assistance to get your TV back online. Don’t hesitate to reach out to them for expert guidance and potential solutions to the WiFi connectivity issue.
Preventing WiFi Connectivity issues on Your TV
Preventing WiFi connectivity issues on your TV is crucial for a seamless streaming experience. Here are some proactive tips to help you avoid these issues in the future:
- Tip 1: Keep Firmware Updated: Regularly check for firmware updates for your TV. Keeping your TV’s software up to date ensures compatibility with your WiFi network and can resolve known connectivity issues.
- Tip 2: Optimal Router Placement: Place your WiFi router in a central location within your home, away from walls and obstructions. This improves signal distribution and reduces the chances of weak connections.
- Tip 3: Strong Passwords: Use strong and unique passwords for your WiFi network. This prevents unauthorized access and potential interference from neighboring networks.
- Tip 4: Regular Router Maintenance: Periodically restart your router to refresh its settings and connections. This helps prevent network congestion and resolves minor glitches.
- Tip 5: Update Network Equipment: If your router is outdated, consider upgrading to a newer model that supports the latest WiFi standards. This can improve overall network performance.
- Tip 6: Limit Connected Devices: Avoid overloading your WiFi network by limiting the number of devices connected simultaneously. Disconnect devices not in use to free up bandwidth.
- Tip 7: Use Quality Equipment: Invest in quality WiFi routers and networking equipment. Cheap or outdated hardware can lead to inconsistent connectivity.
- Tip 8: Minimize Interference: Place electronic devices that might interfere with WiFi signals away from your TV and router. This includes devices like cordless phones and microwave ovens.
- Tip 9: Regular Maintenance: Periodically review and optimize your network settings. Clear cache, update apps, and ensure that DNS configurations are accurate.
- Tip 10: Contact ISP: If you notice persistent connectivity issues, don’t hesitate to contact your Internet Service Provider (ISP). They can help diagnose and address network-related problems.
By following these preventive measures, you can significantly reduce the likelihood of encountering WiFi connectivity issues on your TV. A well-maintained and properly configured network ensures a seamless streaming experience and uninterrupted enjoyment of your favorite shows and movies.
Conclusion
Experiencing WiFi connectivity issues on your TV while other devices work fine can be frustrating, but it’s not an insurmountable problem. By following this comprehensive guide, you’ve equipped yourself with the knowledge to identify the root causes and troubleshoot effectively. Remember, technology hiccups happen, but with patience and these step-by-step solutions, you can restore seamless streaming to your television set. Whether it’s a simple network setting check or a firmware update, these solutions will help you get back to enjoying your favorite shows and movies without interruption.
FAQs
This happens due to signal interference, outdated firmware, or wrong network settings on the TV.
Try resetting network settings, updating firmware, and optimizing router placement for better signal.
Try resetting network settings, updating firmware, and optimizing router placement for better signal.
Outdated firmware can lead to compatibility problems with your WiFi network.
Yes, rebooting the router refreshes its settings and can often resolve connectivity issues.
Prachi Mishra is a talented Digital Marketer and Technical Content Writer with a passion for creating impactful content and optimizing it for online platforms. With a strong background in marketing and a deep understanding of SEO and digital marketing strategies, Prachi has helped several businesses increase their online visibility and drive more traffic to their websites.
As a technical content writer, Prachi has extensive experience in creating engaging and informative content for a range of industries, including technology, finance, healthcare, and more. Her ability to simplify complex concepts and present them in a clear and concise manner has made her a valuable asset to her clients.
Prachi is a self-motivated and goal-oriented professional who is committed to delivering high-quality work that exceeds her clients’ expectations. She has a keen eye for detail and is always willing to go the extra mile to ensure that her work is accurate, informative, and engaging.