How to take a screenshot on iPhone 7 and above like iPhone 12 pro max ? Can’t capture a screenshot properly on your iPhone? Did you know you can maximise your iPhones life by using the touch assist for screenshots instead of physical buttons? Want to use touch assist for taking screenshots? Learn how you can take a screenshot with the home buttons and even without the home button.
See how you can edit the screenshots from your photos and make it look AMAZING! Learn everything you need to know about screenshot along with the touch assist and editing. If you are stuck anywhere or want a fast way then watch out video on our YouTube channel.
What is a screenshot?
A screenshot is the screen capture of the iPhone which is saved on your device in the graphical or image format.
Now you can save a screenshot on your iPhone in a number different ways but you do not need any particular app for it. We will be seeing different ways in which you can save screenshots. Now the method will be the same for iPhone 7, iPhone 7 Plus, 8, 8 Plus. And the same on, iPhone X. XI. Also work for iPhone 12 pro & max.
Watch more:
- How to screenshot on HP laptop
- Can’t take screenshot due to security policy
- How To Screenshot On Snapchat Without Them Knowing
How to screenshot on iPhone 7
We all know that Apple dumped the physical home button for iPhone 7 and above, instead they opted for haptic feedback. Now we will not go into the advantages and disadvantages of such a hardware implementation. But you may be confused as to how you can take the screenshot from iPhone 7 and above. Or maybe you are new to the iPhone ecosystem or new to the iPhones.
You may have noticed that the home button is not physical but still manage to know when you are pressing. This is due to pressure-sensitive touch, once it detects pressing it gives a haptic “taptic” feedback. But this means that when you are trying to get inside the “DFU Mode” or performing a hard reset, then the method will be different.
This is all about the home button and the difference but you must be wondering about the screenshot. Well, we made a list for you with different ways you can take screenshots on your iPhone 7 and above.
How to Take a Screenshot on iPhone 7 or iPhone 7 Plus
- Wake up your iPhone by pressing the power button, you can use iPhone 7Plus and iPhone 8 also.
- Open the app where you want to take a screenshot in / screenshot of.
- Now press the power button and home button at the same time.
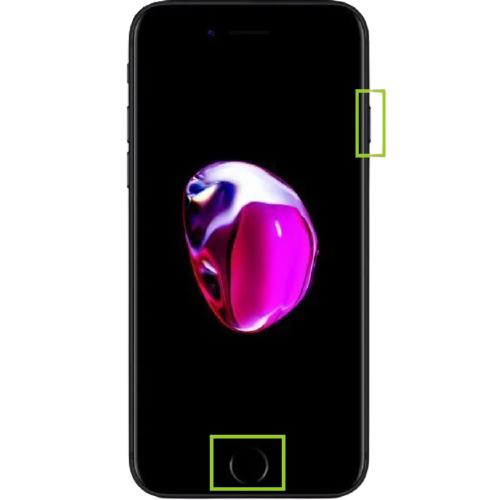
- If you did the step currently then your iPhone screen will make a shutter sound along with a blink. If you see this then it means you have successfully captured a screenshot.
- Now you can open the gallery and see your screenshot saved in a new folder.
How to Take a Screenshot iphone 7 with Assistive Touch
Now in case your iPhone’s power/wake button fails to be pressed at the same time as the home button. And this leads to unexpected inputs or screen closing and more, then you should use the assistive touch. Sometimes we are holding our iPhone in such a way that pressing all buttons at the same time becomes impossible. Or if you don’t want to press the physical buttons again and again for capturing the screenshot. Then Assistive touch lets you take screenshots with a single touch on the screen.
You need to enable the assistive touch on your iPhone to use this method.
- Wake up your iPhone and open “Settings”.
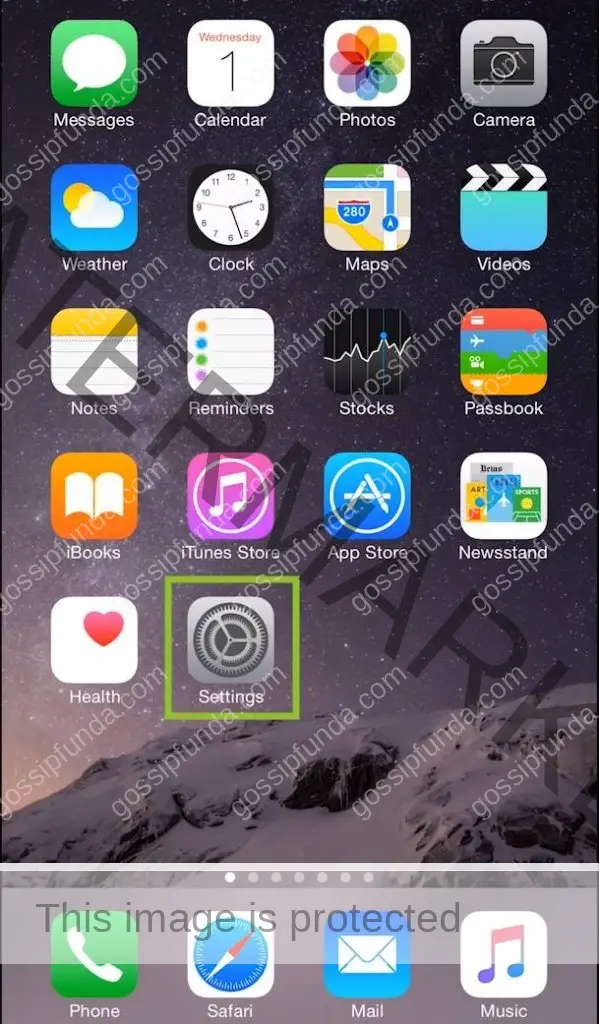
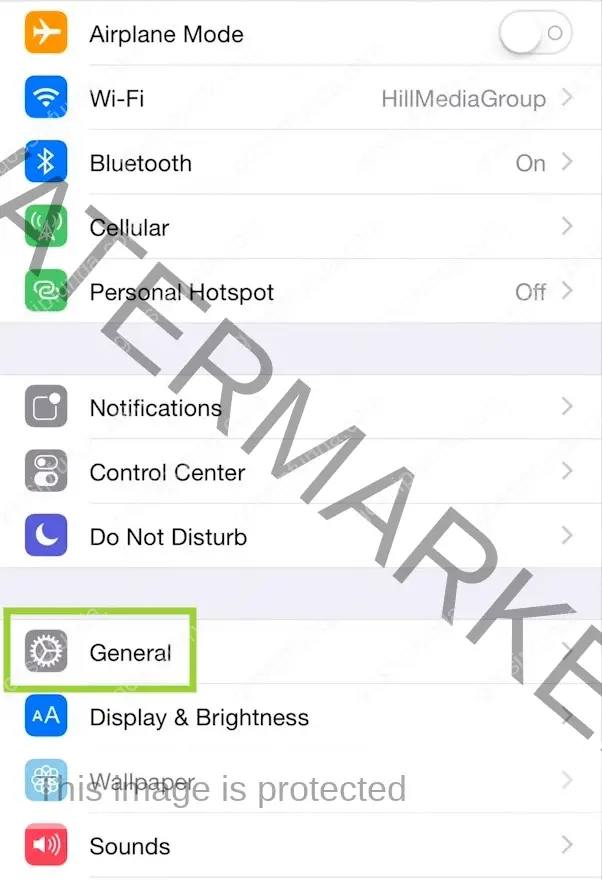
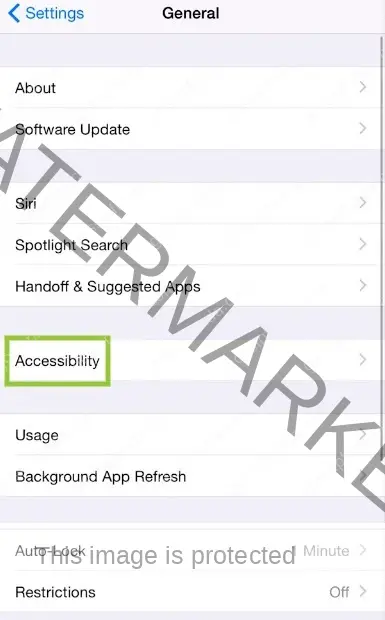
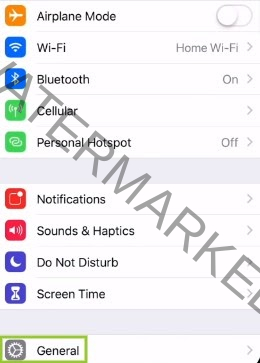
- Open settings and open “General”.
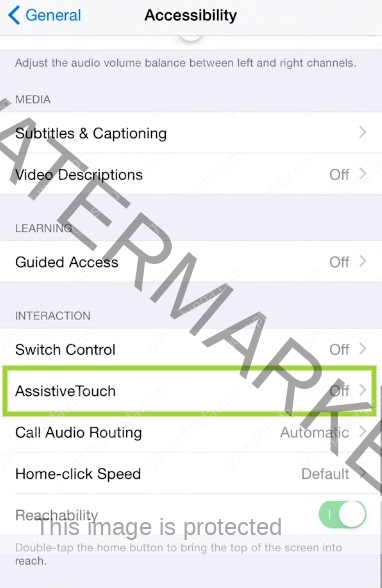
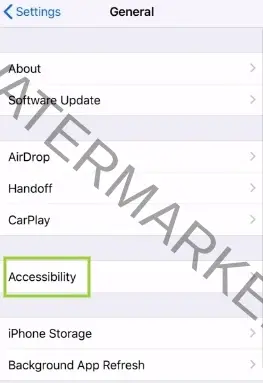
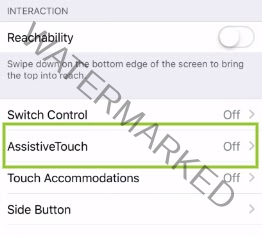
- Once inside settings tap on “Accessibility” and then tap on “Assistive touch”.
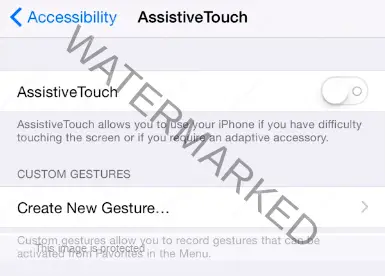
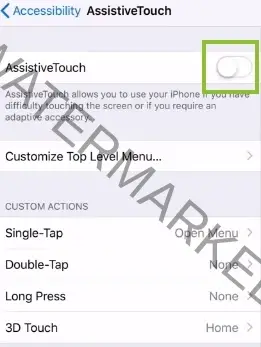
- You need to tap on the toggle and turn the Assistive touch on.
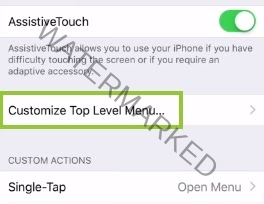
- Now, you will find an option “Customize Top Level Menu” in the settings, tap on it to open.
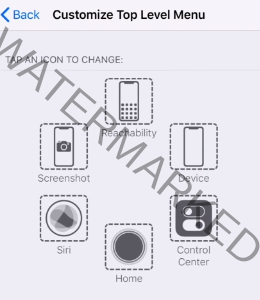
- Next you need to tap on the Custom button which is indicated by a star icon, once done tap on the screenshot.
- Now the screenshot option should be added in the Assistive touch menu, this lets you capture the screenshot without much hassle.
- Tap on the Assistive touch icon and choose screenshot, your screenshot will be captured with the shutter sound follower by a blink.
How to View and Share a Saved iPhone 7 Screen Shot
We captured our screenshot but what to do with it now? We will see how you can see your screenshots and share them with your friends and family. Just follow the simple steps given below:
- Wake up your device and open the “Photos” app.
- Now open “Albums” tap in the Photos and look for the “Screenshots” album.
- Now open the screenshot album and scroll down all the way to the bottom of the list. Ther you should see your most recently saved screenshot and now you can share it.
- Now you will see a share icon when opening the screenshot at the top left corner of the screen. The icon should look like an upward arrow, now tap on the icon and a new menu should pop up. Now you can send the screenshot to any of the third-party applications like Instagram, Facebook, Whatsapp, and more.
- Tap on the app that you want to send a screenshot on, once that app opens choose the contact of your friend or family.
- Now click on “send” or the arrow icon, the screenshot should be shared with the person you want to share it with.
NOTE: You can use these steps for iPhone 7 and all the models with the touch-sensitive home button. But if you are using iPhone X or above then check below on how to take a screenshot.
Screenshot latest version iPhone 12 Pro & Max
We saw how to take screenshots on the iPhone with the physical home button. What about iPhones without a physical home button?
You can use these steps for all the iPhone 12 pro models without a physical home button.
Screenshots with a physical button
- Wake up your device and open the application in/of which you want to take screenshots.
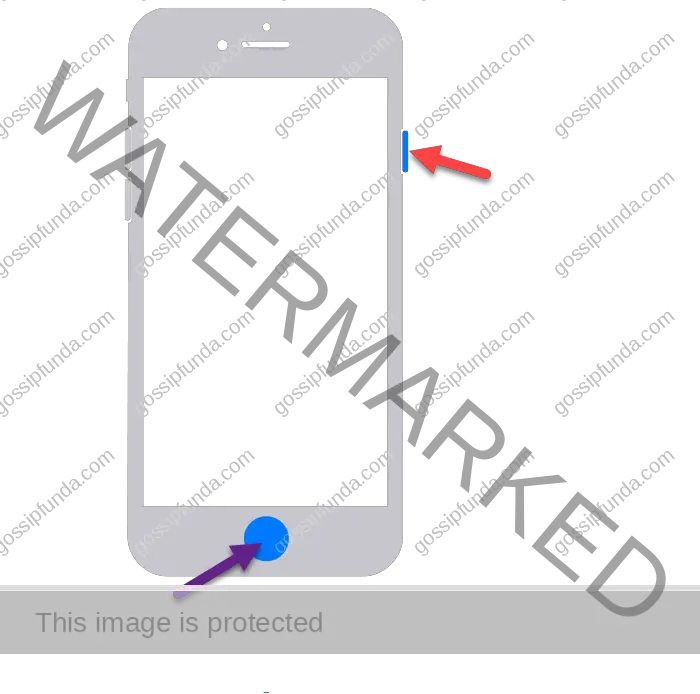
- Now since there is no physical home button, you will need to press Volume up + Lock/Power button simultaneously.
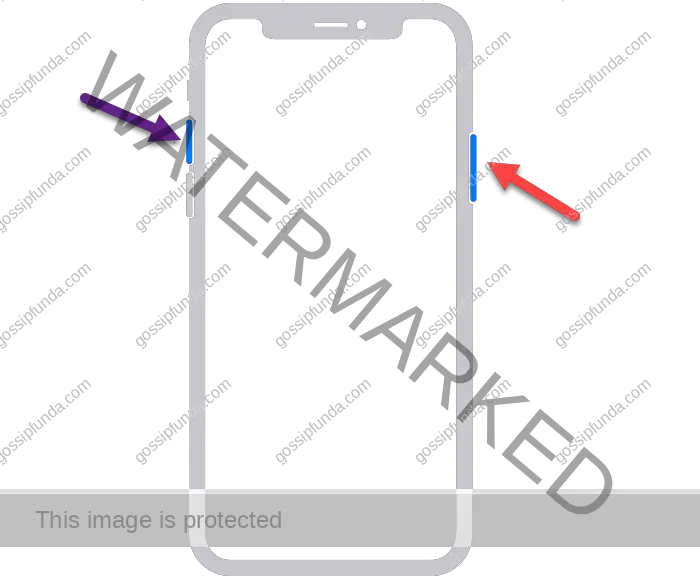
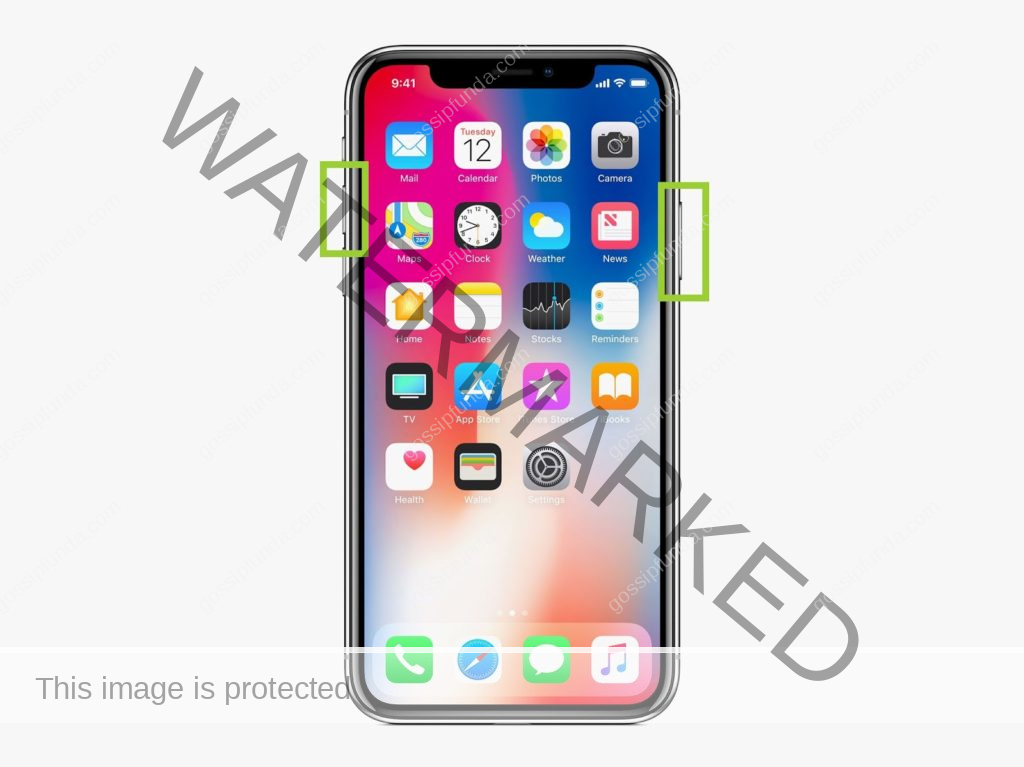
If the capture was successful then you must hear a shutter sound (if the iPhone is on normal profile) followed by a blink.
- Now your screenshot should be saved in the “Photos” app in the “Screenshot” album.
Screenshot with Assistive Touch
Now in case your iPhone’s power/wake button fails or you can not press both the physical buttons at the same time. These things can leave you with unwanted inputs and app closings, this could leave you frustrated. Sometimes we are holding our iPhone in such a way that pressing all buttons at the same time becomes impossible. In such a case, you should use the assistive touch as it reduces your work and makes it easy for you to take a screenshot. Assistive is also useful for more things and provides more functionality. You need to enable the assistive touch on your iPhone to use this method.
- Wake up your iPhone and open “Settings”.
- Tap on “General” in the settings.
- Once inside settings tap on “Accessibility” and then tap on “Assistive touch”.
- Now, you need to tap on the toggle and turn the Assistive touch on.
- You should see the touch assist icon on your screen.
- Next, you will find an option “Customize Top Level Menu” in the settings, tap on it to open.
- You need to tap on the Custom button which is indicated by a star icon, once done tap on the screenshot. Now the screenshot option should be added in the Assistive touch menu, this lets you capture the screenshot without much hassle.
- Tap on the Assistive touch icon and choose screenshot, your screenshot will be captured with the shutter sound follower by a blink. Also, a thumbnail of the screenshot will appear on the cover of your screen.
Editing the screenshot
Now let’s see how we can edit the screenshot we just captured. Now first we will see how to edit directly from the thumbnail and save it.
- Once you capture the screenshot, tap on the thumbnail when it appears.
- A markup mode should open in your iPhone, here you can do all kinds of editing and add filters if you want.
- Once you are done with editing the screenshot, tap on “Save to photos” for the edited version of the screenshot to be saved.
But in case you want to edit an older screenshot or missed the thumbnail, then follow the below-mentioned steps.
- Open “Photos” apps and select “Albums”.
- Select the “Screenshot” album and look for the screenshot you want to edit.
- Tap and open the screenshot that you want to edit and tap on “edit”.
- Now you can do all kinds of editing like add colors, sketch over it, erase, magnify, and more.
- Once you are done with the editing, tap on “Save to Photos” and the edited version of the screenshot should be saved.
Viewing and sharing screenshots
We learned how to take screenshots with your new iPhone, but how to share them? Now we will learn how we can view our screenshots and share them with family and friends. Follow the simple guide we made for you to get started with screenshot sharing.
- Wake up your device and open the “Photos” app.
- Once you are inside the photos app, tap on “albums” and look for the “screenshot” album.
- Tap on the screenshot album and scroll down to find your captured screenshot. Tap on the screenshot and you should be able to see it.
- Now you will see a share icon when opened the screenshot at the top left corner of the screen. The icon should look like an upward arrow, now tap on the icon and a new menu should pop up. Now you can send the screenshot to any of the third-party applications like Instagram, Facebook, Whatsapp, and more.
- Select the app you want to share the screenshot on, choose, and tap on the contact you want to use.
- You should see the “send” icon or icon with an arrow, tap on it. Now your screenshot should be shared with the person you choose.
Summary
We saw how we can save the screenshot on iPhone 7/7 Plus and above models. We would suggest using the assistive touch for taking screenshots as it will reduce your work. But if taking screenshots with physical buttons are much faster and sometimes you need to be fast. It depends from person to person, so you decide which way you want to go.

I am a Computer Science Engineer, have a passion for coding, sketching, and teaching. I took part in various college technical activities and was Mr. Fresher in the 1st year along with the college’s face. Spends most of the time learning new things and coding small codes for little fun and also as academic, keeping Python 3, Android as priority language for coding.
I love writing tech tips with 100% success and enjoying this new side of life. Finding a passion for new things and letting unlock my creativity and hoping to learn new scientific stuff on the journey of life and being grateful for smaller things.


