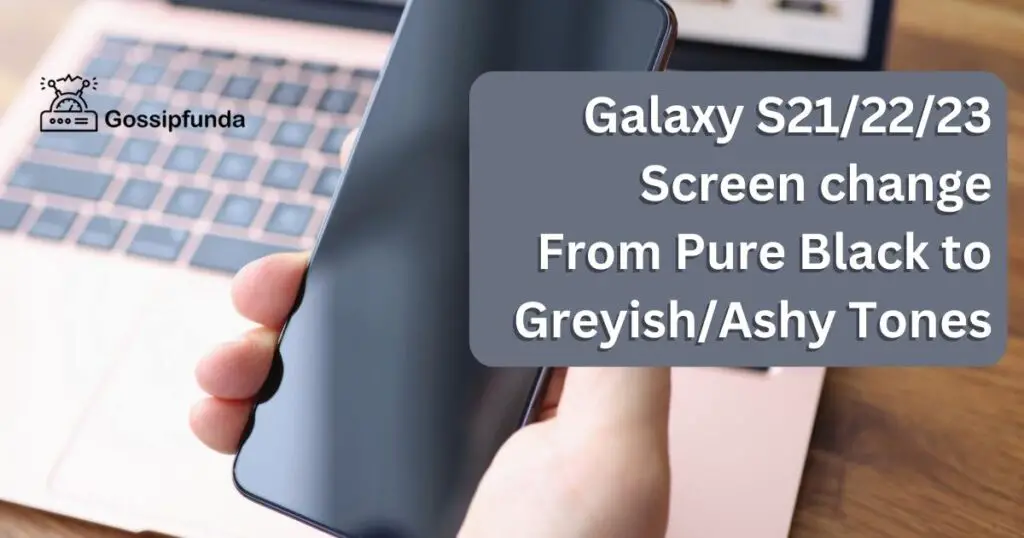
Have you noticed your Galaxy S21/22/23’s pristine black screen transforming into a lacklustre grey? Annoying, right? You are not alone. This peculiar shift from pure black to ashy hues isn’t a rare occurrence. Despite this, many users are left puzzled, navigating through heaps of jargon-laden advice.
Say goodbye to confusion! This comprehensive guide is designed to help you understand why this change occurs. But we don’t stop there. You’ll find tried-and-tested, easy-to-follow solutions to correct this issue. Unleash the full potential of your Galaxy screen – you’re just steps away from reclaiming the crisp, rich colors you know and love. Let’s dive in and bring your Galaxy screen back to life.
Keep in mind, not every fix requires professional help. So, be ready to roll up your sleeves and get into the heart of your Galaxy device. Let’s bring back the deep, pure black that you crave.
Why Does the Galaxy S21/22/23 Screen Change from Pure Black to Greyish Tones?
1. OLED Screen Technology:
The Galaxy S21/22/23 models feature Organic Light Emitting Diode (OLED) screen technology. While this technology offers excellent image quality and deep blacks, it sometimes inadvertently turns black tones to ashy or greyish hues due to its operational characteristics.
2. Software Glitches:
The Galaxy series runs on intricate software. In certain cases, software glitches can alter colour representation on the screen. These glitches can stem from an unstable update or a faulty app installation, causing the screen to display ashy or greyish tones instead of pure black.
3. Third-Party Apps:
Certain third-party apps could interfere with the device’s display settings. An app with poorly optimised graphics or colour coding might lead to inconsistencies in colour representation on the screen.
4. Display Settings:
Incorrect display settings can also cause the screen colour to shift. Sometimes, inadvertently altering a setting can lead to an ashy appearance instead of a pure black tone.
5. Screen Degradation:
Over time, the OLED screen may naturally degrade, causing a shift in the colour representation. This is a common issue in older devices, where the display gradually loses its ability to portray pure black, resulting in greyish or ashy tones.
How to Fix Galaxy S 21/22/23 Screen change From Pure Black to Greyish/Ashy Tones?
Fix 1: Adjust Screen Calibration
- Step 1: Access Display Settings: Firstly, unlock your Galaxy device. Once on the home screen, navigate to the settings menu. In the settings menu, find and select ‘Display’.
- Step 2: Choose Screen Mode: Within the ‘Display’ section, find the option named ‘Screen Mode’. This option allows you to adjust your display’s colour balance and temperature. Tap on ‘Screen Mode’.
- Step 3: Select Your Preferred Mode: Here, you’ll see several options. ‘Vivid’ will give you brighter, more saturated colours, while ‘Natural’ will provide a more realistic colour representation. ‘AMOLED cinema’ offers a vibrant colour experience, and ‘AMOLED photo’ will give you more natural colours. Choose the one that suits your preference.
- Step 4: Adjust White Balance: In the same ‘Screen Mode’ menu, you can adjust the ‘White Balance’ if you’re not satisfied with the colour temperature. Here, you can manually adjust the levels of ‘Red’, ‘Green’, and ‘Blue’ to achieve the desired effect.
- Step 5: Confirm and Exit: After making these adjustments, confirm your choices. The changes should take effect immediately. Navigate away from the settings menu, and you should notice a difference in your display’s colour representation.
Remember, adjusting screen calibration is a trial and error process. Don’t hesitate to return to these settings and tweak them until you achieve the desired display colour. This process should help return your display from a greyish/ashy tone back to a rich, deep black.
Fix 2: Perform Software Updates
- Step 1: Connect to Wi-Fi: For this procedure, it’s best to connect your device to a Wi-Fi network. Software updates can use up a significant amount of data, so make sure you’re connected to a reliable network.
- Step 2: Access Software Update Menu: Now, open the ‘Settings’ app on your Galaxy device. Scroll down until you find ‘Software update’. This is where Samsung provides any new updates for your device.
- Step 3: Check for Updates: Inside the ‘Software update’ menu, select ‘Download and install’. Your device will check Samsung’s servers for any new updates. If there’s an update available, it will show up on this screen.
- Step 4: Download and Install Updates: If an update is available, select ‘Download’. After the download is complete, the option to install the update will appear. Select ‘Install’ to begin the update process. Remember, your device may need to restart during this process.
- Step 5: Confirm Installation and Restart: After the update is installed, your device will restart. Post the reboot, your Galaxy S21/22/23 should be running the latest software. This update may include fixes for screen colour representation, potentially resolving the greyish or ashy tone issue.
By performing regular software updates, you ensure your device is running on the latest software. This can help prevent various issues, including changes in screen colour representation.
Fix 3: Removing Potentially Problematic Applications
- Step 1: Identify the Applications: Take a note of any applications you installed recently or around the time you started noticing the shift from pure black to greyish tones on your screen. These could be the potential culprits causing the problem.
- Step 2: Uninstall the Applications: To uninstall an application, go to the ‘Settings’ menu on your device. Navigate to ‘Apps’, where you’ll find a list of all applications on your device. Find the recently installed application, select it, and tap ‘Uninstall’.
- Step 3: Reboot your Device: After uninstalling the application, restart your device. This helps to refresh the system and potentially rectify any lingering effects from the uninstalled application.
- Step 4: Observe for Changes: Now, monitor your device’s screen over the next few hours or days. Look to see if the pure black colour has returned or if the greyish/ashy tones persist.
- Step 5: Repeat if Necessary: If the problem remains, repeat the process with other recent applications. Continue this process until the issue is resolved.
By keeping a watchful eye on the applications you install, you can ensure the integrity of your device’s display settings. Always remember to install trusted applications to avoid such issues.
Fix 4: Conducting a Factory Reset
- Step 1: Backup your Data: Before conducting a factory reset, ensure you’ve backed up all your important data. This includes photos, videos, documents, and other files. Use Samsung Cloud, Google Drive, or any other preferred backup service.
- Step 2: Access the Reset Menu: On your device, navigate to the ‘Settings’ menu. Scroll down and select ‘General management’. From there, find and select ‘Reset’.
- Step 3: Select Factory Data Reset: In the ‘Reset’ menu, you’ll see several options. Select ‘Factory data reset’. This option will erase everything on your device and restore it to factory settings.
- Step 4: Confirm the Factory Reset: After selecting ‘Factory data reset’, your device will display a warning, letting you know that all data will be erased. If you’ve backed up your data and are ready to proceed, select ‘Reset’ and then ‘Delete All’.
- Step 5: Restart and Set Up Your Device: Your device will now restart. After the reset, you’ll need to set up your device as if it were new. Follow the on-screen instructions to get started.
A factory reset is a more drastic measure, but it can often fix persistent issues, such as the screen changing from pure black to greyish or ashy tones. However, remember to always backup your data before proceeding with this step.
Fix 5: Seeking Professional Assistance
- Step 1: Diagnose the Problem: Try to understand when and how the issue occurs. Take note of any patterns, like specific applications or settings triggering the change from black to greyish tones.
- Step 2: Contact Samsung Support: Navigate to the Samsung Support website. Select ‘Contact Us’ and choose the method you prefer – phone, chat, or email. Describe your issue clearly and concisely to the customer support representative.
- Step 3: Follow the Provided Steps: Samsung’s customer service representative may suggest some troubleshooting steps. Follow these steps carefully and see if the issue gets resolved.
- Step 4: Schedule a Service: If the problem persists, it’s time to schedule a service. The support representative can guide you through this process. They might ask you to send in your device for repairs or direct you to the nearest Samsung service centre.
- Step 5: Visit the Samsung Service Center: Take your device to the service centre on the scheduled date. The professionals there will diagnose the issue and perform necessary repairs or replacements.
Remember, if your Galaxy S21/22/23 is under warranty, some repairs might be done free of charge. Always consider professional help when simple troubleshooting steps fail to resolve the issue.
Fix 6: Activating Dark Mode
- Step 1: Access Display Settings: Start by unlocking your Galaxy device and navigating to the ‘Settings’ menu. In the settings, look for ‘Display’ and select it.
- Step 2: Toggle on Dark Mode: Inside ‘Display’, you should find the ‘Dark mode’ option. Toggle it on. This feature adjusts the colours on your screen to darker hues, which might alleviate the greyish/ashy tones problem.
- Step 3: Customise Dark Mode: To further refine your screen’s colour palette, you can select ‘Dark mode settings’. Here, you can schedule when dark mode is activated or adjust how dark mode is applied to your wallpapers.
- Step 4: Confirm and Check: After adjusting your settings, press the back button to exit. Your new settings should apply immediately. Check your screen to see if there is any improvement in the display colour.
- Step 5: Readjust if Necessary: If the issue persists, you may need to toggle off and on the dark mode or adjust the settings until you find a balance that reduces the ashy/greyish tones.
Activating dark mode is a quick and easy fix that can potentially solve screen colour issues. It not only helps with the colour balance but can also save battery life and reduce eye strain.
Fix 7: Adjusting Blue Light Filter
- Step 1: Access Display Settings: To begin, unlock your Galaxy device. From the home screen, navigate to the ‘Settings’ menu. Inside ‘Settings’, find and select ‘Display’.
- Step 2: Toggle Blue Light Filter: Within ‘Display’, you’ll find an option called ‘Blue light filter’. This feature reduces eye strain by limiting the amount of blue light emitted by your screen, which can also affect the colour representation. Toggle on the ‘Blue light filter’.
- Step 3: Customise Blue Light Filter: For further customization, select ‘Blue light filter settings’. Here, you can adjust the opacity of the filter and schedule when it activates. Increasing the opacity will decrease the amount of blue light, which may help in restoring the pure black colour.
- Step 4: Confirm Settings and Exit: After setting your preferences, press the back button to exit. The changes will take effect immediately.
- Step 5: Evaluate the Changes: Once you’ve adjusted the blue light filter, evaluate your screen. Check if the colour representation has improved and if the pure black colour has returned.
Using the blue light filter not only potentially fixes the screen color issue but also offers health benefits like reducing eye strain and improving sleep quality. This makes it a valuable tool for any Galaxy user.
Fix 8: Power Cycling Your Device
- Step 1: Turn Off the Device: Start by turning off your Galaxy S21/22/23. To do this, press and hold the power button until a menu appears. Tap on the ‘Power off’ option and wait for the device to completely shut down.
- Step 2: Wait: Once the device is off, wait for about a minute. This brief period allows the device’s components to cool down and any temporary software glitches to resolve.
- Step 3: Turn On the Device: After waiting for a minute, turn your device back on. Press and hold the power button until the Samsung logo appears, and release the button.
- Step 4: Check the Screen: When the device is back on, check your screen. Look to see if the pure black colours have returned or if the ashy/greyish tones persist.
- Step 5: Repeat if Necessary: If the problem remains, you may want to repeat the power cycling process a couple of times.
Power cycling your device is a simple and effective troubleshooting method for a variety of issues. It helps to clear the system’s temporary cache and resolve minor software glitches, which may be causing the colour shifts on your Galaxy device’s screen.
Read more: Error Hueneme Negev warzone 2
Fix 9: Disabling Hardware Overlays
- Step 1: Enable Developer Options: To access hardware overlays, you first need to enable Developer Options. Go to ‘Settings’, then ‘About Phone’. Tap on ‘Software Information’, then tap on ‘Build number’ seven times. This will unlock Developer Options.
- Step 2: Access Developer Options: Go back to the main ‘Settings’ menu. You’ll now see ‘Developer Options’ listed. Tap on it to open.
- Step 3: Disable Hardware Overlays: Scroll down in ‘Developer Options’ until you find ‘Disable Hardware Overlays’ under the ‘Hardware Accelerated Rendering’ section. Toggle it on.
- Step 4: Confirm and Exit: After enabling this option, press the back button to exit. The changes should apply immediately.
- Step 5: Evaluate the Changes: Once you’ve disabled hardware overlays, evaluate your screen. Check if the colour representation has improved and if the pure black colour has returned.
Please note that Developer Options are intended for software development and advanced troubleshooting. Adjust these settings with caution. Disabling hardware overlays can help with the screen color issue, but it might also affect other display properties.
Preventing Greyish/Ashy Tones on Your Galaxy S21/22/23 Screen
- 1. Regular Updates: Always keep your device’s software updated. Regular updates not only bring new features but also address bugs and issues that may cause colour changes on your screen.
- 2. Monitor App Installation: Be mindful of the applications you install on your device. Some apps may cause screen colour discrepancies. If you notice a colour shift after installing an app, consider uninstalling it.
- 3. Use Trusted Sources: Download applications and updates from trusted sources like the Google Play Store or Samsung’s Galaxy Store. Third-party sources may contain software that interferes with your screen’s colour representation.
- 4. Care for the Screen: Protect your screen with a quality screen protector. Physical damage to the screen can also cause colour shifts.
- 5. Regular Restart: Regularly restarting your device can help clear temporary software glitches that may impact the colour representation on the screen.
- 6. Factory Reset Only When Necessary: Perform a factory reset only when absolutely necessary and always backup your data beforehand. A factory reset should be the last resort when other troubleshooting methods fail.
- 7. Seek Professional Help: If you can’t identify or fix the problem, consult with a professional or Samsung’s customer support. They have the expertise to identify and address a variety of issues.
Preventive measures can go a long way in ensuring the longevity of your Galaxy device’s screen and its accurate colour representation. By following these tips, you can enjoy a crisp and vibrant display for a long time.
Conclusion
Wrapping up, changes from pure black to greyish/ashy tones on your Galaxy S21/22/23 screen can indeed be worrisome. However, you are not helpless. From simple solutions like adjusting screen settings to more complex ones like factory reset, there are multiple ways to restore your device’s screen color. Don’t forget, prevention is key, so keep your device updated and monitor your app installations. If the problem persists, don’t hesitate to seek professional assistance.
Keep enjoying the stunning visuals that your Samsung device is built to deliver! Remember, a well-maintained device provides the best user experience. Stay proactive in caring for your Galaxy device, and happy troubleshooting!
FAQs
This issue could be due to a software glitch, recent app installation, or even a hardware problem with the device.
Several fixes are available, including adjusting screen settings, performing software updates, uninstalling problematic apps, or even doing a factory reset.
Yes, it’s safe but remember to backup your data first, as a factory reset erases all data on your device.
Yes, changing screen mode or activating the dark mode can sometimes help in fixing this issue.
Keep your device software updated, monitor your app installations, protect your screen, and regularly restart your device.
If none of the mentioned fixes work, or if you’re not comfortable performing them yourself, it’s best to seek professional help.
Prachi Mishra is a talented Digital Marketer and Technical Content Writer with a passion for creating impactful content and optimizing it for online platforms. With a strong background in marketing and a deep understanding of SEO and digital marketing strategies, Prachi has helped several businesses increase their online visibility and drive more traffic to their websites.
As a technical content writer, Prachi has extensive experience in creating engaging and informative content for a range of industries, including technology, finance, healthcare, and more. Her ability to simplify complex concepts and present them in a clear and concise manner has made her a valuable asset to her clients.
Prachi is a self-motivated and goal-oriented professional who is committed to delivering high-quality work that exceeds her clients’ expectations. She has a keen eye for detail and is always willing to go the extra mile to ensure that her work is accurate, informative, and engaging.