Welcome to our comprehensive troubleshooting guide for when your Roku controller refuses to cooperate! It can be incredibly frustrating to have your entertainment experience interrupted by a non-responsive remote. Fear not, as we delve into the reasons behind this issue and provide step-by-step solutions to get your Roku controller working flawlessly again. Whether it’s a simple battery problem or a more complex technical glitch, we’ve got you covered with all the information you need to fix the problem.
Reasons behind Roku controller not working
- Dead or Low Batteries: The most common reason for a non-functional Roku controller is drained batteries. When the power runs out, the remote won’t respond.
- Wireless Interference: Environmental factors or other electronic devices emitting similar signals can interfere with the remote’s wireless connection.
- Unpaired Remote: If the remote becomes unpaired from the Roku device, it won’t work until reconnected.
- Software Glitches: Like any electronic device, the Roku remote can experience software issues, causing unresponsiveness.
- Physical Obstructions: Objects like furniture or electronics blocking the line of sight between the remote and the Roku device hinder its functionality.
- Infrared Signal Interference: Strong light sources can interfere with the infrared signals sent by the remote, affecting its responsiveness.
- Remote Hardware Faults: Physical damage or internal component issues can render the remote non-functional.
- Roku Device Issues: Sometimes, the problem may not lie with the remote but rather with the Roku streaming device itself.
- Outdated Firmware: An outdated remote or device firmware can cause compatibility issues and disrupt functionality.
- User Error: In some cases, users might mistakenly press the wrong buttons or misunderstand how to operate the remote.
- Battery Compartment Issues: Problems with the battery compartment, such as loose batteries or faulty contacts, can lead to remote malfunctions.
- Remote Range Limitations: Each Roku remote has a limited operating range, and using it beyond this range can cause issues.
- Electromagnetic Interference: Strong electromagnetic fields from nearby devices can interfere with the remote’s signal.
- Remote Software Errors: Remote software bugs or glitches can affect its ability to communicate with the Roku device.
- Wireless Signal Jamming: In rare cases, deliberate interference from other wireless devices can disrupt the remote’s connection.
Remember to troubleshoot the issue systematically to pinpoint the exact cause and apply the appropriate fix for a seamless streaming experience.
How to fix Roku controller not working?
Fix 1: Check and Replace Batteries
If your Roku remote is unresponsive, the first step is to check the batteries. Follow these detailed steps to ensure proper battery functioning:
- Locate the Battery Compartment: On the back of your Roku remote, find the battery compartment.
- Open the Battery Compartment: Slide the battery compartment cover off or use a small screwdriver to open it.
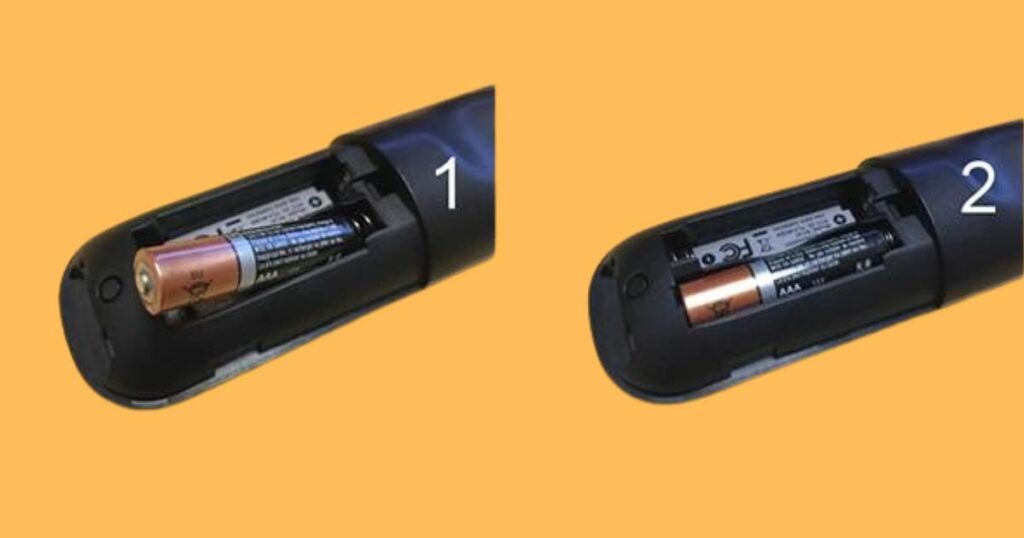
- Check Battery Orientation: Take note of the correct battery orientation (positive and negative ends) inside the compartment.
- Remove Old Batteries: If the batteries are low or dead, remove them from the compartment. Dispose of old batteries responsibly.
- Choose High-Quality Batteries: To ensure optimal performance, use fresh, high-quality alkaline batteries. Avoid using rechargeable batteries, as they may not provide enough power.
- Insert New Batteries: Insert the new batteries into the compartment, following the correct orientation you noted earlier.
- Close the Battery Compartment: Carefully slide the battery compartment cover back into place or use a screwdriver to secure it.
- Re-Pair the Remote: After inserting fresh batteries, you may need to re-pair the remote with your Roku device. To do this, press and hold the pairing button in the battery compartment for a few seconds until the pairing light flashes.
- Test the Remote: Aim the remote at your Roku device and press various buttons to ensure it responds correctly.
- Check Battery Level on Roku: Some Roku models display the remote’s battery level on the TV screen. Verify that the battery level shows as “OK” or “Full.”
Read more: Prime video keeps crashing on Roku
Fix 2: Re-Pair the Roku Remote
If changing the batteries didn’t solve the problem, the next step is to re-pair the Roku remote with your streaming device. Sometimes, the remote can become unpaired due to various reasons. Follow these steps to re-establish the connection:
- Prepare Your Roku Device: Make sure your Roku streaming device is powered on and functioning correctly. Ensure your TV is on and set to the correct HDMI input for the Roku.
- Access the Roku Home Screen: Use your TV remote to navigate to the Roku home screen.
- Locate the Pairing Button: On your Roku streaming device, find the pairing button. The location may vary depending on the Roku model (usually a small button near the HDMI ports or on the bottom of the device).
- Press and Hold the Pairing Button: Press and hold the pairing button for about 3 to 5 seconds until the pairing light starts blinking.
- Press and Hold the Remote’s Pairing Button: Open the battery compartment on your Roku remote and find the pairing button. Press and hold it for about 3 to 5 seconds until the pairing light on the remote starts blinking.
- Wait for Pairing to Complete: The remote and the Roku device will now search for each other and establish a connection. This process may take a few moments.
- Test the Remote: Once the pairing is successful, test the remote by pressing various buttons to ensure it works correctly.
- Remote Not Pairing: If the remote doesn’t pair after following the steps, try repeating the process. If it still doesn’t work, check that you are pressing the correct pairing buttons and that the batteries are correctly inserted.
Fix 3: Update Roku Device Software
If your Roku remote continues to misbehave, it’s worth checking if the issue is related to outdated software on your Roku streaming device. Regularly updating the software ensures you have access to the latest features and bug fixes. Follow these steps to update your Roku device’s software:
- Access Roku Home Screen: Using your TV remote, navigate to the Roku home screen.
- Open Settings: Scroll up or down on the home screen to highlight and select “Settings.”
- Go to System: Within the Settings menu, choose “System.”
- Select System Update: Look for “System update” and click on it.
- Check for Updates: Your Roku device will now check for any available updates. If an update is available, it will be displayed on the screen.
- Start the Update: If an update is found, select “Update” to begin the process. Depending on your internet connection, the update may take some time to download and install.
- Reboot the Roku Device: Once the update is complete, your Roku device will automatically reboot.
- Test the Remote: After the device restarts, test the remote to ensure it is functioning correctly.
- Automatic Updates: To avoid future issues, consider enabling automatic software updates in the Roku settings.
Fix 4: Check for Remote Hardware Faults
If your Roku remote is still not working after trying all the previous fixes, it’s time to inspect the remote for any physical hardware faults. Sometimes, internal component issues or physical damage can cause the remote to malfunction. Follow these steps to check for remote hardware faults:
- Inspect the Remote: Carefully examine the remote for any visible physical damage, such as cracks, dents, or loose parts. Check the buttons to ensure they are not stuck or damaged.
- Clean the Remote: Use a soft, lint-free cloth to clean the remote’s surface, buttons, and infrared transmitter window. Dust and debris can sometimes interfere with the remote’s functionality.
- Remove Batteries: Open the battery compartment and take out the batteries.
- Check Battery Contacts: Inspect the battery contacts in the compartment. If they appear dirty or corroded, use a cotton swab dipped in rubbing alcohol to clean them gently.
- Test with New Batteries: Insert fresh batteries into the remote and test it again.
- Try Another Remote: If possible, borrow a working Roku remote from a friend or family member and test it with your Roku device. This step will help determine if the issue lies with the remote or the Roku device itself.
- Contact Roku Support: If you find any physical damage or the remote still doesn’t work with new batteries, consider reaching out to Roku’s customer support for further assistance or a replacement.
Fix 5: Check Roku Device for issues
If your Roku remote is in good condition and all other troubleshooting steps have been exhausted, the problem might lie with the Roku streaming device itself. Here are some steps to check for potential issues with the Roku device:
- Restart the Roku Device: Unplug the Roku device from the power source and wait for at least 10-15 seconds before plugging it back in. Allow the device to restart and check if the remote responds.
- Update Roku Software: Follow the steps mentioned in Fix 3 to check for and perform any available software updates for your Roku device.
- Check HDMI Connection: Ensure that the HDMI cable connecting your Roku device to the TV is securely plugged in on both ends. Try using a different HDMI cable or port if available.
- Try a Different Remote: If possible, try using a different Roku remote (either from another Roku device or a compatible universal remote) with your Roku device. This step will help identify if the issue is specific to your original remote.
- Factory Reset Roku Device: If all else fails, consider performing a factory reset on your Roku device. Please note that this will erase all settings and data on the device, so proceed with caution. Access the “Settings” menu, go to “System,” select “Advanced system settings,” and then choose “Factory reset.”
- Contact Roku Support: If the remote issue persists and you’ve ruled out all other possibilities, it’s time to seek assistance from Roku’s customer support. They can provide further troubleshooting steps or guide you on potential hardware issues with the Roku device.
Fix 6: Optimize Remote Range
Sometimes, the issue with your Roku remote might be related to its operating range. To optimize the remote’s range and improve responsiveness, follow these steps:
- Position the Roku Device: Ensure that your Roku streaming device is placed in an unobstructed location, preferably with a clear line of sight to the remote. Avoid placing the Roku device behind other objects, inside cabinets, or in enclosed spaces.
- Eliminate Wireless Interference: Minimize potential wireless interference by moving other electronic devices, such as Wi-Fi routers, cordless phones, or baby monitors, away from the Roku device and remote.
- Reposition the Remote: Experiment with different angles and distances when using the remote. Sometimes, small adjustments to your holding position can make a significant difference in remote performance.
- Reset Remote Settings: If you’ve previously adjusted the remote’s range settings, try resetting them to default values. Navigate to “Settings,” then “Remotes & devices,” and choose “Remote.”
- Consider a Wi-Fi Extender: If your Roku device is located far from your Wi-Fi router, consider using a Wi-Fi extender or a mesh network to strengthen the wireless signal and improve remote performance.
- Use an HDMI Extender: In some cases, HDMI cables can interfere with the remote’s signal. Consider using an HDMI extender cable to position the Roku device away from the TV, reducing potential interference.
- Replace Remote Batteries: As a final precaution, double-check that the batteries in your remote are fresh and properly inserted.
Fix 7: Factory Reset the Roku Remote
If all previous attempts to fix your Roku remote have been unsuccessful, performing a factory reset might be the key to resolving the problem. Keep in mind that a factory reset will erase all your preferences and settings, restoring the remote to its original state. Before proceeding, try other fixes as this should be a last resort. Follow these steps to perform a factory reset on your Roku remote:
- Access Roku Home Screen: Use your TV remote to navigate to the Roku home screen.
- Open Settings: Scroll up or down on the home screen to highlight and select “Settings.”
- Go to System: Within the Settings menu, choose “System.”
- Select Advanced System Settings: Look for “Advanced system settings” and click on it.
- Factory Reset: Find and select “Factory reset.”
- Confirm the Reset: A warning message will appear, notifying you that the factory reset will erase all settings. Confirm your decision to proceed.
- Enter Security Code: If prompted, enter the security code displayed on the screen to authorize the factory reset. This step helps prevent accidental resets.
- Complete the Factory Reset: Your Roku remote will now reset to its original settings. This process may take a few minutes.
- Re-Pair the Remote: After the factory reset, you’ll need to re-pair the remote with your Roku device. Follow the re-pairing steps mentioned in Fix 2 to establish a connection.
- Test the Remote: Once the pairing is complete, test the remote by pressing various buttons to ensure it’s functioning correctly.
Fix 8: Contact Roku Support
If you’ve tried all the previous fixes and your Roku remote is still not working, it’s time to reach out to Roku’s customer support. Roku offers dedicated support channels to assist with troubleshooting and resolving issues related to their products.
Conclusion
This comprehensive troubleshooting guide offers valuable insights to resolve common Roku remote issues. By checking and replacing batteries, re-pairing the remote, updating device software, and optimizing range, most problems can be resolved effortlessly. In cases of hardware faults or persistent malfunctions, contacting Roku support is recommended. Employing preventive measures like regular maintenance and safe storage can ensure continued functionality.
With these user-friendly tips, you can enjoy seamless streaming experiences and make the most of your Roku entertainment setup. Stay proactive, keep your remote well-maintained, and relish uninterrupted entertainment with your favorite Roku streaming device. Happy streaming!
FAQs
Low batteries or wireless interference are common culprits. Check and replace batteries first.
Yes, outdated firmware or bugs can hinder remote functionality. Update the Roku software.
Inspect for hardware faults, clean, and handle the remote with care.
Prachi Mishra is a talented Digital Marketer and Technical Content Writer with a passion for creating impactful content and optimizing it for online platforms. With a strong background in marketing and a deep understanding of SEO and digital marketing strategies, Prachi has helped several businesses increase their online visibility and drive more traffic to their websites.
As a technical content writer, Prachi has extensive experience in creating engaging and informative content for a range of industries, including technology, finance, healthcare, and more. Her ability to simplify complex concepts and present them in a clear and concise manner has made her a valuable asset to her clients.
Prachi is a self-motivated and goal-oriented professional who is committed to delivering high-quality work that exceeds her clients’ expectations. She has a keen eye for detail and is always willing to go the extra mile to ensure that her work is accurate, informative, and engaging.