Whether you’re a seasoned Cricut enthusiast or a newcomer to the world of crafting, encountering calibration issues with your Cricut machine can be frustrating. The precision and accuracy of your Cricut machine depend heavily on its calibration, which ensures that your cuts, designs, and projects come out just the way you want them to. In this comprehensive guide, we’ll delve into the reasons behind Cricut calibration not working and provide step-by-step solutions to help you resolve the issue and get back to creating amazing crafts effortlessly.
Understanding Cricut Calibration
Calibration is the process of aligning your Cricut machine’s cutting blade and mat to ensure accurate and precise cuts. When the calibration goes awry, you might experience issues such as misaligned cuts, incomplete shapes, or even ruined materials. Several factors can lead to Cricut calibration problems, but fear not – we’re here to help you troubleshoot and fix these issues effectively.
Common Reasons for Cricut Calibration issues
- Physical Obstructions or Debris: Sometimes, debris or tiny particles can find their way onto the cutting mat or beneath the carriage of your Cricut machine, causing misalignment during calibration.
- Software Glitches: Incompatibility between your Cricut machine’s firmware and the Design Space software could also lead to calibration errors.
- Mat and Blade Issues: Worn-out cutting mats or blunt blades can interfere with the calibration process, resulting in inaccurate cuts.
- Machine Placement: Placing your Cricut machine on an uneven or unstable surface can impact the calibration process and lead to misalignment.
How to fix Cricut Calibration issues?
Fix 1: Cleaning and Inspection
Proper cleaning and inspection are fundamental steps to address Cricut calibration issues. Follow these detailed steps to ensure that your machine and workspace are free from debris and obstructions:
- Disconnect Power: Begin by disconnecting your Cricut machine from the power source to ensure safety during the cleaning process.
- Remove Cutting Mat: Carefully remove the cutting mat from the machine and set it aside.
- Clean the Cutting Mat: Use a lint roller or a slightly damp microfiber cloth to gently clean the cutting mat’s surface. Remove any paper remnants, dust, or debris that might have accumulated.
- Inspect Rollers and Carriage: Examine the rollers and carriage area of your Cricut machine. Look for any particles, paper scraps, or debris that could hinder the calibration process. Use a small brush or compressed air to dislodge and remove any obstructions.
- Inspect Blade Housing: Take a closer look at the blade housing area. Make sure there are no loose bits of material or adhesive residue that could affect the movement of the blade.
- Cleaning the Blade: If your blade appears dirty or has adhesive residue, carefully remove it from the housing and clean it using a soft cloth or a cleaning solution recommended by Cricut.
- Reassemble: Once you’ve completed the cleaning and inspection process, reassemble the cutting mat, and ensure that the machine’s components are back in their correct positions.
- Test Cuts: Before proceeding further, perform a test cut on a scrap piece of material to ensure that the cleaning process hasn’t affected the machine’s performance.
Fix 2: Software Updates and Compatibility
Updating your Cricut machine’s firmware and ensuring compatibility with Design Space is crucial for resolving calibration issues. Follow these steps to ensure your software is up-to-date:
- Access Design Space: Open the Design Space software on your computer or mobile device.
- Check for Updates: Navigate to the settings or profile section within Design Space. Look for an option related to software updates or machine firmware updates.
- Update Firmware: If a firmware update is available, follow the prompts to initiate the update process. This may require your Cricut machine to be connected to your computer via USB.
- Confirm Compatibility: Verify that your Cricut machine’s firmware version is compatible with the version of Design Space you’re using. Outdated firmware can lead to calibration problems.
Don’t miss: Starfield flashlight not working
Fix 3: Blade and Mat Assessment
A worn-out cutting mat or a dull blade can significantly impact calibration. Follow these steps to assess and address blade and mat issues:
- Examine the Cutting Mat: Inspect your cutting mat for signs of wear, warping, or loss of stickiness. If the mat is damaged, replace it with a new one to ensure accurate cuts.
- Check Blade Condition: Examine the blade for signs of dullness or damage. A dull blade can result in uneven and inaccurate cuts. If the blade is dull, replace it with a fresh blade.
Fix 4: Proper Machine Placement
Ensuring your Cricut machine is placed on a stable surface is crucial for successful calibration. Follow these steps to ensure proper machine placement:
- Choose a Stable Surface: Select a flat and stable surface for your Cricut machine. Avoid placing it on surfaces prone to vibrations or tilting.
- Level the Surface: If the surface isn’t perfectly level, use shims or adjustable feet to ensure the machine is balanced and stable.
Fix 5: Recalibration Process
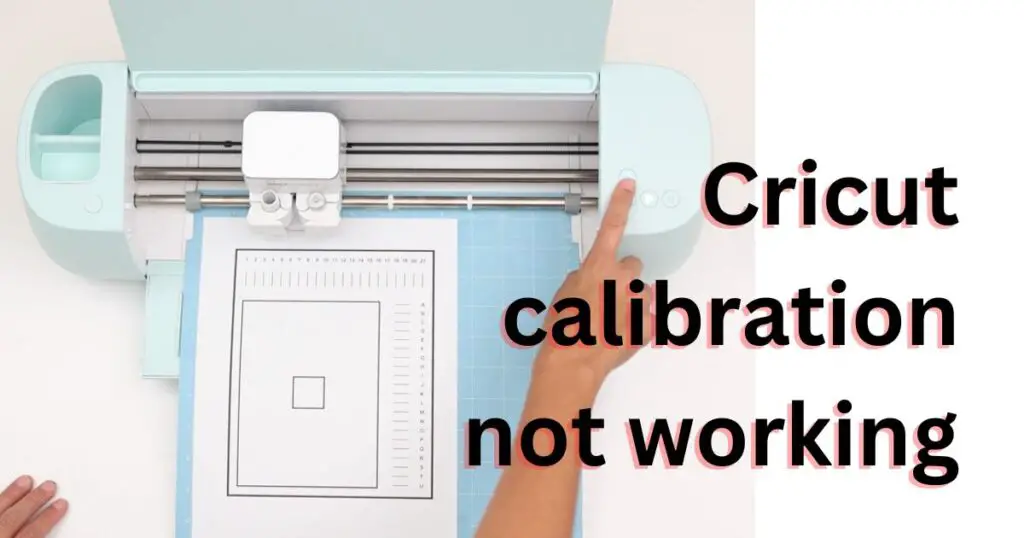
Recalibrating your Cricut machine can often resolve calibration issues. Follow these steps to recalibrate your machine:
- Open Design Space: Launch the Design Space software on your computer or mobile device.
- Connect the Machine: Ensure your Cricut machine is connected to your computer or device.
- Load Plain Paper: Place a sheet of plain paper on the cutting mat.
- Access Calibration: In Design Space, navigate to the settings or calibration section.
- Follow On-Screen Instructions: Follow the on-screen instructions to initiate the calibration process. Your machine will perform a series of test cuts.
- Check Alignment: After the test cuts, inspect the alignment of the cuts on the paper. If they are accurate, your calibration is successful. If not, repeat the calibration process.
Fix 6: Check for Interference and Environment
Sometimes, external factors and the environment can play a role in Cricut calibration issues. Consider these steps to rule out potential interference and environmental factors that might be affecting your machine’s calibration:
- Minimize Interference: Make sure your Cricut machine is placed away from electronic devices that emit electromagnetic interference, such as microwaves, cordless phones, and Wi-Fi routers. These devices can disrupt the calibration process.
- Stable Temperature and Humidity: Extreme temperature fluctuations and high humidity levels can impact the performance of your Cricut machine. Ensure that your crafting space maintains a stable and comfortable environment.
- Proper Lighting: Adequate lighting is essential for accurate calibration. Ensure that your workspace is well-lit so that the machine’s sensors can detect alignment marks accurately.
- Secure Connection: Check the USB or Bluetooth connection between your Cricut machine and your computer or mobile device. A loose or unstable connection can lead to calibration errors.
- Calibration in Different Environments: If you’re consistently experiencing calibration issues in a specific location, consider moving your Cricut machine to a different room or area to see if the environment plays a role in the problem.
Fix 7: Perform a Hard Reset
A hard reset can sometimes resolve stubborn calibration issues by restoring your Cricut machine’s settings to their default state. Follow these steps to perform a hard reset:
- Turn Off the Machine: Disconnect your Cricut machine from the power source and turn it off.
- Disconnect USB or Bluetooth: If your machine is connected to your computer or mobile device via USB or Bluetooth, disconnect the connection.
- Wait for a Few Minutes: Leave the machine disconnected and turned off for at least 5 to 10 minutes to allow any residual electrical charges to dissipate.
- Power On: Reconnect the machine to the power source and turn it on.
- Reconnect USB or Bluetooth: If necessary, reconnect your Cricut machine to your computer or device.
- Check Calibration: After performing the hard reset, attempt to recalibrate your Cricut machine using the standard calibration process. This might help resolve any persistent calibration issues.
Fix 8: Contacting Cricut Support
In some cases, despite your best efforts, Cricut calibration issues may persist. When you’ve exhausted all available options, it’s time to consider reaching out to Cricut’s dedicated customer support team. Their knowledgeable experts are equipped to provide you with the assistance you need to overcome challenging calibration problems. Here’s how to get the expert help you require:
- Contact Customer Support: Visit the official Cricut website and navigate to the support section. Look for contact details, which might include a phone number, email, or live chat option.
- Explain Your Issue: When you contact customer support, provide them with a clear and concise explanation of the calibration issue you’re facing. The more information you can provide, the better they’ll be able to assist you.
- Follow Their Guidance: The Cricut support team will guide you through troubleshooting steps specific to your issue. They might ask you to perform certain tests or provide additional details about your machine’s behavior.
- Receive Personalized Solutions: Based on your interaction with the support team, you’ll receive personalized solutions tailored to your situation. These recommendations could involve advanced troubleshooting techniques or specific actions to resolve the calibration problem.
- Utilize Available Resources: Additionally, the Cricut support team might direct you to helpful resources, such as video tutorials or user guides, to aid in your troubleshooting efforts.
Remember that the Cricut support team is there to assist you, so don’t hesitate to reach out if you’re struggling with calibration issues that you can’t resolve on your own. They have the expertise and experience to help you overcome even the most complex challenges and get your Cricut machine back to working flawlessly.
Preventing Cricut Calibration issues
Calibrating your Cricut machine is essential for achieving precise and accurate cuts in your crafting projects. However, to avoid calibration issues altogether, it’s important to follow preventive measures that can help ensure smooth operations. Here are some valuable tips to keep in mind:
Tip 1: Regular Maintenance
Maintaining your Cricut machine and its components can go a long way in preventing calibration problems. Follow these steps to keep your machine in optimal condition:
- Clean Cutting Mat: Regularly clean your cutting mat to remove debris, adhesive residue, and paper scraps. This prevents buildup that can affect calibration and cutting accuracy.
- Clean Rollers and Carriage: Gently clean the rollers and carriage area to prevent debris from accumulating and interfering with the calibration process.
- Replace Blades and Mats: Regularly assess the condition of your cutting blades and mats. Replace them as needed to ensure consistent, precise cuts.
Tip 2: Stable Workspace
Creating a stable workspace for your Cricut machine is crucial to prevent calibration issues caused by external factors. Consider the following:
- Level Surface: Ensure that your machine is placed on a level surface to prevent vibrations or tilting during calibration and cutting.
- Electromagnetic Interference: Keep your machine away from devices that emit electromagnetic interference, such as microwaves, to prevent signal disruptions.
Tip 3: Software Updates
Staying up-to-date with firmware and software updates is essential for preventing compatibility issues that could lead to calibration problems:
- Regularly Check for Updates: Keep an eye out for firmware and software updates for both your Cricut machine and Design Space. Updated software ensures seamless communication and accurate calibration.
Tip 4: Calibration Checks
Performing regular calibration checks can help you catch and address any minor calibration issues before they escalate:
- Perform Routine Calibration: Even if you’re not experiencing calibration problems, consider performing routine calibration checks to ensure everything is aligned perfectly.
- Test New Materials: When working with new materials, perform test cuts to verify calibration accuracy before starting on your actual project.
Tip 5: Proper Material Handling
How you handle materials during the cutting process can impact calibration. Follow these steps to prevent material-related calibration issues:
- Secure Materials: Ensure that the material you’re cutting is securely adhered to the cutting mat. This prevents shifting during the cutting process that could lead to misalignment.
Tip 6: Avoid Overloading
Overloading your Cricut machine with heavy or thick materials can strain the calibration and cutting mechanisms. Prevent this by:
- Adhering to Material Guidelines: Follow the manufacturer’s guidelines for maximum material thickness and weight to prevent excessive strain on the machine.
By incorporating these preventive tips into your crafting routine, you can significantly reduce the likelihood of encountering Cricut calibration issues. Remember that a little maintenance, careful workspace setup, and proper material handling can go a long way in ensuring that your Cricut machine consistently delivers accurate and precise cuts for all your creative projects.
Conclusion
Calibrating your Cricut machine is crucial for achieving precise and flawless cuts in your crafting projects. With the information provided in this guide, you’re well-equipped to identify the reasons behind your Cricut calibration not working and troubleshoot effectively. By following the step-by-step solutions and tips outlined above, you can overcome these challenges and continue creating stunning crafts without any hindrance. Remember, while calibration issues can be frustrating, they are solvable with patience, attention to detail, and the right approach. Happy crafting!
FAQs
Calibration hitches can result from debris, software glitches, worn parts, or uneven surfaces.
Clean mats, rollers, and carriage to ensure debris-free surfaces and smooth movement.
Update firmware and Design Space for seamless communication between machine and software.
Yes, a blunt blade can compromise precise cuts, affecting overall calibration accuracy.
Uneven surfaces may cause tilting and vibration, leading to misaligned cuts and calibration troubles.
Rahul Kumar is a passionate tech journalist and gaming expert with a knack for breaking down complex game mechanics into easy-to-follow guides. With years of experience covering multiplayer shooters and strategy games, he specializes in troubleshooting gaming errors, optimizing performance, and enhancing the overall gaming experience. When he’s not diving into the latest co-op titles, you’ll find him testing new hardware, exploring hidden gaming tricks, or engaging with the gaming community to bring the most effective solutions. Follow Rahul for in-depth gaming insights, practical fixes, and all things action-packed! 🚀🎮


