Due to the core update on google, everyone wants to improve their core web vitals. Want to boost up the speed of your page for LCP, FID, CLS speed using WP Rocket. We will help you with doing that. We will talk in detail about how to boost your page speed. Keep tuned to know about it.
The TSC rule can boost your site on google’s first page: A fast-loading theme, dedicated server, and a caching plugin can resolve all the problems of speed and load time.
Gossipfunda
Why we need a WP Rocket plugin?
Fast website loading is one of the mandatory things in today’s time if you are a website owner. Fast websites attract a lot of visitors. It also makes your page rating better so that your website comes in the search result more often. There are a lot of plugins available in the market to do this. Today we are going to talk about WP Rocket Plugin. WP Rocket is a tool that minimizes your workload and makes your website fast. This is one of the most popular plugins used nowadays to make the website more responsive. There are a lot of settings and options to change from.
Must see: Be aware of WP Rocket Fake Sites
On our website, we are also using WP Rocket, you can see the picture below of our speed improvement.

There are lot of options to make your website fast and responsive. We are going to talk in detail about them. Also, we will tell you how to use them. We will also guide you how and where to use them. Keep reading to know how to do it. But first, we are going to see the basics of the WP Rocket.
This article is going to be lengthy as it covers all the settings of the WP Rocket. Also, we are talking in a detailed manner about what is best for your website. Keep reading.
WP Rocket
Some of its features are as follows:
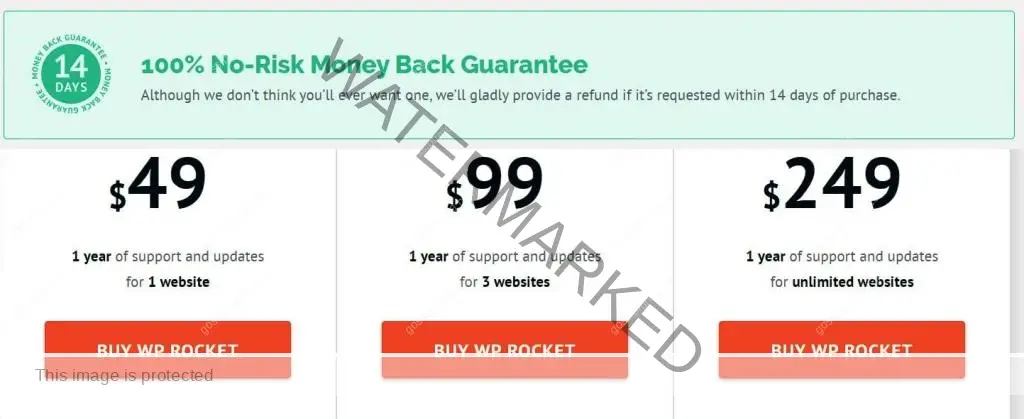
Wp Rocket is a user-friendly, web caching plugin. It is beginners friendly. It costs between $49-$210. it is currently used on more than 7k+ websites. This is one of the widely used words press plugin.
Purchase now: WP Rocket 20% off No Coupon code required
- It creates page caches to load websites fastly.
- WP Rocketcompresses the HTML, CSS, and JavaScript files to make the website works faster.
- It also compresses the images to load it fastly.
- There are many other features.
In this section, we will see the Pros of the WP Rocket Plugin. Let us roll into it.
Pros
- Automatic Speed Optimization: This plugin automatically optimizes the speed of the webpage to almost 70% right after the activation of this plugin on the website.
- Add Ons: There is a lot of add ons in this plugin that you can use when you activate it.
- Easy to use
Cons
- Premium: The main con of this plugin is that this plugin is entirely premium. You have to buy this plugin to use.
- The second con, which is not a con but it is because this plugin not only caches the page but also it has the power to play with the HTML, CSS, and the other websites files. If you are not familiar with these things, don’t touch these options.
Now as we have seen the basics about the WP Rocket, let us move the detailed settings overview of this plugin. But first, we will see how to install WP Rocket.
Don’t miss: Wp Rocket Vs W3 Total Cache
Installation
Installation and starting this plugin is very easy. As we have mentioned above it is one-click activation. We will see the installation process of this plugin. Let us jump into it.
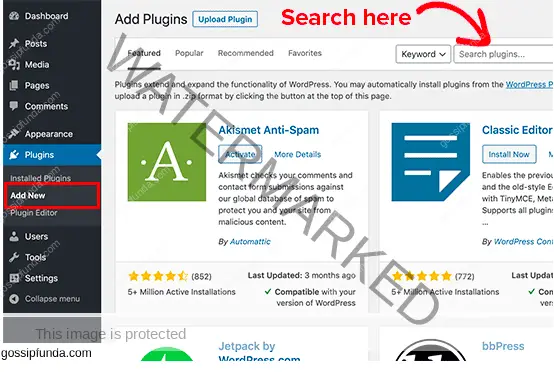
- The first thing you need to do is to go to your WordPress dashboard.
- In the next step, you have to click on the Plugins option. A sub-menu will appear.
- From the submenu, you have to select ADD NEW.
- In the search box provided, search for WP Rocket. Click on the Install button. But before the installation begins you have to buy the plugin. We have talked about the pricing above. Please check it to know more. Now once we have bought it, let us see the next step.
- Once it is installed in your WordPress, click on the WP Rocket, and hit the activate button.
- Next thing you have activated the plugin, we can now see the setting to be done to make your website fast. We will see those settings in a detailed manner in the next section.
Settings
Now we have seen the basics and the installation of the WP Rocket. We will now see the settings of the WP Rocket to make your website fast.
The settings of WP Rocket is quite simple. It has everything aligned in. We will see all the settings available in the WP Rocket. We are also going to talk about which settings are beneficial for your website. Which settings you need to turn on and which not to. With that let us move further to our first section.
DashBoard
- The first thing we are going to talk about the WP Rocket is the dashboard of the plugin. The panel shows all the necessary information about the plugin. Information like your account info, your subscription, and many other things.
- In the dashboard, you will have the option to clean your cache. This option will clean your website cache in one. It also shows when the last time you have cleaned your website cache. This option is quite helpful.
- The next thing in the dashboard is the Cache Preloading. This tool helps to regenerate the cache of the website. So the next time you laid the website, it does not need to take time to load the data.
- The last thing is the Regenerate Critical CSS button. This tool will help you regenerate the minimum CSS for your website to load it fastly.

Now we have seen everything about the dashboard. Let us move to Cache Settings.
Cache
Now we are going to talk about the cache. This is the main feature of Wp Rocket Plugin. There are many caching options available in the plugin. We will talk about each of them to make it easy for you, which one to use and which not to.
Largest Contentful Paint (LCP): count the loading performance of your site. To implement a great user experience, LCP should happen within 2.5 seconds. This can be done by fast hosting and great caching.
Now when you activate the plugin, it automatically starts the caching process for the computers. But there are some options which we need to check and enable or disable according to our needs. To change these settings, you need to go to the WP Rocket Plugin from your WordPress dashboard there. You have to click on the Cache tab. When you click on this tab, a new page will appear with a lot of caching options. We will see them one by one.

Mobile Cache
The first setting in the cache section we are going to talk about is the Mobile Cache. This option is enabled by default. This setting allows the website to create the cache for mobile devices. If your visitors are using your website on mobile devices, then you should keep enabled.
You will find an option in the mobile cache is “separate cache files for mobile devices.” You should enable this function. This function will allow your website to generate separate cache files for the mobile devices so that the cache for the computer devices does not interfere with the mobile device cache.
User Cache
The next option in the cache settings is the User cache. This option is turned on the caching feature for the users logging into your website. To simplify this, if your website needs users to log in to your website and enter data, then you should enable this function. Enabling this function will help the user to login fast, which will increase the efficiency of your website.
If your website does not need to get user data or do not need to login to your website, you should not enable it. This will just eat up your resources otherwise.
Cache Lifespan
The third one in the section of cache is the Cache Lifespan. This is the same as the name tells about it. This will monitor the lifespan of the cache created on your website. This will automatically delete the old cache and reloads the cache after a certain amount of time. You need to specify the time.
It entirely depends on you how much gap you want to give between the generation and the deletion of the cache. By default, the plugin tells of entering 10 hours. If your website has a lot of traffic, you need to decrease this time according to your need.
You need to specify the time very seriously as it is one of the primary settings. If you enter more time than your website needs to refresh, then your website may get slow down. Keep all the factors in mind before setting this up.
After changing all the settings, you need to click save changes to make those changes effective immediately.
This is all about the Cache section. As this is one of the main parts of Wp Rocket, you need to fine-tune it according to your needs. Now let us see the next setting to work on.
File Optimization
After the cache, this is one of the most affecting things. File optimization optimizes your website files to make them load faster. Setting up this with high accuracy is very important. If you don’t set up this properly, you might delete or corrupt some of the necessary files needed for your website.
This setting is also known as the Minifying static content. When you enable this, the static files of your websites get compressed so that it does not affect the website’s performance. To enable this, you need to go to the WP Rocket settings then click on the File optimization settings.
In this section, you can compress your HTML, CSS, and your website JS files. Let us see them one by one.
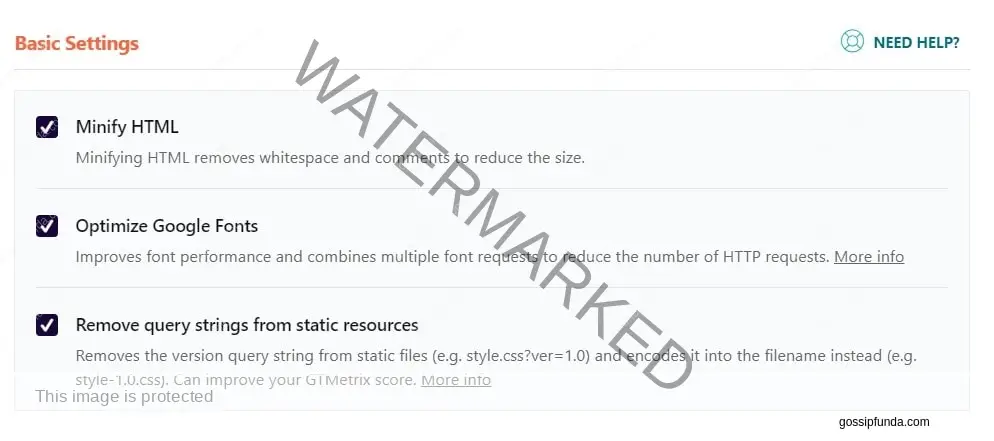
HTML Files
HTML Minify is the first option in this section. Enabling this minimizes the file size of the HTML pages on your website. It removes all the white space and the comments in the HTML file, to make them small. It reduces the size of HTML files so that they can load faster. Before enabling this make a backup of the HTML files of your website if anything goes wrong, you can back it up.
The next option is combining Google Fonts. As most of the websites use Google on the website, this option needs to enabled. Enabling this option will make the request of all the Google Font in one time. As a result, it will decrease the loading time of the website. HTML Files
HTML Minify is the first option in this section. Enabling this minimizes the file size of the HTML pages on your website. It removes all the white space and the comments in the HTML file, to make them small. It reduces the size of HTML files so that they can load faster. Before enabling this create a backup of the HTML files of your website if anything goes wrong, you can back it up.
The next option is combining Google Fonts. As most of the websites use Google on the website, this option needs to enabled. Enabling this option will make the request of all the Google Font in one time. As a result, it will decrease the loading time of the website.
The last option is removing the query strings and enabling this function to remove all the query string present in the HTML fils of your website. It will make your website fast, but if your website needs those queries to fetch some data, then removing them will cause problems to your site. Before enabling this option, make sure that those query does not affect your website if it does then do not allow this function.
CSS Files
The first option is Minify CSS. Enabling this removes all the white space and the comments in the CSS file, to make them small. It reduces the size of CSS files so that they can load faster. If your CSS files are big and there are a lot of animation on your website, you will see some changes in your website after enabling this. Before allowing this to make a backup of the CSS files of your website. If anything goes wrong, you can back it up.
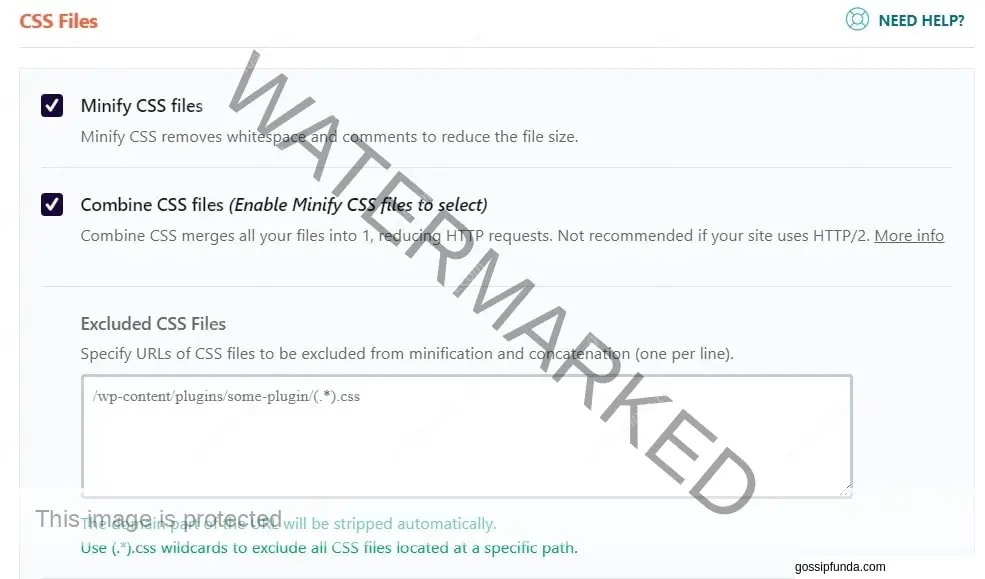
The next option in this section is the Combine CSS files. Enabling this feature will combine all the CSS files present on your website. It will reduce the number of HTTP requests hence a fast performance for your website. However, if your website uses HTTP/2, then you should not enable this. It may cause a problem for your website.
The last option in this section is the Exclude CSS Files. This part gives you an area to enter the path of all those files which you want to exclude reducing size. You just have to provide the path of the file, and it will get excluded. If you have multiple files, then you can enter them in the next line.
JS Files
The first option in this section is the Remove jQuery Migrate. Enabling this will remove all the jQuery Migrate files on your website. Removing them will increase the speed of your website. However, if your website uses jQuery, then you should think before removing it because removing them will cause a problem to your jQuery.
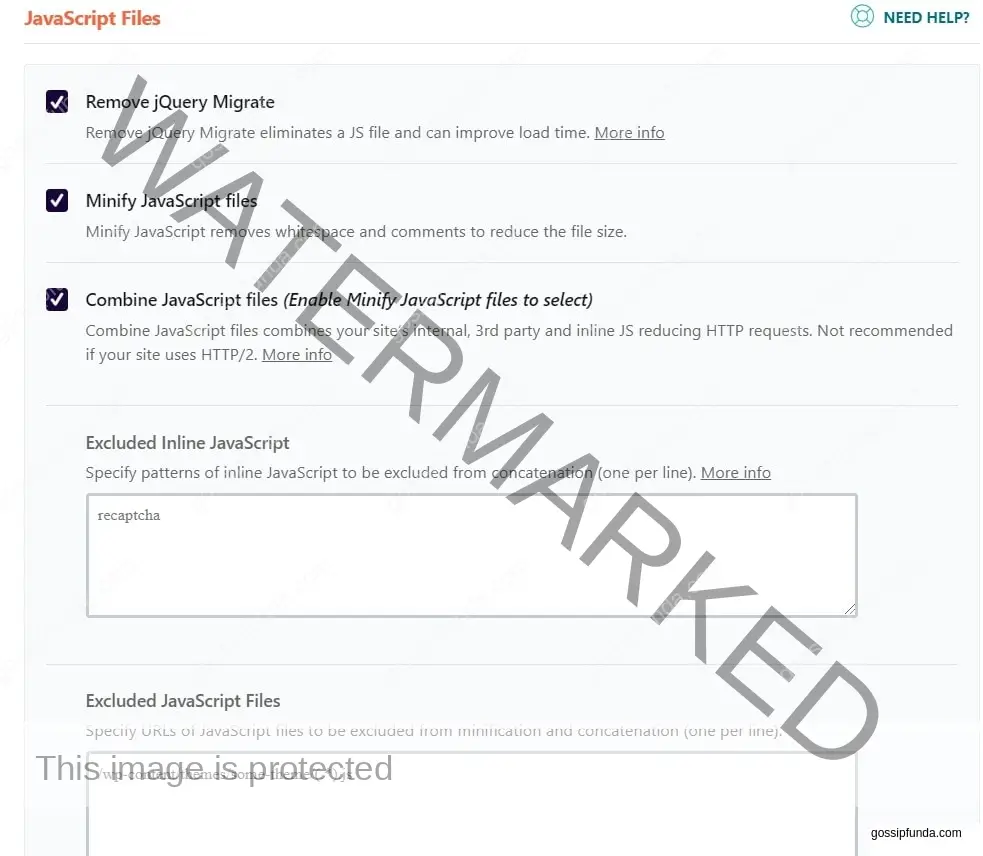
The next option is the JS Minify. Enabling this removes all the white space and the comments in the JS file, to make them small. It reduces the size of JS files so that they can load faster. If your JS files are big and there are a lot of animation on your website, you will see some changes in your website after enabling this. Before enabling this make a backup of the JS files of your website. If anything goes wrong, you can back it up.
The next option in this section is the Combine JS files. Enabling this feature will combine all the JS files present on your website. It will reduce the number of HTTP requests hence a fast performance for your website. However, if your website uses HTTP/2, then you should not enable this. It may cause a problem for your website.
The second last option in this section is the Exclude Inline JavaScript. This part gives you an area to enter the path of all those files which you want to exclude reducing size. All you have to do is enter the Inline JS pattern, and it will be excluded. If you have multiple patterns, then you can enter them in the next line.
The last option is the Exclude JavaScript Files. This part gives you an area to enter the path of all those files which you want to exclude reducing size. You just have to provide the path of the file, and it will get excluded. If you have multiple files, then you can enter them in the next line.
Media
The next section is about the Media. It optimizes the media files to load it faster on the website. The are many options inside the media section to optimize more. It is called Lazy Load Media. To enable these options, you need to go to the WP Rocket settings then click on the media section.
The lazyload is mainly used to delay the image download so that the website can load faster. We will see all the media option in a bit.
LazyLoad
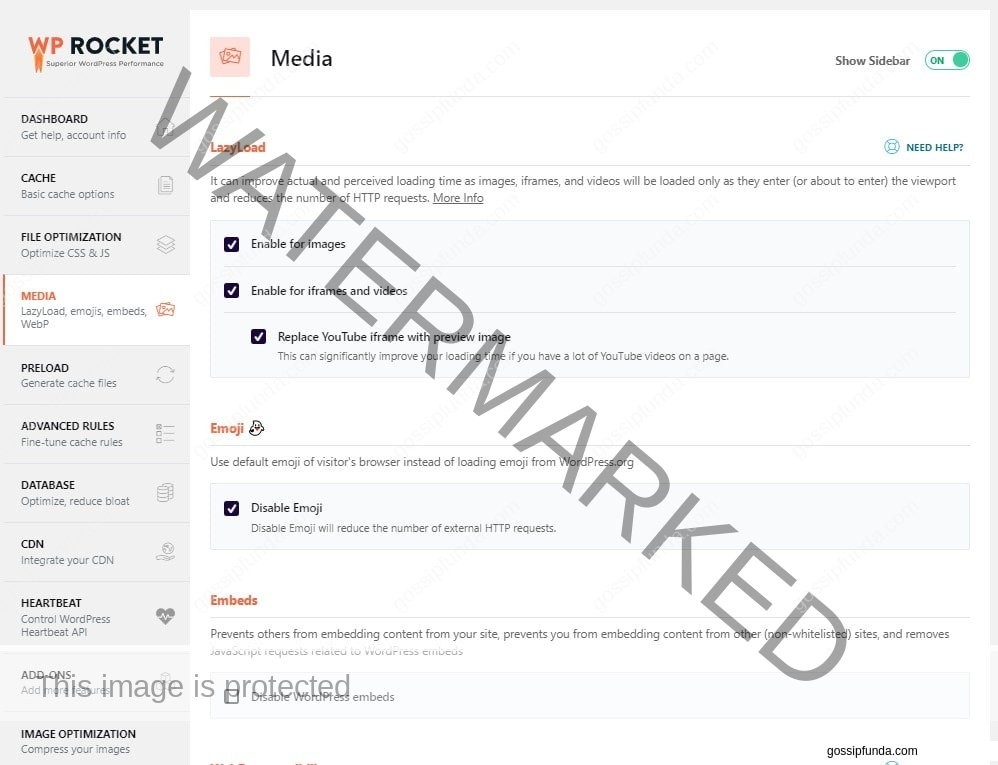
The lazyload feature is beneficial in increasing the speed of the website. It limits the download of the image on the website, so the actual content of the website loads faster. B default, it is automatically enabled. However, you can make some changes to make it more optimized.
The first option is to enable lazyload for the images. It is by default activated. If you use your images to load with the content, you can disable it, but it will reduce the speed of your website.
First Input Delay (FID): counts interactivity. To implement a great user experience, pages should have a FID of less than 100 milliseconds. This can be achieved by the fast loading theme with lazyload images.
The next option is the enable lazyload for videos and the iframes. Enabling this will do the same as it is doing for the images. It will delay the loading of the videos and the iframes so that the content loads faster. In this option, you have a sub-option to replace the youtube video frames with the images preview. It will also help in increasing the speed of the website.
Emoji
Toady emoji plays a big role in web content. As emojis are basically imaging files, it also slows the website. There this option comes in play. Enabling this option will disable all the emojis on the website. Hence making the website faster. However, if your content needs emoji, then you should not enable this function. It will lead you to lose your visitors due to not fulfillment of content.
Embeds
Embeds plays a big role in today’s website. It allows us to embeds video, audio, and images from the other places to make the website contentful. But it also slows down the website.
There are two ways by which embeds slows the website is the first one is the media. Media are big files loading them, obviously slows the website. The second is the fetching those embeds from the links. As fetching takes time, it slows the load time of the website. Wp Rocket allows you to turn off these embeds. However, if your content is based on embeds, you should not disable embeds on your website.
This is it for the media section. We will now see the next section. Stay tuned.
Preload
The following setting In the WP Rocket is the Preload. The preload is for preloading the web links on the websites to make it faster. It caches the links and the data, so when the website gets loaded, the preloaded data also gets loaded with it, reducing the laid time. To view preload settings, you need to go to the WP Rocket plugin then click on the Preload Pannel. It will open up the preload section. There are multiple options to work on. We will see them one by one.

Cumulative Layout Shift (CLS): counts visual stability. To implement a great user experience, we should maintain a CLS of less than 0.1 which can be done by good and fast loading theme, most of the time table of content, button, and boxes takes time to load, you can be done by preload.
Preload Activate
This option allows the user to enable preload on the website. Enabling this option will start caching all the link data so that when the next time it is loaded, it loads faster. By default, the websites automatically preload the data.
Prefetch DNS Request
This option allows you to fetch the DNS before the loading of the page, so the load time of the website gets decreased. All you have to do is that enter the DNS links in the area provided. If you have multiple DNS, then you can enter them one by one. Once you are done entering the data, click on the Save changes button to save the information so that the next time you open the website, all the data gets preloaded.
This is all about Preload. Now let us see the next section.
Advanced Rules
The next section is about the advanced rules. This setting contains additional rules to make the website faster. There are rules like no caching odd data or cookies. These rules are basically for any exception you need on your website. Because there are times when some cached data also make the website slow. Let us talk about them in detail. To change the settings in the advanced rules, you need to go to the WP Rocket plugin then click on the Advanced Rules Pannel. It will open up the advanced rules section. There are multiple options to work on. We will see them one by one.

Never Cache URL
The Never Cache URL is one of the options in the Advanced Rules. As the name suggests, this option will allow you never to cache some of the URLs. Now there may be a question harassing in your mind that if caching enables the website to work faster, then why this option.
The answer is that sometimes some irrelevant data is cached, which makes the website’s loading slow. That is why this option is available. To exclude the websites, all you need is to enter the URL in the given space. If you have multiple of the websites, you can enter them one by one in the next line once you are done hit the Save Changes button.

Never Cache Cookies
The Never Cache Cookies of the Advanced Rules allow you to exclude some of the cookies which you never want to cache. Well, the reason is the same as the above that sometimes some irrelevant cookies get cached, which makes the loading of the website slow.
To start this feature, you need to enter the IDs of the cookies in the area provided to allow the website never to cache the data from those cookies. Hence it will make your website faster. If you have multiple of the cookie id, you can enter them one by one in the next line. Once you are done, hit the Save Changes button.
Never Cache User Agents
Never Cache User-Agents option allows excluding the User Agents not get cached. Talking in the more straightforward term, the user agent is an option to cache to the old versions of the websites to make the load time fast. However, sometimes it happens when we update the websites. Those data become irrelevant, causing a delay in loading the web page. This option allows us to get rid of that.
To enable this feature, all you have to do is specify the user agent strings in the area provided to allow the website never to cache the data from those user agents. Hence it will make your website faster. If you have multiple user-agent strings, you can enter them one by one in the next line once you are done hit the Save Changes button.
Always Purge URLs
The Always Purge URLs allows us to purge and cache the data from those URLs. It means that gathering the data from the URL mentioned in the list will always get purged or scanned, and all the data from those URLs get cached, so the website loads faster.
To enable this option, you have to mention the URLs in the area provided to allow the website always to cache the data from those URLs. Hence it will make your website faster. If you have multiple of the URLs, you can enter them one by one in the next line once you are done hit the Save Changes button.
Cache Query Settings
Cache Query Settings allows us to cache some of the specified queries to make the website work faster. The Cache only those queries which you need more often. Caching all the queries make the website slow.
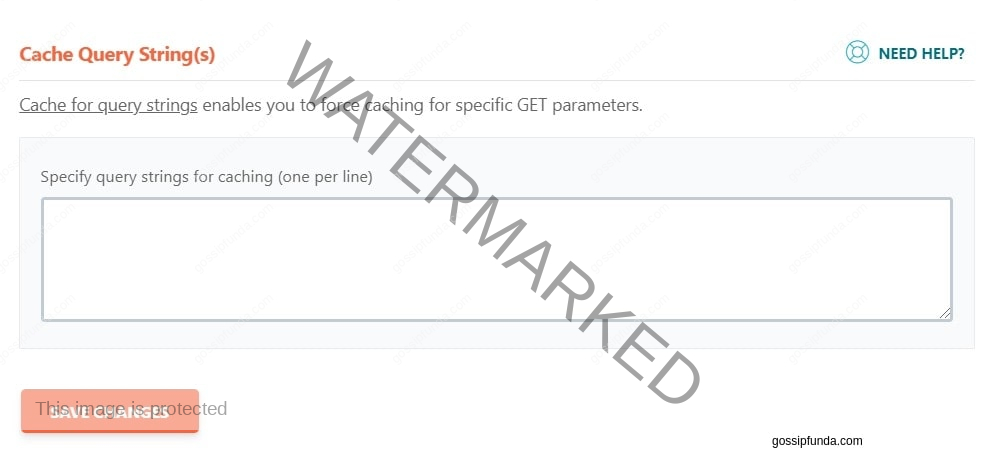
To enable this option, you have to mention the queries in the area provided to allow the website always to cache the data from those queries. Hence it will make your website faster. If you have multiple of them queries, you can enter them one by one in the next line once you are done hit the Save Changes button.
That is all about the Advanced Rules. Let us move further.
Database
The database is an essential part of the website. It is also massive in size. The database makes the website load time longer. So we need to optimize the database so that it can work faster and give us better results. To work on the database settings, you need to go to the WP Rocket plugin then click on the database Pannel. It will open up the database section. There are multiple options to work on. We will see them one by one.

Post-Cleanup
The post-cleanup feature allows the user to clean the irrelevant posts from the database. There are three options of post clean up.
The first is a revision post-cleanup. It cleans all revision post on your website. If you want to keep those revision post, you should not enable this option.
The second is the Draft Post cleanup. It cleans all draft posts on your website. If you want to keep those draft posts, you should not enable this option.
The third is the Trash Post cleanup. It cleans all trash posts on your website. If you want to keep those trash posts, you should not enable this option.
Comments Cleanup

The comment cleanup option allows you to clean all the spam comments on your posts. You should always keep this option turned on. As the spam comment is of no use, it just eats up space in the database and makes the website slow. We recommend enabling this option.
That is all about the Database. Let us move further.
CDN
CDN stands for the content delivery network. It helps in delivering the content faster from the optimized browser. To work on the settings, you need to go to the WP Rocket plugin then click on the CDN Pannel. It will open up the CDN section. There are multiple options to work on; we will see them one by one.

The first thing you need to do is to Enable the CDN. Then you need to specify the CDN Names. If you have more than one CDN name, you can click on the ADD button to add more CDN. However, if you don’t know about CDN, then you should let this thing go. Because if you do something wrong, everything will get messed up.
The next Option in CDN is to exclude files from CDN. This option allows excluding files that you don’t want to send through the CDN. To enable this function, you have to mention the URL of the File, and that will get excluded.
HeartBeat
Heartbeat is a WordPress API. It allows the website to send requests from period to period to the host server. It is mainly done to perform some automated tasks.

This plugin allows us to control the Heartbeat API to make the website work faster. In this plugin, you have the option to reduce heartbeat activity. You have to enable this option, and the plugin will automatically control it. However, we do not recommend to completely turn off the API because it performs some of the crucial tasks to check the connectivity between th website and the server.
AddOns
The following setting available in this plugin is the AddOns. It enables the website to work with those AddOns and work faster. To work on the settings, you need to go to the WP Rocket plugin then click on the AddOns Pannel. It will open up the AddOns section.
There are a lot of AddOns available on the WP Rocket. Some of them are Google Analytics, Facebook Pixel, Varnish, Cloudflare, and many more. You have select and enable the addon you want, and it will get activated on your website an make it work fast than before.
Tools

The following setting available in this plugin is the Tools. To work on the settings, you need to go to the WP Rocket plugin then click on the Tools Panel. It will open up the Tools section. There are multiple options to work on. We will see them one by one.
The first option is the Export Settings. This option allows you to backup the settings on your hard drive for future use. It will make your task easy when you next time configure your plugin. You have to hit the Download button, and the settings will be get downloaded to your hard drive.
The second option is the Import Settings. This function allows you to restore your setting from the backup file you created. All you have to do is to upload the backup file and click Upload and Restore Settings Button.
The last option is the Roll Back. This option is like the factory data restoration on our phone. This function allows to Roll Back to the original settings provided by the WP Rocket by default. It would be best if you only did this when you want to remove all of your settings.
With this, that is all about the WP Rocket and its settings.
Conclusion
WP Rocket is one of the best caching plugins available in the market. It allows you to cache your data more efficiently and effectively. We have seen all the settings in this article. You have to use it according to your preferences and keep in mind that which settings are suitable for your website. Turning on all the best settings will reduce the loading time of your website as well as boost up the speed of your page for LCP, FID, CLS speed. Install and Try. I hope you like the post. Sharing is caring.
I am Abhinav Mishra. I’m from Bhagalpur, Bihar. I am preparing for civil services as well as I‘m also pursuing B.tech from Computer Science. I intended to do a start-up. Apart from writing I also work as a Web Developer. I look for new opportunities that help me to grow and become a better version of myself. I am an honest, hardworking, introvert,fast-learner boy. Technology is my passion and writing is my hobby for me. I love it that’s why I do it.


