Having a solid-state drive (SSD) in the form of an M.2 drive offers numerous advantages, such as faster boot times and improved data transfer speeds. However, it can be frustrating when your M.2 drive fails to appear or be recognized by your system. If you find yourself in this situation, don’t worry! This comprehensive troubleshooting guide will explore the possible reasons behind your M.2 drive not showing up and provide you with step-by-step solutions to fix the issue. Let’s delve into the world of M.2 drives and get you up and running in no time!
Understanding M.2 Drives
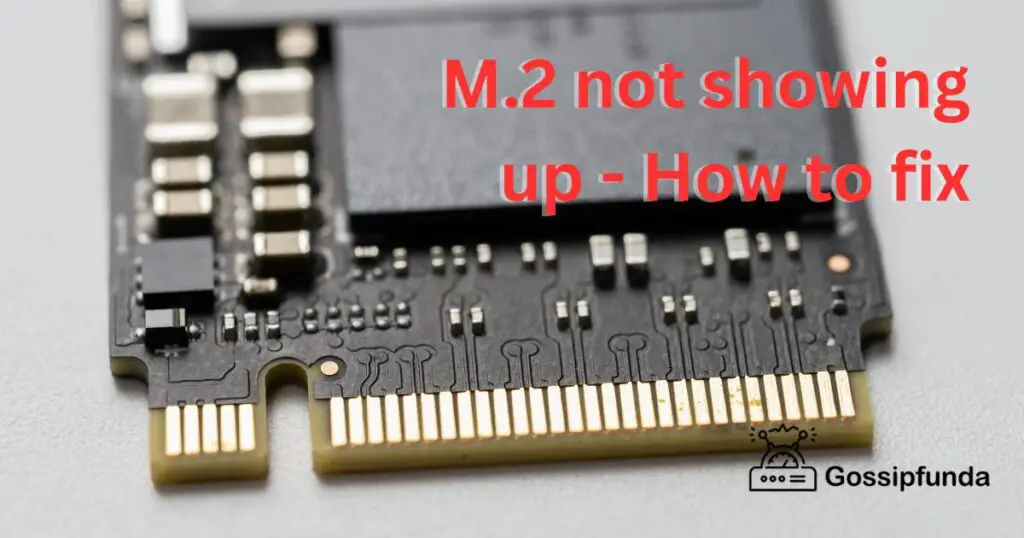
Before we dive into troubleshooting, let’s take a moment to understand what an M.2 drive is and how it functions. M.2 is a small form factor SSD that connects directly to your motherboard, allowing for faster data transfer speeds compared to traditional hard drives or SATA SSDs. This slim and compact design makes M.2 drives perfect for modern laptops and desktops.

Reasons Why Your M.2 Drive May Not Be Showing Up
There can be several reasons why your M.2 drive is not showing up. Let’s explore the most common culprits behind this issue:
- Compatibility Issues: Ensure that your motherboard supports M.2 drives and that you have the appropriate slot available. Older systems may not support newer M.2 standards, so it’s crucial to check compatibility.
- Loose Connections: Sometimes, a loose connection between the M.2 drive and the motherboard can prevent it from being detected. Double-check that the drive is securely seated in the M.2 slot and that the retaining screw is tightened.
- Outdated BIOS: An outdated motherboard BIOS can cause compatibility issues with M.2 drives. Visit your motherboard manufacturer’s website and update to the latest BIOS version compatible with your system.
- Driver Issues: Ensure that you have the correct drivers installed for your M.2 drive. Visit the manufacturer’s website and download the latest drivers to ensure compatibility and optimal performance.
- M.2 Drive Not Initialized: If your M.2 drive is new or has been recently formatted, it may not be initialized. You will need to initialize the drive using Disk Management (Windows) or Disk Utility (Mac) to make it usable.
How to fix M.2 Drive Not Showing Up ?
Now that we have identified potential causes, let’s proceed with the step-by-step troubleshooting process:
Fix 1: Check Compatibility and Ensure Secure Connection
- Check Compatibility: Start by verifying that your motherboard supports M.2 drives and determine the correct M.2 slot to use. Consult your motherboard’s manual or visit the manufacturer’s website to gather this information.
- Power Down and Open the Case: Before proceeding, power down your system and unplug it from the power source. Open the computer case using the appropriate tools, ensuring proper precautions to prevent damage or electrostatic discharge.
- Locate the M.2 Slot: Identify the M.2 slot on your motherboard. It is typically labeled and located near the CPU socket or along the edge of the motherboard. Make sure you have the appropriate slot for the M.2 drive you are using (e.g., M.2 SATA or M.2 NVMe).
- Remove and Reseat the M.2 Drive: Gently remove the M.2 drive from the slot by loosening the retaining screw. Carefully lift it out, being cautious not to touch the gold connectors. Then, reinsert the drive back into the slot, aligning the keying notch on the drive with the slot on the motherboard.
- Secure the M.2 Drive: Once the M.2 drive is properly seated, secure it in place using the retaining screw. Ensure that it is firmly tightened, but avoid over-tightening, as it could damage the drive or the slot.
- Close the Case and Reconnect Power: Carefully close the computer case, ensuring that all cables and components are properly connected. Plug the power cable back in and turn on your system.
By checking compatibility and reseating the M.2 drive, you have eliminated any potential loose connection issues and ensured that the drive is correctly installed in a compatible slot. If the issue persists, proceed to the next fix.
Read more: New SSD not showing up – How to fix it
Fix 2: Update BIOS to the Latest Version
One of the common causes of an M.2 drive not showing up is an outdated motherboard BIOS. Follow these steps to update your BIOS:
- Identify Your Motherboard: Determine the manufacturer and model of your motherboard. You can usually find this information on the motherboard itself or in the system’s BIOS settings.
- Download the Latest BIOS Update: Visit the manufacturer’s website and navigate to the support or downloads section. Locate the BIOS updates for your specific motherboard model and download the latest version available.
- Backup Important Data: Before proceeding with a BIOS update, it’s essential to back up any critical data on your system. Although rare, there is a slight risk of data loss or system instability during the update process.
- Follow the Manufacturer’s Instructions: Carefully read the instructions provided by the motherboard manufacturer for updating the BIOS. They typically include specific steps, such as creating a bootable USB drive or using a dedicated software tool.
- Perform the BIOS Update: Execute the BIOS update according to the manufacturer’s instructions. This process may take several minutes, and your computer may restart multiple times. Avoid interrupting the update or turning off your system during this process.
- Verify M.2 Drive Detection: After the BIOS update is complete, boot into your operating system and check if the M.2 drive is now recognized. If not, proceed to the next fix.
Fix 3: Initialize the M.2 Drive
- Step 1: Access Disk Management (Windows) or Disk Utility (Mac): On Windows, right-click the Start button and select “Disk Management.” For Mac users, open “Disk Utility” from the Utilities folder, which can be found in the Applications folder or by searching in Spotlight.
- Step 2: Locate the Uninitialized M.2 Drive: In Disk Management (Windows) or Disk Utility (Mac), look for the M.2 drive that is not showing up. It should be listed as unallocated or uninitialized.
- Step 3: Initialize the M.2 Drive: Right-click on the unallocated M.2 drive (Windows) or select it and click on the “Initialize” button (Mac). Choose the appropriate partition style (MBR or GPT) based on your needs and follow the on-screen instructions to complete the initialization process.
- Step 4: Assign a Drive Letter (Windows): If you are using Windows, right-click on the initialized M.2 drive and select “Change Drive Letter and Paths.” Click “Add” and assign a drive letter to the M.2 drive. Confirm the changes and exit Disk Management.
- Step 5: Format the M.2 Drive (Optional): If the M.2 drive is not formatted, it will not be accessible. Right-click on the initialized M.2 drive (Windows) or select it and click on the “Erase” or “Format” button (Mac). Choose the desired file system and follow the prompts to format the drive.
- Step 6: Check M.2 Drive Recognition: Restart your computer and check if the M.2 drive is now showing up. It should be accessible in your file explorer or finder.
By initializing the M.2 drive and, if necessary, formatting it, you have taken the necessary steps to make it usable. If the issue persists or if you have exhausted all the fixes provided, it may be beneficial to seek assistance from a professional or contact the manufacturer for further support.
Fix 4: Test the M.2 Drive on Another System
If your M.2 drive is still not showing up after trying the previous fixes, it’s time to determine if the issue lies with the drive itself. By testing the M.2 drive on another system, you can narrow down the possibilities and identify if the problem is related to the drive or your current system. Follow these steps:
- Step 1: Prepare Another System: Locate another computer or laptop that supports M.2 drives and has an available M.2 slot. Ensure that the system is powered off and unplugged before proceeding.
- Step 2: Remove the M.2 Drive: Safely remove the M.2 drive from your current system following the manufacturer’s instructions. Take necessary precautions to prevent any damage to the drive or the system.
- Step 3: Insert the M.2 Drive: Insert the M.2 drive into the available slot on the other system. Make sure it is firmly seated and properly aligned with the slot. Secure it using the retaining screw if necessary.
- Step 4: Power On the System: Plug in and power on the system. Allow it to boot up and check if the M.2 drive is recognized in the BIOS or operating system. If the drive appears and functions correctly on the other system, it suggests that the issue lies within your original system.
- Step 5: Consult a Professional: If the M.2 drive is still not showing up on the other system, it is likely a problem with the drive itself. In this case, it is recommended to seek assistance from a professional technician or contact the manufacturer for further support.
Testing the M.2 drive on another system helps determine if the problem is related to the drive or your original system, providing valuable insights for further troubleshooting or potential warranty claims.
Fix 5: Check for Firmware Updates
Sometimes, M.2 drives may encounter compatibility issues or bugs that prevent them from being recognized by the system. To address this, manufacturers often release firmware updates that can resolve such issues. Follow these steps to check for and install firmware updates for your M.2 drive:
- Step 1: Identify the Manufacturer: Determine the manufacturer of your M.2 drive. This information can usually be found on the drive itself or in the documentation that came with it.
- Step 2: Visit the Manufacturer’s Website: Go to the manufacturer’s official website and navigate to the support or downloads section.
- Step 3: Search for Firmware Updates: Look for firmware updates specifically related to your M.2 drive model. Download the latest firmware update available. Be sure to choose the appropriate version for your operating system.
- Step 4: Follow the Manufacturer’s Instructions: Carefully read the instructions provided by the manufacturer for updating the firmware. They may include specific steps, such as using dedicated firmware update software or utilities.
- Step 5: Install the Firmware Update: Execute the firmware update according to the manufacturer’s instructions. Follow the prompts to install the update on your system. Make sure not to interrupt the process or power off your computer during the update.
- Step 6: Restart Your System: After the firmware update is complete, restart your computer to ensure that the changes take effect.
By checking for firmware updates and installing the latest version, you can address compatibility issues or bugs that may be causing your M.2 drive not to show up. If the issue persists, it is recommended to seek further assistance from the manufacturer’s support or contact a professional for further troubleshooting.
Fix 6: Reset BIOS Settings to Default
In some cases, incorrect BIOS settings can prevent the M.2 drive from being detected by the system. Resetting the BIOS settings to default can help resolve this issue. Follow these steps to reset the BIOS settings:
- Step 1: Access BIOS: Restart your computer and continuously press the designated key (such as F2, Delete, or Esc) to access the BIOS or UEFI settings during startup. The key to access BIOS may vary depending on your computer manufacturer.
- Step 2: Locate the Reset Option: Once inside the BIOS settings, navigate to the “Exit” or “Reset” section. Look for an option to reset the BIOS settings to default or load default settings.
- Step 3: Confirm Reset: Select the option to reset the BIOS settings to default and confirm your selection when prompted. This action will revert all settings back to their original factory defaults.
- Step 4: Save and Exit: Save the changes and exit the BIOS settings. Your computer will restart.
- Step 5: Check M.2 Drive Recognition: After the system restarts, check if the M.2 drive is now detected by the system. Enter the BIOS settings again to ensure that the M.2 drive is listed.
By resetting the BIOS settings to default, you eliminate any incorrect configurations that may be causing the M.2 drive not to show up. If the issue persists, consider seeking assistance from a professional technician or contacting the motherboard manufacturer for further support.
Fix 7: Check Power and Data Cables
Loose or faulty power and data cables can cause connectivity issues and prevent the M.2 drive from being recognized. Ensure that the cables connected to the M.2 drive are properly seated and in good condition. Follow these steps to check the power and data cables:
- Step 1: Power Off and Unplug Your System: Shut down your computer and unplug it from the power source to ensure your safety.
- Step 2: Open the Computer Case: Use the appropriate tools to open the computer case carefully. Take precautions to avoid any damage to components or static discharge.
- Step 3: Locate the M.2 Drive: Identify the M.2 drive and trace the power and data cables connected to it. Check both ends of the cables for any signs of damage or looseness.
- Step 4: Reconnect the Cables: If the cables are loose, gently disconnect them from the M.2 drive and reconnect them firmly. Ensure a snug fit without using excessive force.
- Step 5: Inspect Cable Condition: Examine the cables for any visible signs of damage, such as frayed wires or bent pins. If you notice any issues, replace the cables with new ones.
- Step 6: Close the Case and Power On: Close the computer case securely and reconnect the power cable. Power on your system and check if the M.2 drive is now recognized.
By checking and ensuring proper connections of the power and data cables, you eliminate the possibility of connectivity issues that may prevent the M.2 drive from showing up. If the problem persists, it is recommended to seek further assistance from a professional technician or contact the manufacturer for support.
Fix 8: Update Chipset Drivers
Outdated or incompatible chipset drivers can cause issues with the detection of M.2 drives. Updating the chipset drivers can help resolve these compatibility problems. Follow these steps to update your chipset drivers:
- Step 1: Identify Your Motherboard Model: Determine the manufacturer and model of your motherboard. This information can usually be found on the motherboard itself or in the documentation that came with your system.
- Step 2: Visit the Manufacturer’s Website: Go to the manufacturer’s official website and navigate to the support or downloads section.
- Step 3: Locate Chipset Drivers: Look for the latest chipset drivers specific to your motherboard model. Download the appropriate chipset drivers for your operating system.
- Step 4: Install the Chipset Drivers: Once the chipset drivers are downloaded, run the installer and follow the on-screen instructions to install them. It is recommended to close any other programs or applications before proceeding with the installation.
- Step 5: Restart Your System: After the installation is complete, restart your computer to apply the changes and ensure the new chipset drivers are fully functional.
- Step 6: Check M.2 Drive Recognition: After the system restarts, check if the M.2 drive is now detected by the system. It should be visible in the BIOS or your operating system’s device manager.
Updating the chipset drivers ensures that your motherboard has the necessary software to properly communicate with the M.2 drive. If the issue persists, consider seeking assistance from a professional technician or contacting the motherboard manufacturer for further support.
Preventing M.2 Drive Detection Issues
To avoid future M.2 drive detection issues, it’s important to follow some preventive measures. By implementing the following tips, you can ensure the smooth operation of your M.2 drive:
- Verify Compatibility: Before purchasing an M.2 drive, check your motherboard’s specifications to ensure compatibility with the M.2 standard and available slots.
- Handle with Care: When installing or removing the M.2 drive, handle it delicately by holding the edges. Avoid touching the gold connectors to prevent damage from static electricity.
- Regular Firmware Updates: Keep your M.2 drive’s firmware up to date by periodically checking the manufacturer’s website for any available updates.
- Reliable Power Supply: Ensure your system has a stable and reliable power supply to prevent any power-related issues that could impact M.2 drive detection.
- Proper Cooling: Adequate cooling is essential for M.2 drives to prevent overheating. Make sure your system has sufficient airflow to keep the M.2 drive within optimal temperature ranges.
By following these preventive tips, you can minimize the chances of encountering M.2 drive detection issues and enjoy uninterrupted performance.
Conclusion
In conclusion, troubleshooting M.2 drives not showing up requires careful steps such as checking compatibility, ensuring secure connections, updating BIOS and drivers, initializing the drive, and testing on another system. By following these procedures and preventive tips, you can resolve the issue and maintain smooth operation of your M.2 drive.
Remember to handle the drive with care and keep it updated with firmware releases. Seek professional help if problems persist. With attention to detail and proper maintenance, you can enjoy the benefits of fast and reliable storage with your M.2 drive.
FAQs
Possible reasons include compatibility issues, loose connections, outdated BIOS, or missing drivers.
Refer to your motherboard’s manual or manufacturer’s website for information on M.2 drive compatibility.
Ensure a secure connection by reseating the drive and tightening the retaining screw.
Visit the manufacturer’s website and follow their instructions to download and install the latest BIOS version.
Initialization prepares the drive for use, allowing the system to recognize and allocate it.
Yes, ensure cables are properly connected and in good condition to prevent connectivity problems.
Regularly check the manufacturer’s website for firmware updates and install them as needed.
Proper cooling is crucial to prevent overheating and maintain optimal performance of the M.2 drive.
Prachi Mishra is a talented Digital Marketer and Technical Content Writer with a passion for creating impactful content and optimizing it for online platforms. With a strong background in marketing and a deep understanding of SEO and digital marketing strategies, Prachi has helped several businesses increase their online visibility and drive more traffic to their websites.
As a technical content writer, Prachi has extensive experience in creating engaging and informative content for a range of industries, including technology, finance, healthcare, and more. Her ability to simplify complex concepts and present them in a clear and concise manner has made her a valuable asset to her clients.
Prachi is a self-motivated and goal-oriented professional who is committed to delivering high-quality work that exceeds her clients’ expectations. She has a keen eye for detail and is always willing to go the extra mile to ensure that her work is accurate, informative, and engaging.


