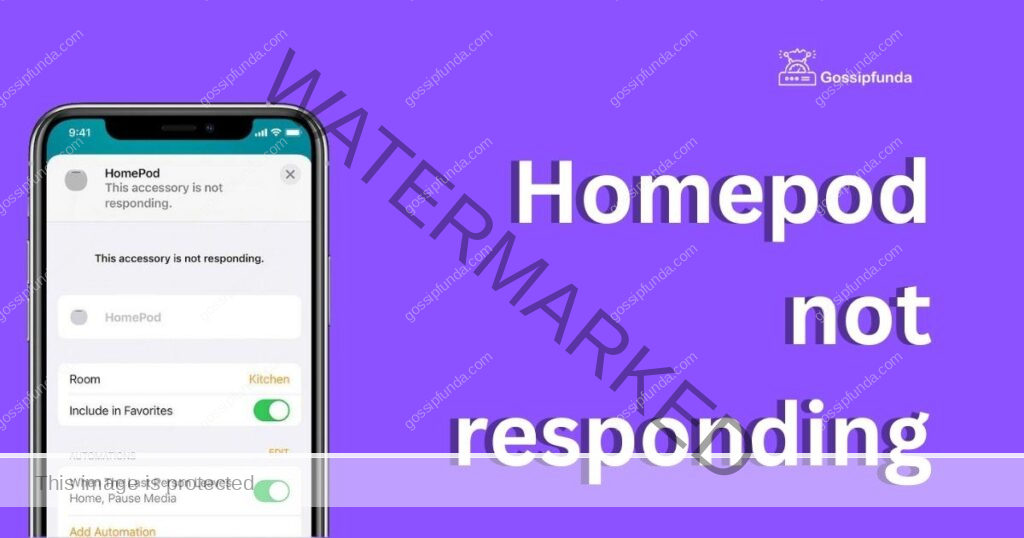
Is your HomePod not responding to your commands or showing any signs of life? Frustrating, isn’t it? The HomePod, Apple’s smart speaker, offers a range of features to enhance your audio experience. However, like any electronic device, it can encounter issues. In this article, we will explore common reasons why your HomePod may not be responding and provide you with step-by-step troubleshooting solutions to get it back up and running.
Reasons Behind HomePod Not Responding
- Power Connection Issues: One of the common reasons for a HomePod not responding is a problem with the power connection. If the power cable is loose, damaged, or not properly plugged into the device or power outlet, it can result in a lack of response.
- Wi-Fi Connectivity Problems: Since the HomePod relies on a stable internet connection to function properly, any issues with Wi-Fi connectivity can lead to unresponsiveness. If the HomePod is out of range of the Wi-Fi router or if the Wi-Fi network itself is experiencing problems, the device may not respond.
- Software Glitches: Like any smart device, the HomePod can experience software glitches or bugs that can cause it to become unresponsive. Outdated software or incompatible firmware versions may hinder the device’s ability to process commands.
- Hardware Malfunction: In some cases, a hardware malfunction within the HomePod can be the cause of it not responding. This could include issues with the internal components or sensors, which may require professional assistance or replacement.
- Personal Requests Conflict: The HomePod’s Personal Requests feature, which enables voice commands for tasks like messaging and calling, can sometimes conflict with the device’s responsiveness. Disabling or re-enabling this feature may help resolve any communication issues.
- Siri Communication Problems: Since the HomePod relies on Siri for voice commands and responses, any communication problems with Siri can result in the device not responding. This can be due to network issues, Siri configuration problems, or software conflicts.
- Incompatible Devices or Settings: Certain devices or settings in your home environment may not be compatible with the HomePod, causing it to become unresponsive. Interference from other electronic devices or incorrect settings within the Home app can hinder its functionality.
It’s important to note that these are general reasons behind HomePod unresponsiveness, and the specific cause may vary. Troubleshooting steps should be taken to identify and resolve the particular issue affecting your HomePod.
How to fix homepod not responding
Fix 1: Check Power Connection and Wi-Fi Connectivity
One of the first steps to take when your HomePod is not responding is to ensure that it has a proper power connection and a stable Wi-Fi connection. Follow the detailed steps below to fix any issues related to power connection and Wi-Fi connectivity:
Step 1: Check Power Connection
- Verify that the power cable is securely plugged into the back of the HomePod.
- Ensure that the power cable is also plugged into a functional power outlet.
- If the cable appears to be loose or damaged, consider replacing it with a new one.
- Wait for a few seconds to see if the HomePod shows any signs of life.
Step 2: Check Wi-Fi Connectivity
Follow steps:
- Make sure that your HomePod is within the range of your Wi-Fi router.
- Check if other devices connected to the same Wi-Fi network are working properly.
- If you suspect a Wi-Fi issue, restart your router and wait for it to boot up.
- On your iPhone or iPad, go to the Settings app, select Wi-Fi, and make sure you are connected to the correct network.
- Try reconnecting your HomePod to the Wi-Fi network by going to the Home app, selecting the HomePod, and choosing “Reconnect to Wi-Fi.”
Step 3: Test HomePod Responsiveness
- After ensuring a proper power connection and Wi-Fi connectivity, try issuing a command to your HomePod.
- Say, “Hey Siri,” followed by a simple command like playing music or adjusting the volume.
- Observe if the HomePod responds to your command and performs the requested action.
- By following these steps, you can determine if any issues with the power connection or Wi-Fi connectivity were causing your HomePod to be unresponsive. If the problem persists, proceed to the next fix for further troubleshooting.
Fix 2: Restart and Reset HomePod
If your HomePod is still unresponsive after checking the power connection and Wi-Fi connectivity, the next step is to restart or reset the device. Follow the steps below to perform a restart or reset:
Step 1: Restart HomePod
- Unplug the HomePod from the power source.
- Wait for approximately 10 seconds.
- Plug the HomePod back into the power source.
- Wait for the device to power up and initialize.
Step 2: Test HomePod Responsiveness
Follow steps:
- After the restart, issue a command to your HomePod by saying, “Hey Siri.”
- Ask a simple question or request a basic task to check if the HomePod is responding.
- Monitor if the HomePod acknowledges the command and performs the desired action.
Step 3: Reset HomePod (if necessary)
Note: Resetting your HomePod will erase all settings and data associated with the device. This step should only be performed if a restart does not resolve the issue.
- Unplug the HomePod from the power source.
- Wait for approximately 5 seconds.
- Plug the HomePod back into the power source.
- Press and hold the top surface of the HomePod.
- Continue holding until you hear a tone, indicating that the reset process has started.
- Release the top surface of the HomePod.
- Wait for the device to reset and restart.
Step 4: Set up HomePod
- Open the Home app on your iPhone or iPad.
- Follow the on-screen prompts to set up your HomePod as a new device.
- Connect the HomePod to your Wi-Fi network and sign in with your Apple ID, if prompted.
- Customize the settings and preferences for your HomePod as desired.
Performing a restart or reset can often resolve software-related issues that cause the HomePod to be unresponsive. If the problem persists, proceed to the next fix for further troubleshooting.
Fix 3: Update HomePod Software
If your HomePod is not responding, it’s possible that outdated software may be causing the issue. Updating the HomePod software can often resolve bugs and compatibility problems. Follow these steps to update the software on your HomePod:
Step 1: Check HomePod Software Version
- Open the Home app on your iPhone or iPad.
- Tap on the Home icon in the top-left corner of the screen.
- Scroll down and select “Software Update.”
Step 2: Update HomePod Software
Follow steps:
- If an update is available, you will see a prompt indicating the availability of a new software version.
- Tap on “Install” or “Update” to begin the software update process.
- Follow the on-screen instructions to complete the update.
- Ensure that your HomePod remains connected to a power source and Wi-Fi network during the update process.
- Wait for the update to download and install. This may take several minutes.
Step 3: Test HomePod Responsiveness
- Once the software update is complete, issue a command to your HomePod using the “Hey Siri” voice activation.
- Check if the HomePod responds to your command and performs the requested action.
Updating the HomePod software ensures that you have the latest features, bug fixes, and improvements. If the HomePod is still not responding after the software update, proceed to the next fix for further troubleshooting.
Fix 4: Disable/Enable Personal Requests
The Personal Requests feature on the HomePod allows you to use Siri to send messages, make calls, and perform other personal tasks using your voice. If your HomePod is not responding, it’s worth checking if this feature is causing any conflicts. You can try disabling and enabling Personal Requests to refresh the connection between your HomePod and Siri. Follow these steps to do so:
Step 1: Open the Home app
- Open the Home app on your iPhone or iPad.
- Make sure you are logged in with the Apple ID associated with your HomePod.
Step 2: Access HomePod Details
Follow steps:
- Long-press on the HomePod icon in the Home app.
- Tap on “Details” when the menu options appear.
Step 3: Disable Personal Requests
- Scroll down to the “Personal Requests” section.
- Toggle the switch to the off position to disable Personal Requests.
Step 4: Enable Personal Requests
Follow steps:
- After a few seconds, toggle the switch back to the on position to enable Personal Requests.
Step 5: Test HomePod Responsiveness
- Issue a command to your HomePod using the “Hey Siri” voice activation.
- Check if the HomePod responds and performs the requested action.
Disabling and re-enabling Personal Requests can help refresh the connection between your HomePod and Siri, potentially resolving any communication issues that were causing the device to be unresponsive. If the issue persists, proceed to the next fix for further troubleshooting.
Fix 5: Reset HomePod to Factory Settings
If all previous fixes have been unsuccessful in resolving the unresponsiveness of your HomePod, resetting the device to its factory settings may help. Resetting the HomePod erases all data and settings, returning it to its original state. Before proceeding with this fix, ensure that you have exhausted all other troubleshooting options and have backed up any important data associated with the HomePod. Follow the steps below to reset your HomePod:
Step 1: Unplug the HomePod
- Unplug the HomePod from the power source.
Step 2: Reset HomePod
Follow steps:
- While keeping the HomePod unplugged, press and hold the top surface of the device.
- After approximately 5 seconds, the HomePod will emit a tone, indicating that the reset process has started.
- Continue holding the top surface until you hear a second tone, which signifies that the reset is complete.
- Release the top surface of the HomePod.
Step 3: Set Up HomePod
- Plug the HomePod back into the power source.
- Follow the initial setup instructions to connect the HomePod to your Wi-Fi network.
- Use the Home app on your iPhone or iPad to add the HomePod to your existing smart home configuration, if applicable.
Step 4: Test HomePod Responsiveness
- After the HomePod has been set up, issue a command to the device using the “Hey Siri” voice activation.
- Observe if the HomePod responds to your command and performs the requested action.
Resetting your HomePod to factory settings eliminates any software or configuration-related issues that may have been causing the unresponsiveness. However, it’s essential to note that this action will erase all data and settings associated with the device, and you will need to set it up again from scratch.
If the HomePod continues to be unresponsive even after resetting it, it is recommended to contact Apple Support for further assistance.
Fix 6: Check for Hardware Malfunction
If your HomePod is still not responding after trying all the previous fixes, it’s possible that there may be a hardware malfunction. In this case, it may be necessary to examine the physical components of the device. Follow these steps to check for any potential hardware issues:
Step 1: Inspect the Power Cable and Outlet
- Ensure that the power cable is securely connected to the HomePod and the power outlet.
- Examine the power cable for any signs of damage such as fraying or cuts.
- Try using a different power cable and outlet to rule out any potential issues.
Step 2: Check for Physical Damage
Follow steps:;
- Inspect the HomePod for any visible physical damage such as dents or cracks.
- Check the speaker grille for any blockages or obstructions that may affect the device’s performance.
- If you notice any damage, consider contacting Apple Support or an authorized service provider for further assistance.
Step 3: Test in a Different Location
- Move the HomePod to a different location in your home.
- Place it in a room with a strong Wi-Fi signal and away from any potential sources of interference.
- Test if the HomePod responds when placed in this new environment.
Step 4: Contact Apple Support or Authorized Service Provider
If you have followed all the troubleshooting steps and your HomePod is still unresponsive, it’s recommended to contact Apple Support or take the device to an authorized service provider. They can provide further diagnostics and repair options if necessary.
It’s important to note that attempting any repairs or opening the HomePod yourself may void the warranty or cause further damage. It’s best to consult with professionals who have the expertise to handle hardware-related issues.
Remember, hardware malfunctions are less common but can occur. By checking for any physical damage and seeking professional assistance, you can ensure that all potential hardware issues are addressed appropriately.
Read more: HomePod– A Complete Guide
Fix 7: Perform a HomePod Software Restore
If your HomePod is still unresponsive after trying all previous fixes, performing a software restore can be a helpful troubleshooting step. Restoring the HomePod to its factory firmware can help resolve any deep-seated software issues that may be causing the unresponsiveness. Follow these steps to perform a software restore on your HomePod:
Step 1: Prepare for the Restore
- Ensure that your iPhone or iPad is running the latest version of iOS or iPadOS.
- Make sure your HomePod is connected to a stable Wi-Fi network.
- Open the Home app on your iOS or iPadOS device.
Step 2: Initiate the Software Restore
Follow steps:
- Tap and hold the HomePod tile in the Home app.
- In the pop-up menu, select “Settings.”
- Scroll down and tap on “Remove Accessory.”
- Confirm your decision by tapping “Remove.”
Step 3: Set Up the HomePod Again
- Unplug the HomePod from the power source and wait for 10 seconds.
- Plug the HomePod back into the power source.
- The white light on top of the HomePod will flash, indicating that it is ready to set up.
- Follow the on-screen instructions in the Home app to set up your HomePod again.
Step 4: Test HomePod Responsiveness
- After the HomePod is set up, issue a command to the device using the “Hey Siri” voice activation.
- Observe if the HomePod responds to your command and performs the requested action.
Performing a software restore can help resolve persistent software-related issues that may have caused the HomePod to become unresponsive. It essentially resets the device to its original firmware, allowing for a fresh start. If the unresponsiveness persists even after the software restore, it is recommended to contact Apple Support or seek assistance from an authorized service provider for further troubleshooting.
Fix 8: Contact Apple Support
If none of the previous fixes have resolved the issue and your HomePod is still not responding, it may be necessary to seek further assistance from Apple Support. The Apple Support team consists of knowledgeable professionals who can provide specialized troubleshooting steps tailored to your specific situation. Here’s how you can reach out to Apple Support:
Step 1: Visit the Apple Support Website
- Open a web browser on your computer or mobile device.
- Go to the official Apple Support website (support.apple.com).
Step 2: Choose HomePod as the Product
Follow steps:
- In the search bar or navigation menu, enter “HomePod.”
- Select “HomePod” from the list of available products.
Step 3: Explore Troubleshooting Options
- Browse through the support articles and troubleshooting guides related to HomePod.
- Look for relevant topics that match your specific issue of the HomePod not responding.
- Follow the recommended troubleshooting steps provided in the articles.
Step 4: Contact Apple Support
Follow steps:
- If you’re unable to resolve the issue with the available resources, look for the “Contact Support” option.
- Depending on your region and support availability, you may have options like phone support, chat support, or scheduling a callback.
- Choose the preferred method of contact and provide the required information.
- Explain your issue in detail and provide any relevant information or steps you’ve already taken.
Step 5: Follow the Guidance from Apple Support
- Work with the Apple Support representative to troubleshoot and resolve the unresponsiveness issue.
- Follow any instructions or steps provided by the support representative.
- Provide any requested diagnostic information or logs to assist in the troubleshooting process.
Contacting Apple Support ensures that you receive personalized assistance and guidance specific to your HomePod issue. They have the expertise to handle complex scenarios and can provide additional solutions or escalate the issue if necessary.
Remember to provide accurate and detailed information to the support representative, as this will help expedite the troubleshooting process and improve the chances of resolving the HomePod’s unresponsiveness.
Note: Apple Support availability may vary depending on your region and product warranty status.
Tips to Prevent HomePod Unresponsiveness
Preventing issues with HomePod unresponsiveness is always better than having to troubleshoot them later. Here are some helpful tips to prevent HomePod from becoming unresponsive:
1. Keep the Software Up to Date
Regularly update the HomePod software to ensure you have the latest features, bug fixes, and performance improvements. Check for software updates through the Home app on your iOS or iPadOS device and install them promptly.
2. Maintain a Stable Wi-Fi Connection
Ensure that your HomePod has a strong and stable Wi-Fi connection. Keep the HomePod within range of your Wi-Fi router and minimize any sources of interference. If you experience Wi-Fi issues, consider restarting your router or contacting your internet service provider for assistance.
3. Avoid Physical Damage
Take care to prevent physical damage to your HomePod. Avoid placing it in areas where it is at risk of being knocked over or exposed to liquid spills. Protect the device from any potential accidents or mishandling that could cause damage.
4. Regularly Clean the Speaker Grille
Dust and debris can accumulate on the HomePod’s speaker grille over time, affecting audio quality and potentially causing issues. Regularly clean the speaker grille using a soft, lint-free cloth to maintain optimal performance.
5. Use Genuine Power Cables and Adapters
Always use genuine power cables and adapters that are specifically designed for the HomePod. Using third-party or incompatible accessories may cause power-related issues or damage the device.
6. Avoid Overloading the HomePod
While the HomePod is designed to handle a wide range of tasks, try to avoid overloading it with excessive commands or requests simultaneously. Give the device time to process each command and perform tasks before issuing additional commands.
7. Keep HomePod Away from Interfering Devices
Ensure that your HomePod is placed away from other electronic devices that may cause interference, such as cordless phones, wireless speakers, or microwave ovens. Interference from these devices can disrupt the HomePod’s performance.
8. Regularly Restart or Power Cycle the HomePod
Periodically restarting or power cycling your HomePod can help prevent software glitches or temporary issues from occurring. Restarting the device clears its memory and can resolve minor performance hiccups.
By following these preventive tips, you can minimize the chances of experiencing HomePod unresponsiveness and maintain the optimal performance of your smart speaker.
Conclusion
Troubleshooting an unresponsive HomePod can be frustrating, but following the steps provided can help resolve the issue. By checking power and Wi-Fi connections, restarting or resetting the device, updating software, adjusting settings, or seeking support, you can regain control of your smart speaker. Taking preventive measures such as software updates, maintaining a stable Wi-Fi connection, avoiding physical damage, and following best practices can help prevent HomePod unresponsiveness in the future. Remember to consult professional assistance if needed, and enjoy a seamless and enjoyable experience with your HomePod.
FAQs
Possible reasons include power connection issues, Wi-Fi problems, software glitches, or hardware malfunctions.
Ensure the power cable is securely plugged into the HomePod and the power outlet.
Check Wi-Fi range, restart your router, and reconnect the HomePod to the Wi-Fi network.
Yes, updating the HomePod software can fix bugs and improve performance.
Yes, toggling off and on Personal Requests can refresh the connection between the HomePod and Siri.
Contact Apple Support for specialized assistance and troubleshooting tailored to your situation.
Yes, hardware issues can cause unresponsiveness. Contact Apple Support or authorized service provider for help.
Prachi Mishra is a talented Digital Marketer and Technical Content Writer with a passion for creating impactful content and optimizing it for online platforms. With a strong background in marketing and a deep understanding of SEO and digital marketing strategies, Prachi has helped several businesses increase their online visibility and drive more traffic to their websites.
As a technical content writer, Prachi has extensive experience in creating engaging and informative content for a range of industries, including technology, finance, healthcare, and more. Her ability to simplify complex concepts and present them in a clear and concise manner has made her a valuable asset to her clients.
Prachi is a self-motivated and goal-oriented professional who is committed to delivering high-quality work that exceeds her clients’ expectations. She has a keen eye for detail and is always willing to go the extra mile to ensure that her work is accurate, informative, and engaging.


