When booting up your computer, have you ever encountered a cryptic message that says “CMOS checksum error” or “CMOS battery low”? This unsettling situation can leave you puzzled, but fear not, as this article will unravel the mysteries behind the CMOS checksum error and guide you through the process of fixing it. Understanding the causes of this error and knowing the proper procedures for resolving it can save you time, money, and frustration. So, let’s delve into the world of CMOS, checksums, and how to tackle this issue head-on.
What is a CMOS Checksum Error?
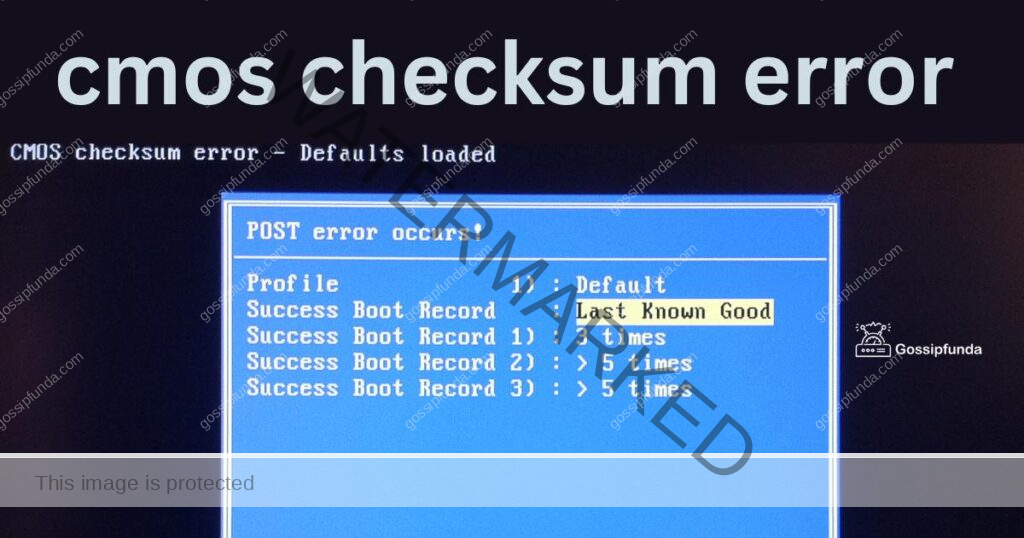
A CMOS checksum error occurs when the data stored in the CMOS (Complementary Metal-Oxide-Semiconductor) chip of your computer’s motherboard becomes corrupted or is not in sync with the expected values. The CMOS is responsible for storing essential system configuration settings, such as the date, time, boot order, and hardware settings. A checksum is a value calculated from data to ensure its integrity; if the checksum doesn’t match the expected value, the error is triggered during the boot process.
Common Causes of CMOS Checksum Errors
Several factors can lead to CMOS checksum errors. Let’s explore the most prevalent ones:
- Weak CMOS Battery: The most common cause of this error is a depleted CMOS battery. This coin-sized battery powers the CMOS chip even when the computer is turned off. If the battery loses its charge over time, the CMOS data can become corrupted, leading to the error message during boot-up.
- Hardware Changes: Making significant changes to your computer’s hardware configuration, such as installing new RAM, swapping the CPU, or upgrading other components, can also trigger a CMOS checksum error. These changes might alter the expected values stored in the CMOS.
- Incorrect BIOS Settings: Tampering with the BIOS (Basic Input/Output System) settings without proper knowledge can result in a checksum error. Inaccurate configuration changes can lead to conflicts and errors during the boot process.
- Electrical Interference: Power surges or electrical interference can cause temporary corruption of the CMOS data, leading to the checksum error. While rare, this can occur in regions with unstable power supply.
How to Fix a CMOS Checksum Error?
Resolving the CMOS checksum error involves a series of straightforward steps. Follow the guide below to fix the issue:
Fix 1: Replace the CMOS Battery
One of the primary reasons for the CMOS checksum error is a depleted or faulty CMOS battery. Replacing the CMOS battery is a simple yet effective way to resolve this issue. Follow these detailed steps to perform the task:
Step 1: Gather the Necessary Tools: Before you begin, make sure you have the following tools ready:
- A new CR2032 or suitable CMOS battery that matches your motherboard’s specifications.
- A screwdriver (if required to access the CMOS battery).
Step 2: Power Off the Computer: Shut down your computer properly and unplug it from the power source. This step ensures safety and prevents any potential damage to the hardware.
Step 3: Locate the CMOS Battery: The CMOS battery is usually located on the motherboard. It appears as a small, round, silver-colored battery. If you are unsure about its location, consult your motherboard’s manual for guidance.
Step 4: Access the CMOS Battery (if necessary): In some cases, the CMOS battery might be hidden under a small cover or placed in a hard-to-reach location. If this is the case, use a screwdriver to carefully remove any covers or obstacles obstructing the battery.
Step 5: Remove the Old CMOS Battery: Gently push the metal latch or clip holding the CMOS battery in place. As you release the latch, the battery should pop up slightly. Carefully lift the old battery out of its socket, taking note of its orientation.
Step 6: Insert the New CMOS Battery: Take the new CMOS battery and ensure its orientation matches the previous one. Usually, the “+” sign should face upwards. Insert the new battery into the socket, making sure it fits snugly.
Step 7: Secure the Battery: Press the CMOS battery down gently but firmly, securing it in its place. If your motherboard has a metal latch or clip, ensure it holds the battery tightly.
Step 8: Reassemble (if applicable): If you had to remove any covers or obstacles to access the CMOS battery, reassemble them carefully.
Step 9: Power On the Computer: Plug your computer back into the power source and turn it on. During the boot process, keep an eye on the screen to check if the CMOS checksum error persists.
Step 10: Update BIOS Settings (if needed): In some cases, you may need to update certain BIOS settings, such as the date, time, and boot order, after replacing the CMOS battery. Access the BIOS settings during boot-up (usually by pressing the Delete or F2 key) and adjust the necessary parameters.
Step 11: Save and Exit BIOS: Once you’ve made the required changes, save the BIOS settings and exit. Your computer should now boot up without the CMOS checksum error.
By following these steps and replacing the CMOS battery, you can ensure that your computer’s CMOS remains in good health and free from checksum errors. Remember to use a high-quality replacement battery to maximize its lifespan and prevent future issues.
Read more: Windows 11 wifi not showing up
Fix 2: Load Default BIOS Settings
If you recently made changes to your computer’s BIOS settings and encountered the CMOS checksum error, it’s possible that incorrect configurations are causing the issue. In such cases, loading the default BIOS settings can resolve the problem. Here’s a step-by-step guide on how to do it:
Step 1: Access the BIOS
Start by rebooting your computer. During the boot-up process, there is usually a specific key (commonly the Delete or F2 key) that you need to press to access the BIOS settings. Pay attention to the screen, as it often displays the required key to enter BIOS.
Step 2: Navigate to “Load Default Settings”
Once you’re inside the BIOS settings, look for an option that says “Load Default Settings”, “Load Optimized Defaults”, or something similar. The exact wording may vary depending on your motherboard manufacturer and BIOS version.
Step 3: Confirm the Action
Before proceeding, the BIOS might prompt you to confirm the action of loading default settings. This is to ensure that you don’t accidentally reset the BIOS. Confirm that you want to proceed with loading the default settings.
Step 4: Save Changes and Exit
After loading the default settings, navigate to the option to save changes and exit the BIOS. In most cases, this option is labeled “Save & Exit” or similar. Confirm that you want to save the changes and exit the BIOS.
Step 5: Restart the Computer
The computer will now restart with the default BIOS settings in place. During boot-up, observe whether the CMOS checksum error still appears. With the default settings, the error should be resolved.
Step 6: Adjust Settings if Needed
In some cases, loading the default BIOS settings might lead to other issues, especially if you had customized specific configurations before. Check that your computer’s hardware and components are recognized correctly, and if needed, adjust settings such as boot order, memory timings, and CPU settings to match your system requirements.
Step 7: Save Changes and Exit Again
If you made any adjustments, save the changes and exit the BIOS once more. This will ensure that your computer uses the appropriate settings and functions optimally.
By loading default BIOS settings, you eliminate the possibility of incorrect configurations causing the CMOS checksum error. It’s a simple but effective troubleshooting step that can save you from unnecessary hardware or software investigations. Remember to be cautious while making changes in the BIOS, and only modify settings if you are confident in what you are doing.
Fix 3: Clear CMOS Memory
If the CMOS checksum error persists even after trying the previous fixes, clearing the CMOS memory might be the solution. This process resets the CMOS settings to their default state, eliminating any conflicting or corrupted data. Follow these steps to clear the CMOS memory:
Step 1: Power Off and Unplug the Computer
Before attempting any hardware-related tasks, ensure your computer is powered off and unplugged from the power source to avoid any electrical accidents.
Step 2: Locate the CMOS Clear Jumper
On the motherboard, look for the CMOS clear jumper. The jumper is usually a small plastic connector that can be found near the CMOS battery or BIOS chip. Refer to your motherboard’s manual to pinpoint its exact location.
Step 3: Check the Jumper’s Default Position
The CMOS clear jumper has two positions: the default position and the clear position. By default, the jumper connects two of the three pins. Take note of its original position before proceeding.
Step 4: Change the Jumper Position
With the computer powered off and unplugged, carefully move the CMOS clear jumper from its default position to the clear position. This will disconnect the power to the CMOS chip and initiate the clearing process.
Step 5: Wait for a Few Seconds
Leave the CMOS clear jumper in the clear position for about 10 to 15 seconds. This duration allows the CMOS memory to discharge fully and reset to default settings.
Step 6: Return the Jumper to Its Default Position
After waiting for the specified time, move the CMOS clear jumper back to its default position, connecting the original two pins again. This re-establishes the power to the CMOS chip.
Step 7: Power On the Computer
Plug your computer back into the power source and power it on. During the boot-up process, check whether the CMOS checksum error persists.
Step 8: Adjust BIOS Settings (if necessary)
After clearing the CMOS memory, some of your BIOS settings may have been reset to default values. Access the BIOS settings during boot-up and make any required adjustments, such as setting the date and time, boot order, and other specific configurations for your hardware.
Step 9: Save Changes and Exit BIOS
Once you’ve adjusted the BIOS settings, save the changes and exit the BIOS. Your computer should now boot up without the CMOS checksum error.
Clearing the CMOS memory is an effective way to resolve persistent checksum errors. However, keep in mind that this process resets all BIOS settings, so you may need to reconfigure certain parameters to match your hardware and preferences. If the error continues to occur, consider seeking professional assistance to diagnose and resolve any underlying hardware issues.
Fix 4: Update BIOS Firmware
An outdated BIOS firmware can contribute to the CMOS checksum error. BIOS updates often include bug fixes and improvements, which can help resolve compatibility issues and errors. Updating the BIOS firmware is a more advanced fix, but it can be effective in addressing the checksum error. Follow these steps to update your BIOS:
Step 1: Identify Your Motherboard Model
Before updating the BIOS, you need to identify your motherboard model. This information is usually printed on the motherboard itself. Alternatively, you can find it in the BIOS settings or refer to the motherboard’s manual for guidance.
Step 2: Download the Latest BIOS Update
Visit the official website of your motherboard manufacturer. Look for the support or download section and locate the latest BIOS update for your specific motherboard model. Ensure that you download the correct BIOS version to avoid compatibility issues.
Step 3: Prepare a Bootable USB Drive
Most motherboard manufacturers provide BIOS updates in the form of a ZIP archive or an executable file. Follow the instructions on the manufacturer’s website to create a bootable USB drive with the BIOS update file.
Step 4: Back Up Important Data
Updating the BIOS carries a small risk, so it’s a good idea to back up important data from your computer, such as documents, pictures, and other files, to an external storage device.
Step 5: Enter BIOS and Check Current Version
Restart your computer and access the BIOS settings during boot-up by pressing the designated key (usually Delete or F2). Once inside the BIOS, navigate to the system information or BIOS version section to check your current BIOS version.
Step 6: Perform the BIOS Update
Insert the bootable USB drive containing the BIOS update file into a USB port on your computer. Restart the computer, and it should automatically boot from the USB drive. Follow the on-screen instructions to initiate the BIOS update process. It’s essential to let the update process finish without interruption.
Step 7: Reboot the Computer
After the BIOS update is complete, the computer will automatically restart. Once again, enter the BIOS settings to verify that the BIOS firmware has been successfully updated to the latest version.
Step 8: Adjust BIOS Settings (if needed)
After updating the BIOS, you may need to readjust certain settings, such as the boot order or memory timings, to match your hardware configuration.
Step 9: Save Changes and Exit BIOS
Save any changes you made to the BIOS settings and exit. Your computer should now boot up without the CMOS checksum error.
Updating the BIOS can be a technical process, and an incorrect update can cause serious issues. Therefore, ensure that you carefully follow the manufacturer’s instructions and double-check the correct BIOS version for your specific motherboard model. If you are not confident in performing this task, it’s best to seek assistance from a professional or the manufacturer’s support team.
Fix 5: Check for Hardware Issues
If none of the previous fixes have resolved the CMOS checksum error, it’s time to investigate potential hardware-related causes. Faulty or incompatible hardware can trigger checksum errors during the boot process. Follow these steps to check for hardware issues:
Step 1: Power Off and Unplug the Computer
As always, start by powering off your computer and unplugging it from the power source to ensure your safety.
Step 2: Perform a Visual Inspection
Open up your computer case and perform a visual inspection of the components. Look for any loose connections, damaged cables, or visibly damaged hardware such as capacitors or chips. Ensure that all components are properly seated in their respective slots.
Step 3: Remove and Reinsert Hardware
If you recently installed new hardware, such as RAM modules or expansion cards, carefully remove them and reinsert them into their slots. Sometimes, poor connections can lead to checksum errors.
Step 4: Test Hardware Compatibility
If you made recent hardware upgrades or changes, check whether all components are compatible with your motherboard and other hardware. Consult the motherboard and component manuals for compatibility information.
Step 5: Run Hardware Diagnostics
Many computer manufacturers provide built-in hardware diagnostic tools that can help identify faulty components. Check your computer’s documentation or the manufacturer’s website for instructions on how to run hardware diagnostics.
Step 6: Test RAM Modules
Faulty RAM modules can cause various errors, including CMOS checksum errors. Use a reliable memory testing tool to check your RAM for any issues. If you find errors, consider replacing the problematic RAM module.
Step 7: Check Hard Drive Health
A failing hard drive can also lead to checksum errors if it affects the storage of critical data. Use a disk health monitoring tool to check the status of your hard drive and ensure it is in good condition.
Step 8: Inspect the CMOS Chip
While rare, there is a possibility that the CMOS chip itself is faulty. If you’ve exhausted all other troubleshooting options, consider seeking professional help to inspect or replace the CMOS chip.
Step 9: Seek Professional Assistance
If you’ve gone through all the steps and the CMOS checksum error persists, it’s advisable to seek help from a qualified technician or computer repair service. They can conduct in-depth hardware diagnostics and identify the root cause of the issue.
Fixing hardware-related problems can be challenging, especially for users with limited technical expertise. In such cases, it’s best to leave the troubleshooting to professionals who can accurately diagnose and resolve hardware issues. Remember to consult your computer’s warranty if it is still valid, as some hardware problems might be covered for repair or replacement.
Fix 6: Check for Electrical Interference
In rare cases, electrical interference can lead to CMOS checksum errors, especially in regions with unstable power supply or inadequate grounding. Electrical surges can temporarily corrupt data stored in the CMOS chip, triggering the error during the boot process. To address electrical interference issues, follow these steps:
Step 1: Use a Surge Protector
Plug your computer and other electronic devices into a reliable surge protector or uninterruptible power supply (UPS). A surge protector can help shield your equipment from sudden voltage spikes and electrical disturbances.
Step 2: Grounding Check
Ensure that your computer and all its components are adequately grounded. A lack of proper grounding can make your computer susceptible to electrical interference. Make sure the power outlets in your home or office have proper grounding.
Step 3: Avoid Power Fluctuations
If you experience frequent power fluctuations or blackouts, consider investing in a voltage regulator or voltage stabilizer. These devices help regulate the incoming voltage to protect your computer from sudden changes.
Step 4: Separate Power Sources
If possible, avoid connecting high-power consuming devices, such as air conditioners or refrigerators, to the same power outlet or circuit as your computer. Such appliances can cause fluctuations in the power supply, affecting your computer’s stability.
Step 5: Isolate Interference Sources
Identify potential sources of electrical interference near your computer. Keep it away from devices with strong magnetic fields, such as large speakers or transformers. Additionally, avoid placing your computer near microwave ovens, cordless phones, or wireless routers, as they can emit electromagnetic interference.
Step 6: Consider a Line Conditioner
For users experiencing persistent electrical interference issues, investing in a line conditioner might be beneficial. A line conditioner filters the incoming power, smoothing out any disturbances before they reach your computer.
Step 7: Monitor the CMOS Error
After implementing the above steps, monitor your computer for a few days to see if the CMOS checksum error persists. If the issue persists, it’s best to consult with an electrician or an IT professional to assess and rectify any electrical issues in your environment.
Remember that electrical interference is an infrequent cause of CMOS checksum errors, and most users won’t encounter this problem. However, taking precautionary measures to protect your computer from electrical disturbances can help maintain stable system performance and prevent potential damage to sensitive components.
Fix 7: Check for Overheating Issues
Although uncommon, overheating can sometimes lead to CMOS checksum errors. Excessive heat can affect the stability of various components, including the CMOS chip, causing data corruption and triggering the error. To address overheating problems, follow these steps:
Step 1: Check CPU and GPU Temperatures
Use temperature monitoring software to check the temperatures of your CPU (Central Processing Unit) and GPU (Graphics Processing Unit). High temperatures, especially above the manufacturer’s recommended maximum, indicate possible overheating issues.
Step 2: Clean Dust and Debris
Over time, dust and debris can accumulate inside your computer’s case and on its components, obstructing airflow and contributing to overheating. Power off your computer, unplug it, and carefully open the case. Use compressed air or a soft brush to clean out the dust from the fans, heatsinks, and other areas.
Step 3: Ensure Proper Airflow
Make sure your computer case has adequate airflow. Ensure that all fans are working correctly and are positioned to facilitate proper cooling. Consider adding additional fans or upgrading to more efficient cooling solutions if needed.
Step 4: Reapply Thermal Paste
If you are comfortable with more advanced hardware tasks, consider reapplying thermal paste on your CPU and GPU. Old or improperly applied thermal paste can lead to poor heat transfer and increased temperatures.
Step 5: Check for Faulty Cooling Components
If your CPU or GPU temperatures remain excessively high even after cleaning and reapplying thermal paste, it’s possible that a cooling component, such as a fan or heatsink, is faulty. Test or replace any malfunctioning cooling components.
Step 6: Monitor Temperatures Again
After performing the above steps, monitor your CPU and GPU temperatures again. Ideally, the temperatures should now be within acceptable ranges. If the temperatures remain too high, consider seeking assistance from a professional technician to diagnose and address the issue.
Step 7: Avoid Overclocking
If you’ve overclocked your CPU or GPU to achieve higher performance, consider reverting to default clock speeds. Overclocking can increase heat output and lead to instability, potentially causing checksum errors.
Step 8: Provide Adequate Ventilation
Ensure that your computer is located in a well-ventilated area, away from walls or obstacles that can hinder proper airflow. Avoid placing your computer inside enclosed spaces or near heat-emitting devices.
By addressing overheating issues, you can improve the overall stability and reliability of your computer, potentially resolving the CMOS checksum error. Overheating is not always the cause of checksum errors, but it’s essential to maintain proper cooling to prolong the life of your hardware and prevent potential data corruption.
Fix 8: Perform a BIOS Update Rollback
If you recently updated your BIOS firmware and started experiencing the CMOS checksum error, it’s possible that the new BIOS version introduced compatibility issues. In such cases, performing a BIOS update rollback can be a viable solution. Here’s how to do it:
Step 1: Identify the Previous BIOS Version
Visit the official website of your motherboard manufacturer and look for the previous BIOS version that was installed before the update. This information is usually available in the download section or in the release notes of the latest BIOS update.
Step 2: Download the Previous BIOS Version
Download the previous BIOS version from the manufacturer’s website and ensure it matches your motherboard model. Be cautious not to download a BIOS version that is not compatible with your specific hardware.
Step 3: Create a Bootable USB Drive
Follow the instructions provided by the manufacturer to create a bootable USB drive with the previous BIOS version. This will allow you to perform the BIOS update rollback.
Step 4: Back Up Important Data
As with any BIOS update, it’s wise to back up essential data from your computer before proceeding with the rollback. This step is to ensure that your data remains safe in case anything goes wrong during the process.
Step 5: Enter BIOS and Perform the Rollback
Insert the bootable USB drive containing the previous BIOS version into a USB port on your computer. Restart your computer and access the BIOS settings during boot-up using the appropriate key (usually Delete or F2). Once inside the BIOS, locate the option to update or flash the BIOS and choose the option to perform a rollback.
Step 6: Follow On-Screen Instructions
The BIOS update rollback process will vary depending on the motherboard manufacturer. Follow the on-screen instructions carefully to complete the rollback. It’s essential not to interrupt the process to avoid potential BIOS corruption.
Step 7: Verify the Rollback
After the rollback is complete, verify that your computer now runs on the previous BIOS version. Check the BIOS settings and system information to ensure that the rollback was successful.
Step 8: Check for CMOS Checksum Error
After performing the BIOS update rollback, observe whether the CMOS checksum error still appears during the boot-up process. With the previous BIOS version, the issue should now be resolved.
Performing a BIOS update rollback should be approached with caution. Only use this fix if you are confident that the CMOS checksum error was triggered after the recent BIOS update. If you are unsure or uncomfortable with the process, seek assistance from a knowledgeable friend or a professional technician to avoid any potential risks.
Remember, BIOS updates often provide bug fixes, security improvements, and support for newer hardware. Therefore, if the rollback resolves the CMOS checksum error, it’s essential to stay vigilant for future BIOS updates that may address the compatibility issues and restore optimal performance.
Conclusion
A CMOS checksum error can be an alarming sight, but armed with the knowledge from this article, you now have the tools to tackle it with confidence. Remember to start by checking the date and time, as well as replacing the CMOS battery if necessary. Loading default BIOS settings, clearing the CMOS memory, and updating the BIOS firmware are equally essential steps to troubleshoot this issue effectively. By following these procedures, you can bid farewell to the CMOS checksum error and keep your computer running smoothly.
Now that you understand the causes and solutions for this error, you can ensure your computer’s CMOS remains error-free, safeguarding your system’s configuration and smooth boot-ups in the future. Happy computing!
FAQs
A CMOS checksum error occurs when data in the CMOS chip gets corrupted.
Common causes include weak CMOS battery, hardware changes, and incorrect BIOS settings.
Replace CMOS battery, load default BIOS settings, or clear CMOS memory.
Yes, updating BIOS can help, but do it cautiously and follow manufacturer guidelines.
Check for hardware issues or electrical interference and seek professional assistance if needed.
Yes, overheating can affect CMOS chip stability, so ensure proper cooling and ventilation.
Sometimes, a new BIOS version may introduce compatibility issues; consider BIOS rollback.
Awill Guru is a technology enthusiast with degrees in VLSI Engineering (B.Tech, M.Tech) and Android Development. Their passion for education drives them to teach and share knowledge through their blog. He also hold qualifications in Sociology (M.A.) and Education (B.Ed), along with NIELIT O and A Level certifications.