Bluestacks for Chromebook + Android Tablet + Windows? Read that again for me, will you? Yes✔️, that’s right. It is possible to get an Android tablet on your PC, and that too for free! Today, I will be telling you about an application you might not have heard about. It’s called bluestacks, and it is by far the best android emulator I have come across. Being a happy customer of bluestacks for over 3 years now, I couldn’t just write an article on it.
What is an emulator?
An emulator helps a computer behave like another computer. So, when you install an Android emulator, your Windows PC, behaves like an Android device. The same goes for Android devices. If you install a limbo emulator on your Android, you could get Windows up and running on it. What happens here is the applications use your hardware to run another operating system altogether on your machine. So, even if you are using a Windows laptop, it is possible to get android running on it without having to create partitions in your drive or downloading and installing a new operating system altogether.
What Limbo and Bluestacks do is, they are applications inside which they run an operating system. You open both like any other application installed on your Android device or PC, respectively. But, inside lies an entirely new operating system, and the best part is you can use it without having any technical knowledge.
Why do people use an emulator?
Let us see the reason behind this:
Getting Android apps
Apps are made Operating system-specific. The Windows store will never be able to meet the superiority of the Google Play Store. Apps like WhatsApp and Instagram have become available only recently on it, and popular apps like Prime Video, Disney+, and YouTube are not available. Sure, you can use the web versions of these apps, but it’s not the same experience. Moreover, you lose essential features like offline downloads.
You won’t be able to watch your favorite movies and TV shows on-the-go! Instagram’s application on windows is just the Web version, which has been converted into an app. You cannot log in into multiple accounts, and it just is very glitchy. Apps like Snapchat don’t even have a web version available for use on the PC. You must use it on your phone no matter what, but hey! I’m a PC guy, and I like to use all my apps on the PC.
Gaming on an emulator
Moreover, gaming on the phone is nothing like gaming on a PC. On the PC, you get the full package, the full experience to the game like a pro. On the phone, in the regular thumb position, you can use only two thumbs, and in the claw position, you can use just four fingers, while on the PC, you can make use of both of your hands completely. Moreover, you get that powerful CPU and those amazing graphics that your phone processor may or may not be able to process. The game works at its full potential. Downloading an emulator also increases your game collection significantly. You can now play games such as PUBG mobile, Real Racing 3, Call of Duty Mobile, and many more.
All these apps and games I am talking about are not available on the Windows Store or their official website. This is quite a downside for those mobile games who want the full package and the whole experience on their PC. I have played PUBG Mobile on the emulator, and it takes getting used to it at first. However, later, you will never want to play on your phone again. Pros know what I am talking about.
Using your Hybrid drive wisely
Another reason why I use an emulator is, to save things on my hard drive rather than my SSD. I have a laptop that has a hybrid drive. 256GBs of SSD and 1TB of Hard Drive. Sure, the SSD is faster. However, I don’t want to save everything over there! Windows store apps and their data get saved only on the SSD. I cannot keep it on the Hard Drive, no matter what!
So, no matter what, my iTunes songs get saved on the SSD, occupying more than 20GBs of it! Nobody wants that. My two options were, either get the .exe file from apple.com or simply download apple music from the play store using bluestacks. I went for the latter because the user interface of Apple Music is so much better than that of iTunes if all you want to do is listen to songs and watch movies.
Now, let’s talk about how you can install this beautiful piece of software.
How to Install Bluestacks?
- Head over to the site.
- Download the .exe file from there.
- Run it.
- Bluestacks will launch and will download about 500 MB of Data.
- You are good to go!
Yes, that is how easy it is to install android on your Windows PC. I know all of you thought it was much more complicated than this.
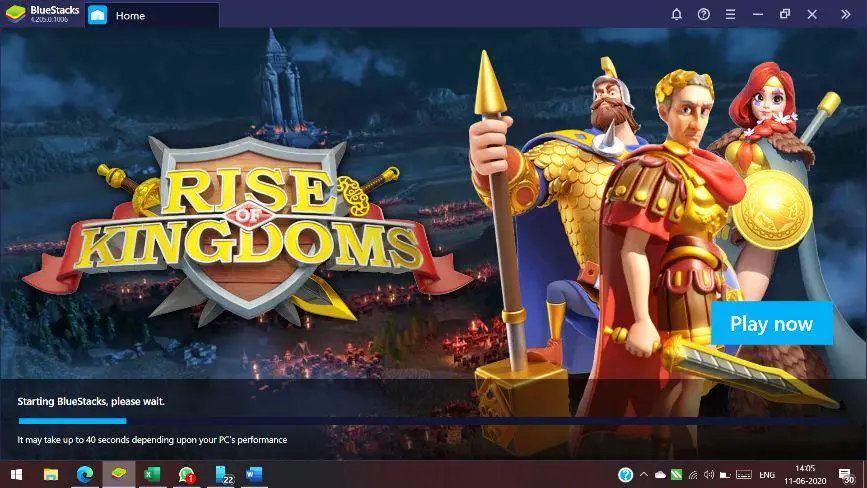
This is the bootup screen of bluestacks. The first boot might take a few minutes, but after that, it should be quicker. On my PC, it takes about 20 seconds, and I have an i5 processor.
Things you can do in Bluestacks
So, I told you all about the apps you can use in bluestacks, but there is more to it. Bluestacks contains a lot of features inbuilt, which can help you redefine your gaming experience.
1. Changing the number of cores available
You might not want to dedicate all the cores of your CPU to bluestacks if you want to keep it running in the background and not use it for pure gaming. I recommend keeping it open in the background, and for that, if you have let’s say an i7 CPU, which has 8 cores, you might wanna supply bluestacks with only 4. There is an option to do that too, and believe it or not, it comes in pretty handy when using bluestacks just to open daily use android apps.
Head over to Settings (or simply press ctrl + shift + i) -> Engine -> Performance -> select the number of cores you want bluestacks to use.
What you could also do is keep the number of cores low when using it to open daily use apps and then increase them when you want to game. I do that, and it has turned out to be very efficient as it saves battery.
Here you will also find the option to choose your “Graphics Renderer.” You have an option to choose between “DirectX” and “OpenGL.” Use DirectX to support sound, music, input, networking, and multimedia, as OpenGL is strictly a graphics API. While DirectX is just available on Windows, OpenGL is cross-platform.
Then come the GPU settings. I have an NVIDIA GeForce MX 250 Graphics card installed. So, I have the option to use that instead of intel’s integrated graphics.
See also: 2070 super vs 5700 xt
2. Saving Games in the Hard Drive
As I had mentioned earlier, like me, you might not be having a load of SSD storage. This is where Bluestacks will come in handy to be able to store your games in the HDD.
Head over to preferences -> Scroll to the bottom -> Media Folder -> Change the destination to the Hard Drive.
3. User Data
Here, you can clean up extra disk space used by bluestacks, or you can Backup and Restore your games and other data.

4. Advanced
You can choose the phone profile you want to use for your games. You can choose one of the pre-created profiles:
- Google Pixel 2XL,
- OnePlus 3T,
- OnePlus 5,
- Samsung Galaxy S8 Plus,
- Samsung Galaxy S10, or
- Xperia XZ.
- Samsung s20 ultra 5g
Or, you could create your own profile by entering the Manufacturer, model number, and brand.
5. Shortcut keys
Here, you can change or view all the shortcut keys available in bluestacks.
6. Changing controls
Not all of us like the default controls in a game. They might not be according to our preference, and we might not be comfortable with them.
Bluestacks let you set custom controls according to your will and preference.
Here is how you do it:
- Open the Game
- In the side panel, select the keyboard icon (or simply press ctrl + shift + A)
The controls are displayed like this on the screen.
- Open the control editor, and there you will find a set of controls that look like this:
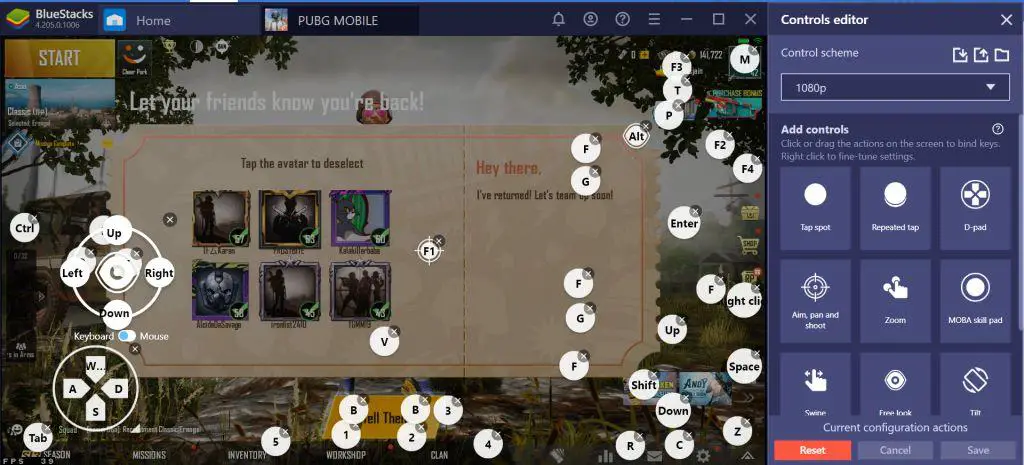
This shows which key controls which area and what function it performs. You can select the options of “tap spot” “Repeated Tap,” “D-Pad” and much more, to map the controls you would be having on your phone.
Popular games like PUBG have the usual controls mapped on the screen, and you do not need to map them, however for a few other games, you will have to create controls on your own.
Finally
That was it for this article. Bluestacks is one of the few applications that enable this, and as I said previously, it is one of the best I have found in a long time. It is also the most popular one in the market and has tons of functionality. The features and options it provides are unmatched, and that is what has enabled it to become the number one player in the game. As a happy user for the past three years, I’d say you should definitely go for it if you want the android experience on your windows device.

I am a great learning author aspiring to become an aerospace engineer and astrophysicist. I learn theoretical physics and astronomy in my free time. Technology has always appealed to me and I have been interested in it ever since I got my first tablet. Since then I’ve created a YouTube channel and a blog related to tech. It gave me an insight into the world of tech as I started reading more articles related to this.


