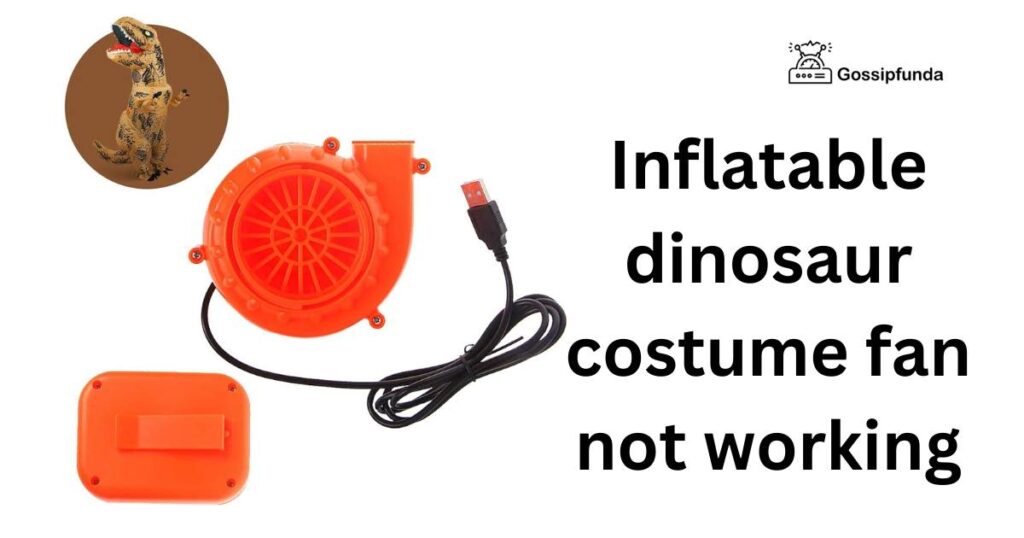
It’s almost Halloween, and there’s nothing quite like the joy of trotting around in an inflatable dinosaur costume. But what happens when the fan that keeps you puffed up stops working? Panic mode, right? In this guide, we’ll discuss the common reasons why your inflatable dinosaur costume fan might stop working and, more importantly, provide detailed steps on how to fix it.
Reasons Why Your Inflatable Dinosaur Costume Fan Might Not Be Working
- Dead Batteries: The most common reason, your batteries might have run out of juice.
- Faulty Wiring: Over time, the wiring can become damaged or disconnected, leading to fan failure.
- Clogged Fan: Dirt and debris can accumulate, obstructing the fan’s movement.
- Malfunctioning Motor: The motor might wear out or become faulty, causing the fan to stop.
- Damaged Costume: Tears or punctures in the costume can prevent it from inflating, even if the fan is working.
- Overheating: Continuous usage can cause the fan to overheat and temporarily stop working.
- Faulty Switch: The on-off switch might become defective, preventing the fan from starting.
How to fix inflatable dinosaur costume fan not working?
Fix 1: Replacing Dead Batteries in Your Inflatable Dinosaur Costume Fan
The heartbeat of your inflatable costume’s fan is the power it receives from the batteries. When these run dry, so does the fun. Let’s walk through the steps to address this common issue:
- Step 1: Identify the Issue: First, ascertain that the batteries are indeed the culprit. If you switch on the fan and there’s no sound or movement, this is a strong indicator.
- Step 2: Access the Battery Compartment: Locate the battery compartment, usually found at the base of the fan or in a separate pouch attached to the costume.
- Step 3: Remove Old Batteries: Open the compartment and take out the exhausted batteries. Be gentle to avoid damaging any internal connections.
- Step 4: Check for Corrosion: Before placing new batteries, inspect the battery terminals for any corrosion or residue. This can hamper the connection and performance.
- Step 5: Insert New Batteries: Purchase the right size and type of batteries recommended for the costume fan. Insert them correctly, aligning the positive and negative terminals as indicated.
- Step 6: Test the Fan: Close the battery compartment and switch on the fan. It should come alive if the batteries were the main issue. If not, there might be another underlying problem.
- Step 7: Secure Everything: Ensure the battery compartment is closed securely. This prevents any unwanted interruptions and keeps the batteries safe from external elements.
Remember: Always use high-quality batteries for longer performance. Consider keeping a spare set handy during events or parties, so you’re always prepared.
Don’t misss: Error code 2001 IRS Tax Tools
Fix 2: Addressing Faulty Wiring in Your Inflatable Dinosaur Costume Fan
Wires are the veins of your costume fan, transmitting power and signals. If these are damaged or disconnected, the fan won’t operate.
- Step 1: Safety First: Before inspecting the wiring, ensure the costume fan is turned off and the batteries are removed to prevent any accidental short circuits.
- Step 2: Expose the Wiring: Carefully access the interior where the wires of the fan are located. This might require opening a compartment or unzipping a section of the costume.
- Step 3: Visual Inspection: Look for any visible signs of damage – frayed wires, disconnected terminals, or burnt sections.
- Step 4: Reconnect Loose Wires: If you find any wires that have come loose from their connections, carefully reconnect them. Using a small set of pliers or tweezers can be helpful.
- Step 5: Insulate Exposed Wires: If any wire’s insulation looks damaged, wrap it with electrical tape to prevent short circuits.
- Step 6: Test the Fan: After making adjustments, reconnect the batteries and turn on the fan to check if the problem is resolved.
- Step 7: Seek Professional Help: If you’re unsure about any step or the wiring looks severely damaged, it might be best to consult a professional or consider replacing the fan unit.
Fix 3: Cleaning a Clogged Fan in Your Inflatable Dinosaur Costume
A clogged fan can severely hamper the inflation process. Dust and debris can slow it down or even halt it entirely.
- Step 1: Safety Precautions: Make sure the costume’s fan is turned off. Remove the batteries to ensure no power is flowing.
- Step 2: Access the Fan: Locate the fan’s compartment, usually found at the base or side of the costume, and open it.
- Step 3: Inspect for Debris: Look for any visible obstructions like dirt, leaves, or small objects that might be blocking the fan blades.
- Step 4: Gentle Cleaning: Using a soft brush or a can of compressed air, gently remove any debris. Be careful not to apply too much force, which might damage the fan blades.
- Step 5: Check the Fan’s Housing: Ensure that the housing around the fan isn’t warped or damaged, as this can also cause obstructions.
- Step 6: Reassemble and Test: Once cleaned, put everything back in its place. Insert the batteries, turn on the fan, and see if the airflow has improved.
- Step 7: Regular Maintenance: To prevent future clogs, make it a habit to inspect and clean the fan after each use, especially if worn outdoors.
By addressing these common issues, you can ensure that your inflatable dinosaur costume remains the life of the party!
Fix 4: Rectifying a Malfunctioning Motor in Your Inflatable Dinosaur Costume Fan
The motor is the heart of the fan, driving its blades to circulate air. If this component falters, the entire inflatable costume won’t function.
- Step 1: Diagnose the Issue: Turn on the fan. If you hear a faint humming or buzzing but the fan doesn’t spin, the motor might be the issue.
- Step 2: Access the Motor: Open the fan compartment to expose the motor, ensuring you’ve first removed the batteries for safety.
- Step 3: Check for Obstructions: Inspect the area around the motor. Sometimes, small debris or particles can jam it. Remove any obstructions.
- Step 4: Test the Motor Manually: Gently try to spin the fan blade with your finger. If it moves freely, the motor might be burnt out. If it’s stuck, there might be an internal jam.
- Step 5: Consider Replacement: If the motor is burnt out, it might be more feasible to replace the entire fan unit. Many inflatable costumes offer replacement fans that can be purchased separately.
- Step 6: Reassemble: After addressing the issue or replacing the fan, reassemble the costume and test the fan’s functionality.
Fix 5: Repairing Tears or Punctures in Your Inflatable Dinosaur Costume
Air escaping from a tear or puncture will prevent the costume from inflating properly, even if the fan is operational.
- Step 1: Identify the Damage: Inflate the costume partially. Listen and feel around for escaping air to locate the tear or puncture.
- Step 2: Clean the Area: Before repairing, ensure the area around the damage is clean and dry. Use a damp cloth to wipe and let it air dry.
- Step 3: Use Clear Tape for Quick Fixes: For minor tears, clear tape can be a quick fix. Place the tape over the tear, pressing firmly to seal. Make sure it adheres well to prevent air from escaping.
- Step 4: Sewing for Larger Tears: For more significant damage, consider sewing the tear shut. Use a strong, durable thread and ensure the stitches are close together to make it airtight.
- Step 5: Consider Professional Repair Kits: There are specialized inflatable repair kits available in the market. These often come with patches that can be glued onto punctures, providing a more durable fix than tape.
- Step 6: Test the Repair: Once the repair is done, inflate the costume to ensure no air is escaping from the fixed area.
Addressing these issues with care and precision ensures that your inflatable costume stays inflated and keeps the fun going!
Fix 6: Addressing Overheating Issues in Your Inflatable Dinosaur Costume Fan
Overheating can be a silent saboteur, causing the fan to shut down unexpectedly and leaving you deflated.
- Step 1: Recognize Overheating: If the fan suddenly stops after prolonged use or feels extremely hot to touch, it might be overheating.
- Step 2: Power Down: Immediately turn off the fan and remove the batteries. Allow the unit to cool down for at least 20-30 minutes.
- Step 3: Provide Ventilation: Ensure that the fan has adequate ventilation. Avoid using the costume in extremely hot environments or direct sunlight.
- Step 4: Check for Blockages: Ensure that the fan’s air intake isn’t blocked. Sometimes, fabric or debris can obstruct airflow, causing the motor to work harder and overheat.
- Step 5: Resume with Caution: After the cooldown period, power the fan back on. If it continues to overheat frequently, consider seeking a replacement.
Fix 7: Tackling a Faulty On-Off Switch in Your Inflatable Dinosaur Costume Fan
The switch controls the power flow. If it’s defective, your fan won’t spring to life.
- Step 1: Inspect the Switch: Look for any visible damage or loose parts in the switch mechanism.
- Step 2: Test for Connectivity: If you have a multimeter, test the switch for continuity. If there’s no reading, the switch might be faulty.
- Step 3: Secure Loose Connections: Tighten any loose wires or connections that might be causing intermittent contact.
- Step 4: Consider Replacement: If the switch is undoubtedly defective, either replace the switch (if you’re comfortable with basic electronics) or purchase a replacement fan.
- Step 5: Ensure Proper Assembly: After addressing the switch issue, reassemble any parts you might have disassembled, ensuring everything fits securely.
Fix 8: Dealing with Moisture-Related Issues in Your Inflatable Dinosaur Costume Fan
Moisture can be an invisible enemy, damaging internal components.
- Step 1: Identify Moisture Signs: If the fan makes a gurgling sound or doesn’t turn on after exposure to rain or moisture, water might be the culprit.
- Step 2: Dry the Fan: Open the fan compartment and use a dry cloth to wipe away any visible moisture. Place the fan in a dry, warm place to let any internal moisture evaporate.
- Step 3: Use Silica Gel: Place packets of silica gel (those tiny packets you find in new bags or shoe boxes) inside the fan compartment. They’ll help absorb any lingering moisture.
- Step 4: Avoid Direct Water Exposure: In the future, avoid using the costume in rainy conditions or near water sources.
- Step 5: Regularly Check for Moisture: If you store your costume for extended periods, occasionally check and ensure it’s dry, preventing any long-term moisture damage.
By understanding and addressing these common and less-often-discussed issues, your inflatable costume will be set for many more occasions of joy and laughter!
Conclusion
Facing issues with your inflatable dinosaur costume fan can be daunting, especially when you’re all set for an event. However, with a little patience and the right approach, these problems can be solved with ease. Remember, always prioritize safety. If unsure, seek professional help. Enjoy your inflatable adventures!
FAQs
Dead batteries, clogs, or motor issues might be the culprits.
If the fan remains silent or doesn’t move, replace the batteries and test.
Check for tears or holes in the costume. They can cause air leaks.
No. Overheating can be dangerous. Turn it off and let it cool.
Prachi Mishra is a talented Digital Marketer and Technical Content Writer with a passion for creating impactful content and optimizing it for online platforms. With a strong background in marketing and a deep understanding of SEO and digital marketing strategies, Prachi has helped several businesses increase their online visibility and drive more traffic to their websites.
As a technical content writer, Prachi has extensive experience in creating engaging and informative content for a range of industries, including technology, finance, healthcare, and more. Her ability to simplify complex concepts and present them in a clear and concise manner has made her a valuable asset to her clients.
Prachi is a self-motivated and goal-oriented professional who is committed to delivering high-quality work that exceeds her clients’ expectations. She has a keen eye for detail and is always willing to go the extra mile to ensure that her work is accurate, informative, and engaging.


