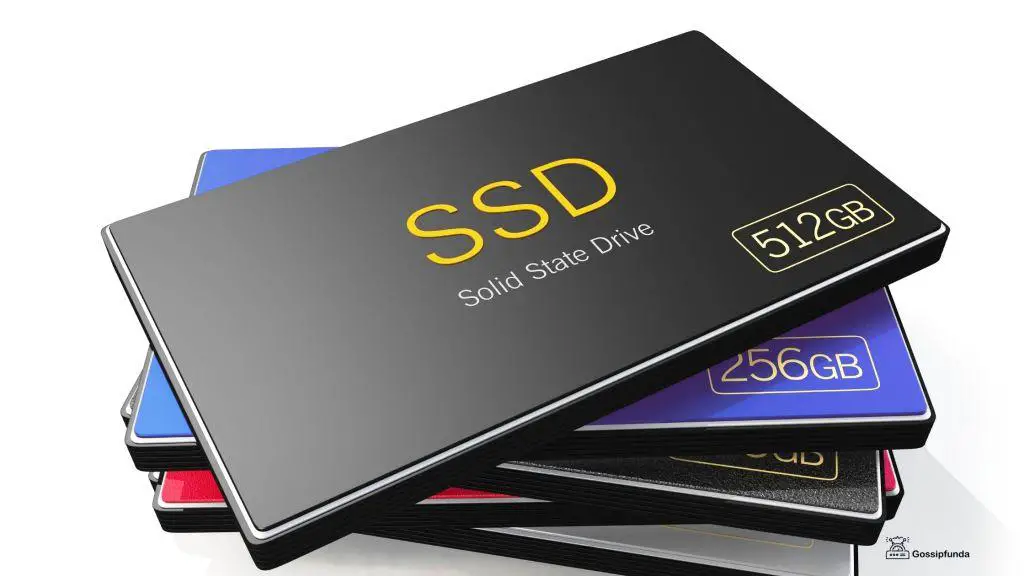
You’ve invested in a brand-new Solid State Drive (SSD), only to find it’s not showing up in disk management. It’s a frustrating issue, but you’re not alone. Many users find themselves in this predicament, searching desperately for solutions. So, what should you do if your SSD is not showing up in disk management?
Why is your SSD not showing up in disk management?
There are several reasons why your SSD may not appear in disk management. These can include scenarios where the SSD is new and not initialized, there is a drive letter conflict, or the BIOS settings are not properly configured.

1. New and Uninitialized SSD
New SSDs are often not initialized. This means that they haven’t been prepared for use within your system. Uninitialized SSDs will not appear in disk management because they aren’t ready to handle data storage yet. It’s like having a new employee who hasn’t been briefed on their job – they’re there, but they can’t start working until they’re set up properly.
2. Drive Letter Conflict
In some situations, your SSD may have the same drive letter as an existing drive in your system. This is similar to two houses having the same address – confusion is bound to occur. When this happens, a drive letter conflict arises, and your SSD may fail to show up in disk management.
3. Incorrect BIOS Settings
The BIOS (Basic Input/Output System) manages the data flow between your computer’s operating system and attached devices, like your SSD. If the BIOS settings aren’t properly adjusted, it’s like a faulty traffic signal – data can’t flow as it should, and your SSD may not be recognized, causing it to not show up in disk management.
These are the primary reasons why your SSD might not be visible in disk management. The good news is that once you know the cause, it’s easier to find the appropriate solution.
How to fix ssd not showing up in disk management?
Fix 1: Initialize the SSD
An uninitialized SSD might not appear in disk management. Here’s how you can initialize your SSD.
- Step 1: Open Disk Management: To start, press Windows + X together, and a list will appear. Select and click on “Disk Management” from this list.
- Step 2: Identify the Unallocated SSD: In the Disk Management window, you’ll see a list of all drives connected to your system. Look for your SSD. If it’s unallocated, it’s uninitialized. It should be listed as “Disk X (Unallocated)”.
- Step 3: Initialize the SSD: Right-click on the unallocated space of the SSD. A menu will pop up. Click on “Initialize Disk”.
- Step 4: Choose the Correct Partition Style: After clicking “Initialize Disk”, a dialog box will appear. It will ask you to select a partition style. You can choose between Master Boot Record (MBR) or GUID Partition Table (GPT). If your SSD is less than 2TB, choose MBR. If it’s more than 2TB, opt for GPT.
- Step 5: Confirm the Initialization: After selecting the correct partition style, click “OK”. Your SSD should now be initialized and visible in disk management.
It’s essential to note that initializing your SSD will erase all existing data on the drive. So, if there’s any data you want to keep, make sure you back it up before initializing the SSD.
Fix 2: Resolve the Drive Letter Conflict
If there is a drive letter conflict with your SSD, it might not be visible in disk management. Here’s how to assign a new drive letter and resolve the issue.
- Step 1: Open Disk Management: Press Windows + X together, and from the list that appears, select “Disk Management”.
- Step 2: Identify the SSD without a Drive Letter: In Disk Management, look for the SSD that’s missing a drive letter. It should be listed without any letter next to it.
- Step 3: Change Drive Letter: Right-click on the SSD without a drive letter. A menu will pop up. Click on “Change Drive Letter and Paths”.
- Step 4: Assign a New Drive Letter: A new window will open after you select “Change Drive Letter and Paths”. Click on “Add”. After clicking “Add”, a dialog box will appear. Choose an available drive letter from the dropdown menu and click “OK”.
- Step 5: Confirm the Change: After you’ve assigned a new drive letter, click “OK”. Now, your SSD should have a new drive letter, resolving the conflict and making it visible in disk management.
This process will not affect your data. However, if your SSD is also not showing up in File Explorer, it may have other issues. In such cases, consult a tech professional.
Fix 3: Adjust BIOS Settings
Incorrect BIOS settings can prevent your SSD from showing up in disk management. Follow these steps to adjust your BIOS settings.
- Step 1: Enter BIOS: To enter the BIOS, restart your computer. As your computer restarts, press the key to enter the BIOS. The key varies among manufacturers, but it’s often F1, F2, F10, or Del.
- Step 2: Navigate to the Boot Order: In the BIOS interface, look for the “Boot” tab or something similar, depending on your BIOS version. Here, you can check the boot order of your devices.
- Step 3: Enable SSD: Your SSD should be listed here. If it’s not, double-check your physical connections. If it is, but it’s disabled, you need to enable it. Use the instructions provided in the BIOS to enable the SSD.
- Step 4: Save and Exit: After ensuring your SSD is enabled, you need to save these changes. Look for an option like “Save and Exit” or “Exit Saving Changes”. Once saved, your computer will restart.
Now, your BIOS should recognize your SSD, and it should appear in disk management. Remember, messing with BIOS settings can potentially harm your computer, so proceed with caution and only change what’s necessary.
Read more: New SSD not showing up – How to fix it
Fix 4: Update the SSD Driver
Sometimes, your SSD might not show up in disk management due to outdated drivers. Here’s how to update your SSD driver to fix this issue.
- Step 1: Open Device Manager: Press Windows + X together and select “Device Manager” from the list that appears.
- Step 2: Locate the SSD: In Device Manager, look for the “Disk drives” section and expand it. Your SSD should be listed here.
- Step 3: Update Driver: Right-click on your SSD listed under “Disk drives”, and select “Update driver” from the menu that appears.
- Step 4: Search Automatically: A new window will open after you select “Update driver”. Click on “Search automatically for updated driver software”. Windows will then search for and install any available updates for your SSD driver.
- Step 5: Restart Your Computer: After the driver update is complete, restart your computer. This will ensure the changes take effect.
Now, your SSD driver should be up-to-date, and your SSD should appear in disk management. If your SSD is still not showing up, consider consulting a tech professional, as there might be a hardware issue.
Fix 5: Check SSD Connection
Sometimes, the reason your SSD is not showing up in disk management could be as simple as a poor or improper connection. Checking and securing your SSD’s connection can solve the issue.
- Step 1: Shut Down Your Computer: Before checking any physical connections, make sure to power off your computer completely to avoid any potential electrical damage or injury.
- Step 2: Open Your Computer Case: Next, open your computer case. The process for this will vary depending on your computer model. Usually, it involves removing a few screws on the back of the case.
- Step 3: Locate the SSD: Once the case is open, locate your SSD. It will usually be situated in a hard drive bay or connected directly to the motherboard.
- Step 4: Check SSD Connections: Check both the power and data connections of your SSD. The power connection will come from your power supply, and the data connection will be a SATA cable connecting your SSD to your motherboard.
- Step 5: Secure the Connections: If any connections are loose, secure them by firmly (but gently) pushing the connectors into the SSD. If the cables appear damaged, you may need to replace them.
- Step 6: Close the Computer Case and Restart: After checking and securing the connections, close your computer case and restart the computer.
If your SSD was loosely connected, this should resolve the issue, and your SSD should now appear in disk management. If not, the problem may be more complicated and could require professional assistance.
Fix 6: Enable Disk Controller in BIOS
If your SSD is not showing up in disk management, another possible solution is to enable the disk controller in your computer’s BIOS. This is how you can do it:
- Step 1: Restart and Enter BIOS: Restart your computer, and press the BIOS key during startup to enter BIOS. The BIOS key varies depending on the manufacturer, but it’s typically F1, F2, F10, or Del.
- Step 2: Navigate to the Disk Controller Settings: Once you’re in the BIOS, look for the “Storage”, “Advanced”, or “Integrated Peripherals” section (the name varies depending on your BIOS version). Then find “Disk Controller” or “SATA Controller” (or similar).
- Step 3: Enable the Disk Controller: If the disk controller setting is disabled, enable it. The exact method to change this setting will depend on your BIOS version. However, there is usually an “Enable/Disable” option.
- Step 4: Save and Exit: Once you’ve enabled the disk controller, remember to save your changes before you exit BIOS. There is typically a “Save and Exit” option for this.
- Step 5: Restart Your Computer: After exiting BIOS, your computer will restart. Now, the disk controller is enabled, and your SSD should appear in disk management.
Please note that the exact instructions may vary depending on your specific BIOS version. If you’re not comfortable changing BIOS settings, you may want to seek assistance from a tech professional.
Fix 7: Run Hardware and Devices Troubleshooter
If your SSD is not showing up in disk management, running the built-in Windows troubleshooter for hardware and devices can help identify and resolve the issue. Follow these steps:
- Step 1: Open Settings: Press Windows + I together to open the Settings app.
- Step 2: Access Troubleshoot Settings: In the Settings window, navigate to “Update & Security”. Here, you’ll find a “Troubleshoot” tab on the left-hand side.
- Step 3: Run the Troubleshooter: Under the “Troubleshoot” tab, you’ll find the “Hardware and Devices” option. Click on it, and then select “Run the troubleshooter”.
- Step 4: Follow the Prompts: The troubleshooter will begin scanning for issues. Follow any prompts or instructions it gives you.
- Step 5: Restart Your Computer: After the troubleshooter has finished, restart your computer. This will ensure any changes it made take effect.
After running the hardware and devices troubleshooter, your SSD should now be visible in disk management. If not, you might need to explore more advanced troubleshooting methods or seek help from a tech professional.
Fix 8: Use Diskpart in Command Prompt
When your SSD is not showing up in disk management, using the Diskpart command in the Command Prompt can be an effective solution. Please follow these steps:
- Step 1: Open Command Prompt as Administrator: Press Windows + X together and select “Command Prompt (Admin)” from the list that appears.
- Step 2: Run Diskpart Command: In the Command Prompt window, type “diskpart” and press Enter.
- Step 3: List the Disks: After entering Diskpart, type “list disk” and press Enter. This will show all the disks currently connected to your system.
- Step 4: Select Your SSD: In the list, identify your SSD. Once identified, type “select disk X” (replace X with the number of your SSD) and press Enter.
- Step 5: Clean the SSD: Next, type “clean” and press Enter. This will remove all existing partitions and formatting from the SSD, making it “unallocated”.
- Step 6: Create a New Partition: To use the SSD, you’ll need to create a new partition. Type “create partition primary” and press Enter. After that, type “format fs=ntfs quick” and press Enter. This will format the new partition as NTFS.
- Step 7: Assign a Drive Letter: Finally, assign a drive letter to the SSD by typing “assign letter=X” (replace X with your desired letter) and press Enter.
- Step 8: Exit Command Prompt: Once done, type “exit” to leave Diskpart, and then close the Command Prompt window.
This process should make your SSD appear in disk management. However, it will also erase all data on the SSD, so only use this method if there’s no data on the SSD you need to keep, or if you’ve backed up any important data.
Prevention Tips: Avoiding SSD Not Showing Up in Disk Management
Keeping your SSD from disappearing in disk management can save you a lot of time and potential data loss. Here are some preventative measures you can take:
- 1. Regularly Update Your SSD Firmware and Drivers: Manufacturers often release updates to improve hardware compatibility and fix bugs. Regularly updating your SSD firmware and drivers can prevent many issues.
- 2. Properly Shut Down Your Computer: Improper shutdowns can cause many problems, including SSDs disappearing from disk management. Always shut down your computer using the correct procedure.
- 3. Ensure Proper Connection: Always make sure your SSD is properly connected. Loose connections can cause your SSD not to show up in disk management. Regularly check your SSD’s physical connections to avoid this issue.
- 4. Run Regular System Checks: Running regular system checks can identify potential issues before they cause problems. Use built-in Windows tools, like the Hardware and Devices Troubleshooter, to regularly check your system.
- 5. Backup Your Data: While this won’t prevent SSDs from disappearing from disk management, regularly backing up your data can prevent data loss when SSD issues occur.
By following these tips, you can help ensure your SSD continues to work properly and remains visible in disk management.
Conclusion
In the digital world, troubleshooting is a must-have skill. If your SSD is not showing up in disk management, don’t panic. Use the knowledge in this article to diagnose the problem and fix it effectively. Whether it’s initializing the SSD, resolving a drive letter conflict, or adjusting BIOS settings, these actionable solutions will get your SSD up and running in no time.
FAQs
Your SSD may not show up due to outdated drivers, BIOS settings, a bad connection, or drive letter conflicts.
Yes, like any hardware component, an SSD can fail due to physical damage, power surges, or prolonged use.
You can update drivers, adjust BIOS settings, check the connection, assign a new drive letter, or use Diskpart in Command Prompt.
Regularly update SSD firmware and drivers, properly shut down your PC, ensure secure SSD connection, and run regular system checks.
No, updating SSD drivers won’t erase your data. But always ensure to back up critical data before performing system changes.
Prachi Mishra is a talented Digital Marketer and Technical Content Writer with a passion for creating impactful content and optimizing it for online platforms. With a strong background in marketing and a deep understanding of SEO and digital marketing strategies, Prachi has helped several businesses increase their online visibility and drive more traffic to their websites.
As a technical content writer, Prachi has extensive experience in creating engaging and informative content for a range of industries, including technology, finance, healthcare, and more. Her ability to simplify complex concepts and present them in a clear and concise manner has made her a valuable asset to her clients.
Prachi is a self-motivated and goal-oriented professional who is committed to delivering high-quality work that exceeds her clients’ expectations. She has a keen eye for detail and is always willing to go the extra mile to ensure that her work is accurate, informative, and engaging.


