How to overclock RAM?
Want to overclock your RAM to squeeze out more performance? Stuck wondering how to overclock RAM? We got you covered with our article made especially for you. Learn about what overclocking means and how it can help you. See how to use the BIOS for overclocking and checking the system. But also see which RAM your system is using as DDR3 less overclockable than DDR4. Learn how to change DRAM Timing, DRAM Voltage, and more with our article. One place to find all you need to know about RAM overclocking.
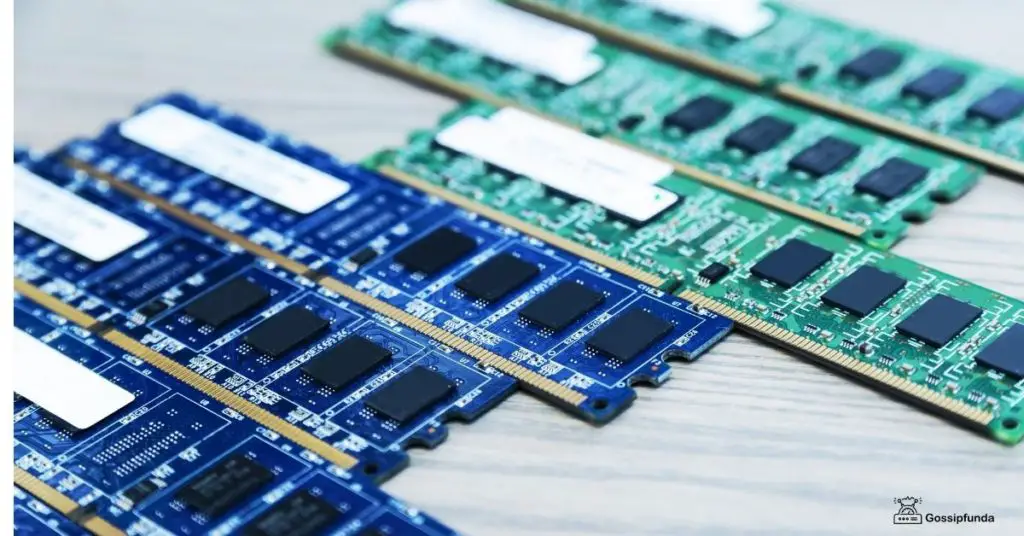
RAM stands for “Random Access Memory” and it is used for storing the temporary data of any program or game. Now there are a number of different RAMs available in the market and we will discuss them below.
Types of RAM
There are basically two different types of RAMs however, we only use one of them.
- SDRAM (Synchronous Dynamic Random Access Memory)
- DDR SDRAM (Double Data Rate SDRAM)
Now we do not use the SDRAM nowadays and only use the DDR SDRAM (Double Data Rate Synchronous Dynamic Random Access Memory). SDRAM is the older generation and we use the newer DDR as it gives high bandwidth. DDR achieves this by transferring data on the clock signal, instead of a single data rate it uses a double data rate. Now we will not go in-depth as to how the DDR achieves this, but know that it doubles the transfer rate without increasing the frequency.
We use two main types of DDR nowadays in our PC or laptops, the most common is the DDR3. Unlike the DDR2 (previous generation) it reduces 40% power consumption allowing it to operate it on lower voltage. There are two features of DDR3 which make it better, ASR (Automatic Self-Refresh) and SRT (Self-refresh Temperature).
Now DDR4 is the latest you can pick-up for yourself, it operates at an even lower voltage (1.2V) and a much higher transfer rate. DDR4 introduced four new features of single-handed operation. DDR4 has 4 process data in the clock cycle making it more efficient than the DDR3. Also, DDR4 has improved stability for data transmission and access.
| Type | Internal rate (MHz) | Bus clock (Mhz) | Transfer rate (GB/s) | Voltage (V) |
| SDRAM | 100-168 | 100-160 | 0.8-1.3 | 3.3 |
| DDR | 130-200 | 130-200 | 2.1-3.2 | 2.6 |
| DDR2 | 130-200 | 260-400 | 4.2-6.4 | 1.8 |
| DDR3 | 130-200 | 530-800 | 8.5-14.9 | 1.35/1.5 |
| DD4 | 130-200 | 1060-1600 | 17-21.3 | 1.2 |
What is overclocking?
It is simply pushing your PC harder than what it normally does, you are taking out most performance for your buck. We will not discuss overclocking in-depth in the article, if you want to know more than check out our article what is Overclocking.
What You Need to Know Before You Begin
Unlike CPU and GPU overclocking, RAM overclocking is more complex as there are no dials or sliders to crack. But the best thing about RAM overclocking is that it is safer than other overclocking. There is not much heat produced unlike GPU or CPU overclocking, if you want to know more about it then we got you covered.
Now there are a number of advantages of overclocking RAM, every program uses RAM to store data. If you are a gamer then you must be familiar with the RAM getting full mid-game and it starts hanging. Overclocking RAM cuts down the latency along with giving you better performance. This reduces the annoying shuttering during heavy loads on the CPU or heavy computational programs.
Now keep in mind that RAM speed is measured in MHz or megahertz, if you own DDR4 then it will have 2100 Mhz to 2400 MHz stock. Now this memory interactive with motherboard, CPU, and other components is known as “serial presence detect”.
How to find the Perfect RAM Timings
Now we agree that overclock your RAM is much safer compared to CPU or GPU overclocking, but RAM overclocking is much more complex. Because you can not just enter random values and hope it will work out for you, it’s not safe and not advisable. Now if you happen to have an AMD Ryzen setup then you are in luck as there is software to make your work easy, it is “Ryzen DRAM Calculator“.
Now what it does is to use different combinations of values and see what works out best for your set-up, so you wouldn’t have to do this manually or leave settings on “auto”. But if you have an Intel setup then this tool can give you an idea for other tools that you will use. So download the tool even if you don’t have an AMD set-up, as this will still give you primary timings along with testing.
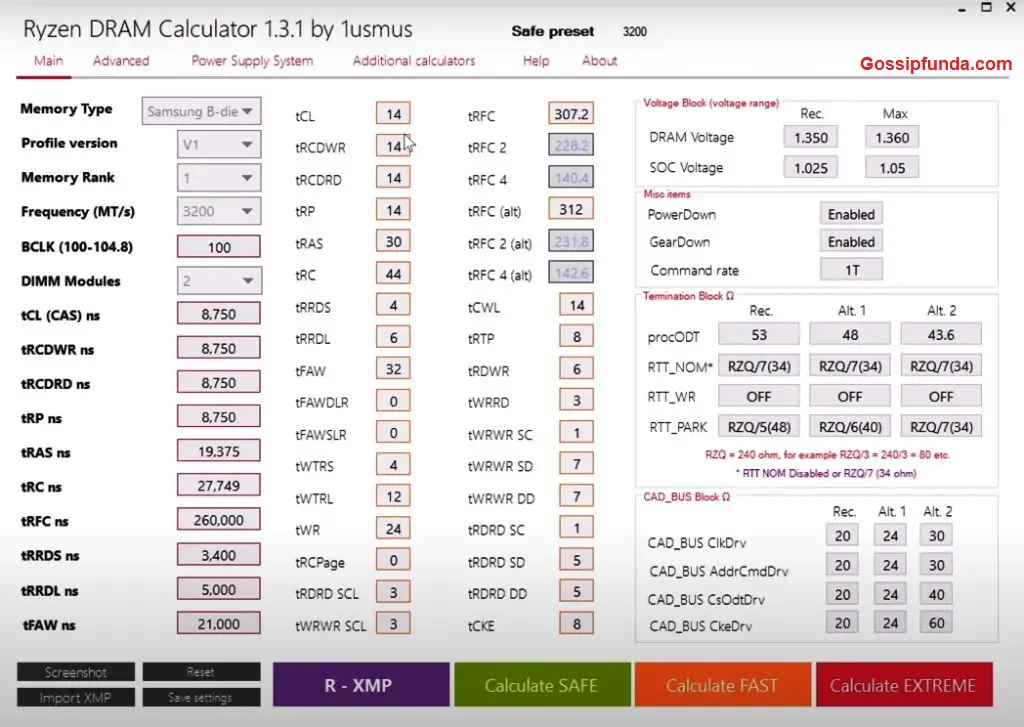
Once you have downloaded the tool, open it and enter all the information like which processor you are using along with what link of memory you are using. But if you are not sure about the RAM then you can simply search the RAM kit’s part number. Follow the steps mentioned below to use the calculator.
- Once you are all set and done click on “R – XMP” button which should be located at the bottom of the screen for loading your kit’s XMP profile.
- Now you should enter the memory type and processor which you are using.
- Once done then click on “Calculate SAFE“.
- Now we always should use the safe option as it will give more stable numbers and will not damage the RAM in any case.
- Once it is done calculating, click on “Compare timings” and see the difference between your settings, timing will have changed.
- Now if you decide to go with the fast settings then it will be more powerful but a lot less stable. We would suggest you stick with safety, but there is no need to hold back if you want to push RAM further.
NOTE: Note the values that you will get from the calculator, or take pictures from the phone as you will not be able to access it from BIOS.
How to Overclock Your RAM
Now we will come to the main part of the article, overclock your RAM with BIOS (Basic Input / Output System). Keep in mind that you note down the numbers or take pictures of the calculator from your phone as you will not be able to access your PC while overclocking. Now follow the instructions step by step and do not skip any step.
- Power off your system and once it is off, hit the power key and boot it up (do not restart the system). When the system is starting continuously press the delete key or the “del” key on your keyboard. NOTE: Start pressing as soon as the system gets power, do not wait for the display to appear.
- Now you should see your system’s BIOS, every BIOS will be different as it depends on the motherboard.
- Next, You need to find “DRAM Timing control“, it will vary according to different BIOS but it should be under the “memory” section or something similar to it.
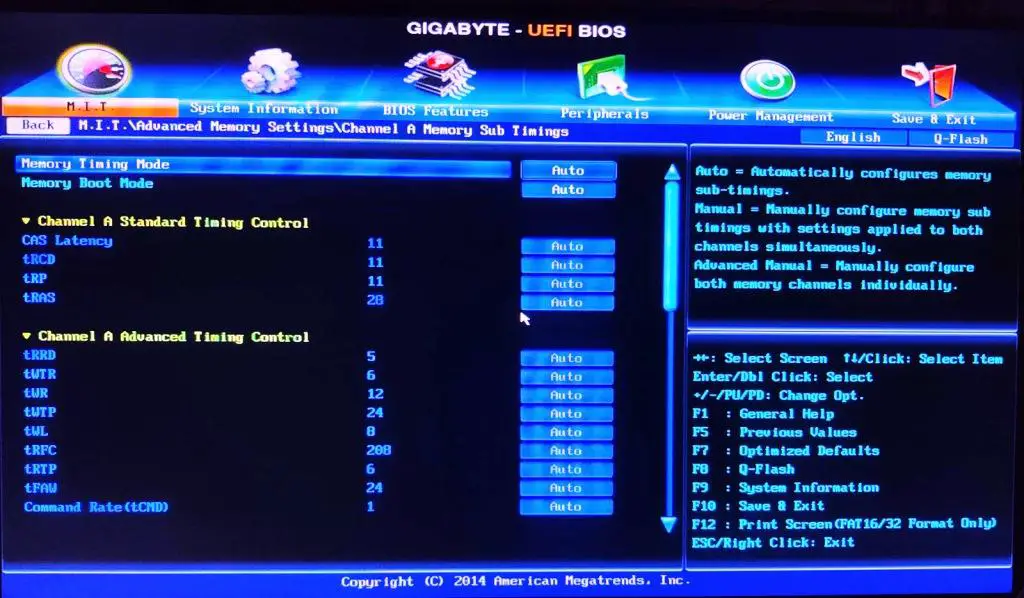
- Now increase the frequency of your RAM, refer to the numbers you noted down or the screenshot you saved. For Intel platforms keep the timings same and do not put variable timings, this will avoid any future errors.
- You will find the “DRAM CAS# Latency” or something similar to it under the “timing control” section. Now simply open the screenshot and start twerking the numbers . Keep in mind that the numbers match-up and double check before saving the values.
- Now here are some of the primary timings, it will vary for your BIOS but you will have an idea about it.
- tCL – Primary CAS Latency
- tRCDRD – RAS to CAS Read Delay
Other than this the rest of the timings and settings should match up.
- If you have the Intel platform then you need to enter the primary timings, other than that you can leave it on auto. But if you want to tweek the values then refer to the screenshot and use those values only and enter all the values manually.
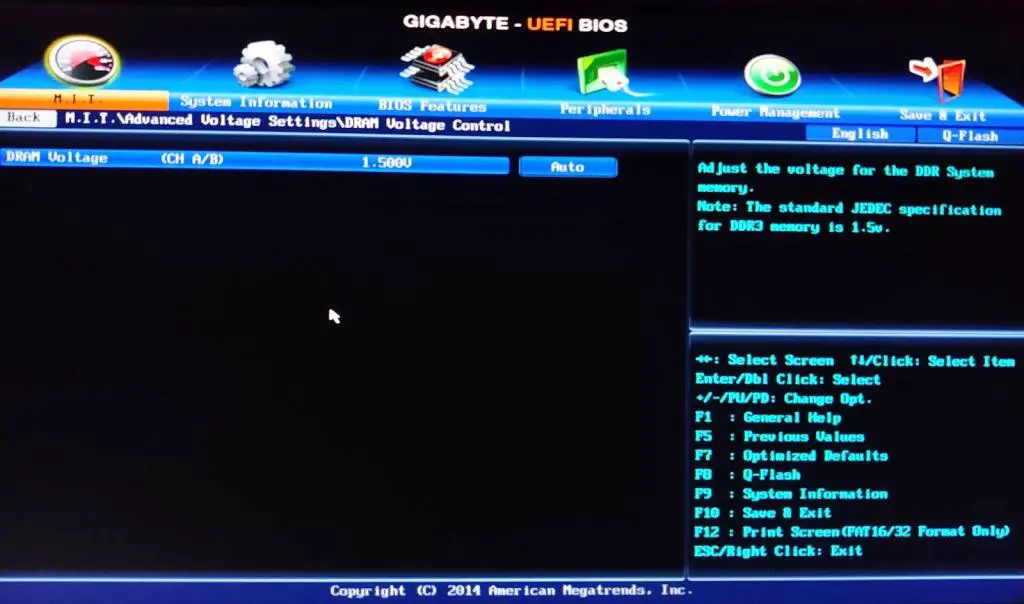
- Now when you have entered all the values and double-checked it with your screenshot. Now you need to change the voltage for the DRAM, it will say “DRAM Voltage” and the value you need to enter will be mentioned in the screenshot. Note that red values in the calculator will be unsafe, so try not to enter those values. The voltage before 1.4 or 1.45 should be safe for most users but still, make sure how much you need by referring to the calculator.
- Now you are done with all the twerking and you can save your settings and exit the BIOS. To do so you simply go to profiles and save the changes, you may need to press “F-10” for saving changes. Now restart or reboot your system and we can move to our next step.
System not starting up?
If your system does not boot up after you overclocked your system, this means your motherboard failed. Whenever it fails it’s POST or “Power On Self Test” and you have to wait about 30 seconds for BIOS to boot into safe mode automatically. This will load all your previous settings or we should say last working settings.
Now if your system does not have a safe mode then it does not mean that you lost your precious PC. You need to clear the CMOS manually of your system. This can be done by either removing the battery (if you are using a laptop) and then using a pin by the front panel headers of the motherboard. If you are not sure then check the manual which came with your motherboard or watch a video for your particular motherboard. You will need some tools so we suggest you keep them ready and follow the video or manual:
- Scissors
- Screw driver
- Two pins of similar size
- Jumper and switcher(optional)
Now watch the video or read the manual and make the circuit complete with your hand, it will not shock you as the current will not be strong.
NOTE: DO NOT PLACE PC ON BARE GROUND OR ON CONDUCTIVE SURFACE.
Is the Overclock RAM Stable?
We have overclocked our RAM successfully but is it stable enough to use? We need to check if our overclock is stable or not and it is fairly simple to check. Follow the steps to check the stability of your system:
- Boot your system up and open your work ID or the ID you will use mostly.
- Now download “MEMbench” for your system and it is free for downloading. Simple search will give you multiple options.
- Once you have downloaded and installed the tool, open it and click on “custom” and set task scope to 400%.
- Now click on “Max RAM” which should be located at the bottom of the screen and allocate your remaining RAM. We will be testing our RAM for any error and repeat it 4 times.
- Now when all is set, click on “Run” and let it run for sometime. For example, if you are using a 16 GB RAM then the task scope will take like 5-10 minutes, depending on the RAM type.
- Once the process is completed see if there is any error, in case there is no error then you can push your RAM even further. Now try using and “FAST” settings and repeating the steps. Overclocking is all about trial and error, trying different settings to find the best overclocked version of your system.
- Once you are satisfied with the results leave your system for longer testing times. Sometimes like 80000% and leave it for a longer duration of time, we would suggest you keep it overnight and see the results in the morning. If you find no error in the morning then congratulations, you got yourself a stable overclock RAM.
Summary
We saw what is overclocking and how to overclock RAM safely. Now it is safe to overclock your RAM unlike the CPU or GPU overclocking. But still, try to stick with the “SAFE” instead of “FAST” in the application. The topic is very technical we know but it’s worth giving a try especially if you are a gamer. And if you want to learn more about overclocking then we mentioned our article. And if you want to overclock your GPU and CPU then check out our dedicated articles on the same.

I am a Computer Science Engineer, have a passion for coding, sketching, and teaching. I took part in various college technical activities and was Mr. Fresher in the 1st year along with the college’s face. Spends most of the time learning new things and coding small codes for little fun and also as academic, keeping Python 3, Android as priority language for coding.
I love writing tech tips with 100% success and enjoying this new side of life. Finding a passion for new things and letting unlock my creativity and hoping to learn new scientific stuff on the journey of life and being grateful for smaller things.


