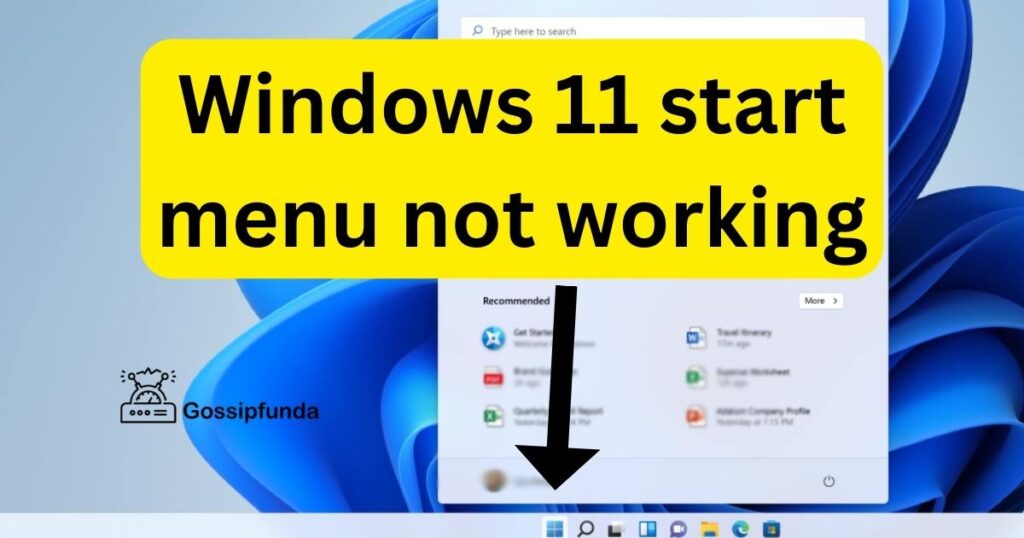
Windows 11, the latest operating system from Microsoft, has brought a fresh and modern interface to your PC. However, like any software, it’s not immune to issues. One common problem that many users have encountered is the Windows 11 Start Menu not working as expected. This can be incredibly frustrating, as the Start Menu is the gateway to your apps and settings. Fortunately, there are several effective solutions to get your Start Menu back on track.
In this comprehensive guide, we will explore the reasons behind the Windows 11 Start Menu malfunction and provide step-by-step instructions on how to fix it. Whether you’re a tech-savvy user or a novice, we’ve got you covered. Let’s dive into the troubleshooting process and restore the functionality of your Windows 11 Start Menu.
Reasons behind the issue of the Windows 11 Start Menu not working
Certainly, here the reasons behind the issue of the Windows 11 Start Menu not working:
- Corrupted System Files: Corrupted system files can disrupt the proper functioning of the Start Menu.
- Outdated or Incompatible Drivers: Start Menu problems can occur due to outdated or incompatible device drivers.
- Third-Party Software Interference: Conflicts with third-party software or apps can cause the Start Menu to stop working.
- Windows Updates and Pending Updates: Unresolved updates or pending updates may interfere with the Start Menu’s functionality.
- User Profile Corruption: A corrupted user profile can prevent the Start Menu from working correctly.
- Windows PowerShell Command: Incorrect or faulty use of Windows PowerShell commands can lead to Start Menu issues.
How to Fix issue of the Windows 11 Start Menu not working?
Fix 1: Repair Corrupted System Files
When the Windows 11 Start Menu isn’t working, it could be due to corrupted system files. Corrupted files can disrupt essential functions of your operating system, including the Start Menu. To resolve this issue, you can use the System File Checker tool to identify and repair these corrupted files. Here’s how to do it:
- Open Command Prompt as Administrator: Right-click on the Start button and select “Windows Terminal (Admin)” to open Command Prompt with administrator privileges. This is important to ensure that you have the necessary permissions to perform system repairs.
- Run the System File Checker (sfc) Tool: In the Command Prompt window, type the following command and press Enter:
bashCopy code
sfc /scannow
The System File Checker will start scanning your system for corrupted files and automatically attempt to repair them. This process may take some time, so please be patient.
- Wait for the Process to Complete: The scanning and repair process will take several minutes to complete. During this time, do not interrupt it or close the Command Prompt window.
- Review the Results: Once the scan is finished, you will receive a message indicating whether any corrupted files were found and repaired. If the tool found and fixed issues, it will display a message confirming the successful repair.
- Restart Your Computer: After the repair process is complete, it’s essential to restart your computer to ensure that the changes take effect.
After following these steps, your Windows 11 Start Menu should be functioning correctly. If the issue persists, you can proceed to other troubleshooting steps.
Don’t miss: Windows installer folder cleanup
Fix 2: Update Outdated or Incompatible Drivers
Outdated or incompatible drivers can also cause the Windows 11 Start Menu to malfunction. Ensuring that your device drivers are up to date and compatible with your operating system can resolve this issue. Follow these steps:
- Open Device Manager: Right-click on the Start button and select “Device Manager” from the context menu. This will open the Device Manager window.
- Identify Problematic Drivers: In the Device Manager, look for any devices with a yellow triangle icon, as this indicates driver issues. Right-click on the device with the problem and select “Update driver.”
- Search for Updated Drivers: Choose the option to “Search automatically for updated driver software.” Windows will attempt to find and install the latest compatible driver for the selected device.
- Follow On-Screen Instructions: If prompted, follow any on-screen instructions to complete the driver update process.
- Restart Your Computer: After updating drivers, it’s a good practice to restart your computer to ensure that the changes take effect.
Fix 3: Resolve Third-Party Software Conflicts
Conflicts with third-party software can often interfere with the proper functioning of the Windows 11 Start Menu. To identify and resolve such conflicts, follow these steps:
- Uninstall Recently Installed Software: Begin by uninstalling any recently installed third-party software one by one. To do this, go to “Settings” > “Apps” > “Apps & features.” Select the software you want to uninstall and click “Uninstall.”
- Check for Start Menu Functionality: After uninstalling each software, check if the Start Menu starts working correctly. If the issue is resolved after uninstalling a particular program, it is likely the source of the conflict.
- Reinstall Problematic Software (if necessary): If you determine that a specific software is causing the issue but it’s essential for your work, try reinstalling it after ensuring it is compatible with Windows 11.
By following these additional fixes, you can address other potential reasons behind the Windows 11 Start Menu not working as expected. If the problem persists after trying these solutions, you can explore further troubleshooting steps or seek assistance from Microsoft support.
Fix 4: Check and Install Pending Windows Updates
Incomplete or pending Windows updates can sometimes lead to issues with the Start Menu in Windows 11. Microsoft regularly releases updates that include bug fixes and improvements. To ensure your system is up to date and the Start Menu functions correctly, follow these steps:
- Open Windows Update: Go to “Settings” by pressing Win + I and select “Windows Update.”
- Check for Updates: Click on the “Check for updates” button. Windows will scan for available updates.
- Install Available Updates: If there are pending updates, Windows will display them. Click “Download” and “Install” to initiate the update process. This may take some time depending on the size of the updates.
- Restart Your Computer: After the updates are installed, you will be prompted to restart your computer. Ensure you save any open work and click “Restart” to complete the update process.
Fix 5: Create a New User Profile
Sometimes, issues with the Start Menu can be specific to a user profile. If you suspect that your user profile is corrupted, creating a new user profile can resolve the problem. Here’s how:
- Access User Accounts: Go to “Settings” by pressing Win + I and select “Accounts.”
- Family & Other Users: In the left pane, click on “Family & other users.”
- Add Account: Scroll down to the “Other users” section and click on “Add account.”
- Create a New Account: Choose “I don’t have this person’s sign-in information” if prompted. Then, select “Add a user without a Microsoft account.”
- Set Up the New User: Follow the on-screen instructions to create a new user profile. You can use your Microsoft account or create a local account.
- Switch to the New Profile: Sign out of your current user profile and sign in with the newly created one. Test if the Start Menu functions correctly in the new profile.
If the Start Menu works as expected in the new user profile, it indicates that the issue was related to your previous profile. You can then transfer your files and settings to the new profile or continue using it as needed.
By following these two additional fixes, you can address other potential causes of Start Menu problems in Windows 11. If the issue persists after trying these solutions, consider seeking further assistance or exploring advanced troubleshooting options.
Fix 6: Utilize Windows PowerShell Commands
Windows PowerShell offers a powerful set of commands that can help resolve various system-related issues, including Start Menu problems in Windows 11. Here’s how to use Windows PowerShell to potentially fix the issue:
- Open Windows Terminal: Right-click on the Start button and select “Windows Terminal” to open the terminal window.
- Run PowerShell as Administrator: Type powershell and press Enter. This will open PowerShell with administrative privileges, which are necessary for making system-level changes.
- Run the PowerShell Command: In the PowerShell window, paste the following command and press Enter:
sqlCopy code
Get-AppXPackage -AllUsers | Foreach {Add-AppxPackage -DisableDevelopmentMode -Register “$($_.InstallLocation)\AppXManifest.xml”}
This command will re-register all Windows apps and can often resolve issues with the Start Menu.
- Wait for the Process to Finish: The PowerShell command may take some time to execute, as it registers all the apps. Allow it to complete without interruption.
- Restart Your Computer: After the command has executed successfully, restart your computer to apply the changes.
Fix 7: Perform a System Restore
If you’ve tried various troubleshooting steps and the Start Menu issue persists, you can consider performing a system restore. System restore allows you to revert your Windows 11 operating system to a previous state when it was functioning correctly. Here’s how to do it:
- Open System Properties: Type “Create a restore point” in the Windows search bar and select the corresponding result to open the System Properties window.
- Access System Restore: In the System Properties window, click on the “System Restore” button. This will open the System Restore wizard.
- Select a Restore Point: In the System Restore wizard, click “Next” and choose a restore point from a time when your Start Menu was working correctly. You can also check the “Show more restore points” option for additional choices.
- Initiate the Restore: Click “Next” and then “Finish” to start the system restore process. Your computer will restart and begin the restoration.
- Wait for Completion: Allow the system restore process to complete. Your computer will restart again.
System restore will roll back your system files and settings to the chosen restore point without affecting your personal files. This can often resolve issues, including Start Menu problems, that were caused by recent changes or updates.
Fix 8: Check for Malware and Viruses
Malware or viruses can also interfere with the normal operation of Windows, leading to Start Menu issues among other problems. To ensure your system is free of malware:
- Install and Update Antivirus Software: Ensure you have reputable antivirus software installed and up to date.
- Run a Full System Scan: Perform a full system scan with your antivirus software to identify and remove any malware or viruses.
- Use Windows Security: In Windows 11, you can also use Windows Security for scanning and removing threats. Go to “Settings” > “Privacy & Security” > “Windows Security” and run a scan.
- Additional Scans: Consider using third-party anti-malware tools for a second opinion. Tools like Malwarebytes can be useful in detecting and removing stubborn threats.
By addressing malware or virus-related issues, you can potentially resolve Start Menu problems and ensure the overall security and performance of your Windows 11 system.
Conclusion
A non-responsive Start Menu in Windows 11 can be a significant hindrance to your productivity, but with the right troubleshooting steps, you can resolve this issue and get your PC back to peak performance. In this guide, we’ve covered the most common reasons behind the Windows 11 Start Menu not working and provided detailed instructions on how to fix it.
Remember, it’s essential to identify the root cause of the problem before attempting any solution. Whether it’s corrupted system files, outdated drivers, third-party software conflicts, pending updates, user profile corruption, or a PowerShell command, following these steps will help you restore the functionality of your Start Menu.
By following these troubleshooting tips, you can ensure that your Windows 11 experience remains smooth and efficient, allowing you to make the most out of this latest Microsoft operating system. Don’t let Start Menu issues slow you down; take control of your PC and enjoy the full benefits of Windows 11.
FAQs
The Start Menu can malfunction due to corrupted files, outdated drivers, or software conflicts.
You can use the System File Checker tool in Command Prompt with admin privileges.
Updating drivers through Device Manager can resolve Start Menu issues.
Uninstall recently added software to identify and resolve conflicts with the Start Menu.
Yes, pending updates can sometimes disrupt the Start Menu. Make sure your system is up to date.
Prachi Mishra is a talented Digital Marketer and Technical Content Writer with a passion for creating impactful content and optimizing it for online platforms. With a strong background in marketing and a deep understanding of SEO and digital marketing strategies, Prachi has helped several businesses increase their online visibility and drive more traffic to their websites.
As a technical content writer, Prachi has extensive experience in creating engaging and informative content for a range of industries, including technology, finance, healthcare, and more. Her ability to simplify complex concepts and present them in a clear and concise manner has made her a valuable asset to her clients.
Prachi is a self-motivated and goal-oriented professional who is committed to delivering high-quality work that exceeds her clients’ expectations. She has a keen eye for detail and is always willing to go the extra mile to ensure that her work is accurate, informative, and engaging.