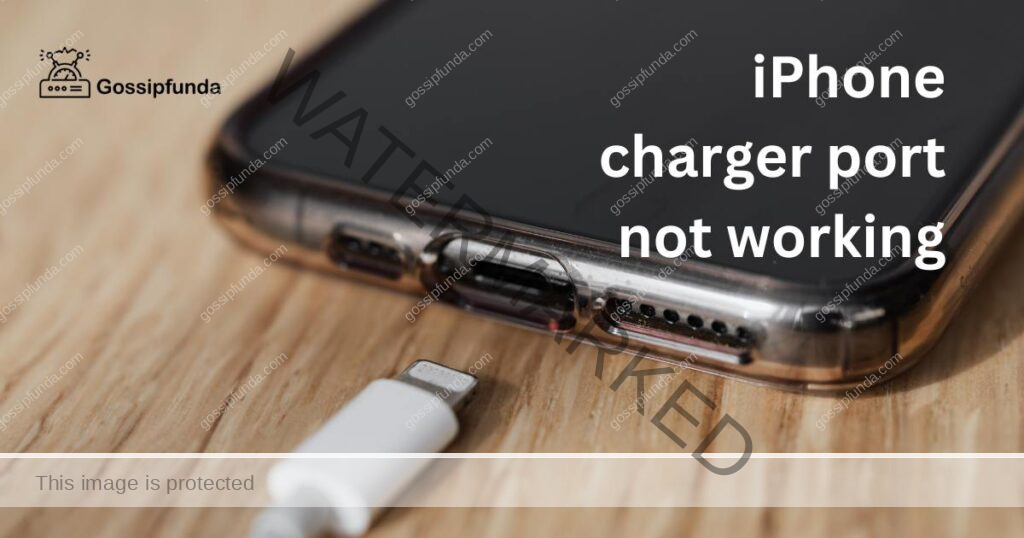
Imagine the frustration – you plug in your iPhone for a quick power-up, and…nothing. The dreaded iPhone charger port not working issue strikes! Fear not, iPhone loyalists. Whether you’re tech-savvy or a total newbie, we’ve got you covered. Dive in as we tackle the reasons behind this pesky problem and provide easy-to-follow solutions. Say goodbye to power woes and hello to a smoothly charging iPhone! This comprehensive guide will turn you into your own tech wizard, one step at a time. Let’s get started on your journey to victory over faulty iPhone charger ports. Don’t let a minor hitch stop you from enjoying your iPhone experience. Keep reading and be ready to reclaim your tech life!

Reasons why your iPhone charger port may not be working as expected
There are several potential reasons why your iPhone charger port may not be working as expected:
- Dirt and Debris: The accumulation of dust, lint, or debris inside the port can prevent the charging cable from making proper contact, impeding the charging process.
- Physical Damage: The charging port might have physical damage due to mishandling or an accident. This could include bending, breaking, or other distortions.
- Water Damage: If your iPhone was exposed to water or high humidity, it could lead to corrosion or short circuits inside the charging port, making it non-functional.
- Faulty Charging Cable or Adapter: Sometimes, the issue might not be with the port but with the charging cable or adapter. If they are damaged or not working correctly, they may not deliver the necessary power to charge the iPhone.
- Software Glitch: In some instances, a software bug or glitch might cause the iPhone to not recognize the charger, even though the physical components are all in working order.
- Worn-out Port: If your iPhone is older, the charging port may simply be worn out from regular use, leading to inefficient or no charging.
How to fix iPhone charger port not working?
Fix 1: Clean the Charging Port
- Step 1: Inspect the Port: First, use a flashlight to inspect your charging port for any visible debris, dust, or lint. Be gentle to avoid any damage.
- Step 2: Turn Off Your iPhone: For safety reasons, it’s crucial to turn off your device before you begin the cleaning process.
- Step 3: Choose a Cleaning Tool: To clean the port, use a new, clean toothbrush, a cotton swab, or a can of compressed air. Avoid metal tools, as they can cause damage.
- Step 4: Clean the Port: Gently clean the port using your chosen tool. If using a toothbrush or cotton swab, make sure to brush lightly to dislodge any debris. If using compressed air, hold the can about an inch away from the port and spray in short bursts.
- Step 5: Check Your Work: Inspect the port again with the flashlight. If you still see debris, repeat the cleaning process.
- Step 6: Test: Once the port is clean, turn on your iPhone and try to charge it again. If the problem was debris in the port, your phone should now charge correctly.
Fix 2: Check and Replace the Charging Cable or Adapter
- Step 1: Inspect Your Charging Cable: Inspect your charging cable for any visible signs of damage. Look for fraying, bent prongs, or any other physical abnormalities that could prevent proper charging.
- Step 2: Try a Different Charging Cable: If you have a spare iPhone charging cable, try using it to charge your device. This can help you determine whether the issue is with the cable or the iPhone’s charging port itself.
- Step 3: Inspect the Adapter: Just like the cable, the charging adapter can also be at fault. Examine it closely for any signs of physical damage or wear.
- Step 4: Try a Different Charging Adapter: If possible, use a different adapter to test if your current one is faulty.
- Step 5: Test: After switching the charging cable and/or adapter, try charging your iPhone again. If it starts charging, then the problem was likely with your charging cable or adapter, not the port.
If replacing these components doesn’t solve the problem, it’s time to explore other fixes or consult with a professional at an authorized Apple service center.
Fix 3: Hard Reset Your iPhone
A software glitch could be preventing your iPhone from charging properly. Performing a hard reset can clear minor software issues that may cause such problems.
- Step 1: Back Up Your Data: Before initiating a hard reset, ensure you back up all essential data. This includes contacts, photos, messages, and any other important information. Use iCloud or iTunes to backup securely.
- Step 2: Perform a Hard Reset: The process for a hard reset varies based on your iPhone model. Here’s how to do it for different models:
- For iPhone 8 or later: Press and release the ‘Volume Up’ button, then the ‘Volume Down’ button. Then, hold the ‘Side’ button until the Apple logo appears.
- For iPhone 7 or 7 Plus: Simultaneously hold the ‘Volume Down’ and ‘Sleep/Wake’ buttons until the Apple logo appears.
- For iPhone 6s or earlier: Simultaneously hold the ‘Home’ and ‘Sleep/Wake’ buttons until you see the Apple logo.
- Step 3: Test: Once your iPhone restarts, try charging it again. If a software glitch was the culprit, your device should now charge correctly. If it still doesn’t charge, it might be time to seek help from an Apple professional.
Fix 4: Update iOS Software
At times, an outdated iOS version could lead to charging issues. Keeping your software up-to-date can help you avoid such problems.
- Step 1: Check for Software Updates: Open the ‘Settings’ app on your iPhone. Go to ‘General’ and then select ‘Software Update’. If there’s an update available, you’ll see an option to download and install it.
- Step 2: Backup Your Data: As always, it’s important to backup your data before updating your iOS. Use iCloud or iTunes to backup your data.
- Step 3: Update the Software: Tap ‘Download and Install’. If asked, enter your passcode. You can also choose to install updates automatically by going to ‘Settings’, ‘General’, ‘Software Update’, and then customize your ‘Automatic Updates’ settings.
- Step 4: Test: Once your software is updated, try charging your iPhone again. If it was a software issue, the update should resolve the charging problem. If your iPhone charger port is still not working, it’s time to take your device to a professional.
Fix 5: Restore Your iPhone Using iTunes
If all else fails, restoring your iPhone to factory settings using iTunes can be a solution. This is a more drastic step as it will erase everything on your device.
- Step 1: Backup Your Data: Before you proceed, ensure you’ve backed up all your important data to iCloud or your computer. This includes photos, contacts, apps, and any other valuable data.
- Step 2: Connect Your iPhone to Your Computer: Using a good quality USB cable, connect your iPhone to a computer that has the latest version of iTunes installed.
- Step 3: Open iTunes: Once connected, open iTunes on your computer and select your device.
- Step 4: Restore iPhone: In the Summary panel, click on ‘Restore iPhone’. Confirm your decision and wait for the process to complete. Your iPhone will restart and should display the setup screen.
- Step 5: Set Up Your iPhone: Follow the prompts to set up your iPhone as new, or restore it from the backup you made earlier.
- Step 6: Test: After you’ve completed the setup process, try charging your device. If the issue was software-related, a restore should have resolved it. If your iPhone charger port is still not working, you should seek professional help. Contact Apple Support or visit an authorized service center for further assistance.
Read more: iPhone wireless charging not working
Fix 6: Check for Water Damage
Water damage could cause issues with your iPhone’s charging port. The steps below guide you on what to do if your iPhone has been exposed to water.
- Step 1: Disconnect Your Device: If your iPhone is plugged into a charger or any other device, unplug it immediately to avoid further damage.
- Step 2: Dry Your iPhone: Dry your iPhone thoroughly using a soft, lint-free cloth. Ensure no water is trapped in the charging port.
- Step 3: Use Silica Gel Packets: Silica gel packets can help absorb remaining moisture. Place your iPhone and some silica gel packets in a ziplock bag and let it sit for at least 24 hours.
- Step 4: Check Liquid Contact Indicator: Every iPhone has a Liquid Contact Indicator (LCI) that turns red when in contact with water. Check this indicator to confirm water damage.
- For iPhone 8 and later, the LCI is located in the SIM slot.
- For iPhone 7 and earlier, it’s inside the charging port.
- Step 5: Seek Professional Help: If your LCI is red or your iPhone still doesn’t charge after drying, contact Apple Support or visit an Apple Authorized Service Provider. They can provide a thorough diagnosis and potential solutions. Be aware that water damage isn’t typically covered by warranty, so repairs might come at a cost.
Remember, it’s critical to prevent water exposure to your iPhone to avoid such issues in the future.
Fix 7: Try Charging in Different Modes
Sometimes, trying to charge your iPhone in different modes can rectify the charging issue. Here’s how you can do it:
- Step 1: Charge in Airplane Mode: Switch your iPhone to Airplane Mode. This disables all wireless connections, reducing power consumption. To activate it, go to ‘Settings’ and toggle on the ‘Airplane Mode’ switch.
- Step 2: Charge While iPhone is Off: Another method is charging your device while it’s off. Power off your iPhone, then connect it to the charger. This eliminates all power consumption and allows maximum power for charging.
- Step 3: Test: After trying to charge your iPhone in these different modes, see if the charging issue is resolved. If your device is still not charging, consider trying the other solutions mentioned above or seek professional help.
- Step 4: Monitor Battery Health: Go to ‘Settings’, then ‘Battery’, and finally ‘Battery Health’. This section provides insights on your battery’s maximum capacity and peak performance capability. If your battery health is significantly degraded, it might be time for a battery replacement.
Remember, regularly monitoring your battery health can help avoid sudden charging or power issues.
Fix 8: Seek Professional Help
If you’ve tried all of the above steps and your iPhone charger port is still not working, it might be time to seek professional help. The problem could be a hardware issue that requires expert attention.
- Step 1: Contact Apple Support: Start by contacting Apple Support online or via phone. Explain the issue and the steps you’ve already tried. They might be able to offer additional troubleshooting steps.
- Step 2: Book an Appointment: If online support is unable to resolve the issue, book an appointment at an Apple Store or authorized service provider. Bring your device, charging cable, and adapter for the appointment.
- Step 3: Professional Inspection: Allow the professionals to inspect your device. They’ll be able to diagnose if the issue is due to a faulty charging port, internal hardware issues, or something else.
- Step 4: Repair or Replacement: Based on the diagnosis, the service provider might repair your charging port, replace internal hardware, or in some cases, replace your iPhone.
Remember, it’s important to seek professional help when necessary, to prevent causing more damage to your device.
Preventing Tips for iPhone Charging issues
Charging issues can be frustrating, but they can also be prevented. Here are some practical tips to avoid facing such problems:
- Use Original Apple Accessories: Always use Apple-certified cables and adapters. Counterfeit or non-Apple products may cause harm to your device’s charging system.
- Keep Your Charging Port Clean: Regularly inspect and clean your iPhone’s charging port. A can of compressed air, a new toothbrush, or a cotton swab can be used for gentle cleaning.
- Avoid Exposing Your iPhone to Liquid: Liquid exposure can cause serious damage. Avoid using your iPhone in the rain, near pools, or in other wet environments.
- Update Your iPhone Regularly: Always keep your iPhone’s software updated. Software updates often include fixes for bugs that could potentially impact charging.
- Avoid Physical Damage: Handle your iPhone, charger, and cables gently. Physical damage can lead to a multitude of issues, including charging problems.
- Monitor Battery Health: Regularly check your battery health in the iPhone settings. This can provide you with early warnings about potential battery issues.
Remember, a well-maintained iPhone not only lasts longer but also delivers a seamless user experience. By following these preventive measures, you can keep your device in top-notch condition.
Conclusion
An iPhone charger port not working can be a hiccup in your digital life. Luckily, there are several solutions at your fingertips. Whether it’s clearing dust from the port, updating software, or resorting to professional help, you’re not without options. These steps are designed to restore the seamless use of your device. So, wave goodbye to charging woes and return to enjoying your iPhone’s fantastic features. Remember, an informed user is a powerful one. Keep this guide handy for any future iPhone charging issues, and continue exploring the world with your beloved device. After all, our digital buddies deserve the best care!
FAQs
Your iPhone might not be charging due to debris in the port, a faulty cable, or software issues.
Use a clean toothbrush, a cotton swab, or a can of compressed air. Always turn off your device before cleaning.
A damaged port might prevent your cable from fitting properly. Physical damage or iPhone not charging could indicate a problem.
Yes, the charging port can be replaced by professionals at an Apple Store or an authorized service provider.
Dry your iPhone thoroughly, and use silica gel packets to absorb any remaining moisture. If the issue persists, consult a professional.
Keep the port clean, use authentic Apple charging equipment, and protect your device from physical damage or water exposure.
Yes, an outdated iOS version can cause charging issues. Always keep your software up-to-date.
Prachi Mishra is a talented Digital Marketer and Technical Content Writer with a passion for creating impactful content and optimizing it for online platforms. With a strong background in marketing and a deep understanding of SEO and digital marketing strategies, Prachi has helped several businesses increase their online visibility and drive more traffic to their websites.
As a technical content writer, Prachi has extensive experience in creating engaging and informative content for a range of industries, including technology, finance, healthcare, and more. Her ability to simplify complex concepts and present them in a clear and concise manner has made her a valuable asset to her clients.
Prachi is a self-motivated and goal-oriented professional who is committed to delivering high-quality work that exceeds her clients’ expectations. She has a keen eye for detail and is always willing to go the extra mile to ensure that her work is accurate, informative, and engaging.

