Monefy is a powerful budgeting app designed to help you take control of your finances effortlessly. If you find yourself losing money due to daily expenses or struggling to stick to your monthly budget, Monefy offers a smart solution to track and manage every transaction systematically. In this digital age, where carrying a physical diary is impractical, Monefy provides a convenient way to monitor your spending habits, ensuring you stay within your financial plans. Available for free on both the Play Store and the App Store, Monefy (developed by Aimbity AS, previously by Monefy Apps) is an essential tool for anyone looking to improve their financial health.
Procedure to Get Started with Monefy
To fully utilize the features of Monefy, follow the step-by-step procedure outlined below:
- Install Monefy on Your Smartphone: Monefy is compatible with both Android and iOS devices. Visit the Play Store or the App Store to download and install the app for free.
Setting Up Your Currency
After installing Monefy, the next step is to set up your preferred currency. To do this, tap on the menu icon (three dots) located at the top right corner of the screen. This will open the settings menu where you can customize various aspects of the app to suit your preferences.
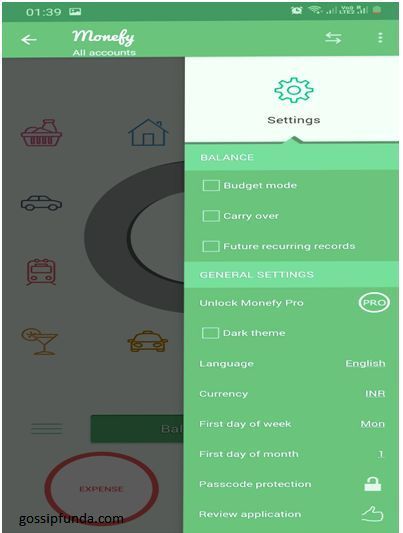
In the settings menu, you will find options such as language, currency, the first day of the week, password protection, and export to files. Customize these settings according to your needs to enhance your user experience.
You can also personalize the app’s appearance by changing the theme. This allows you to choose a color scheme that best fits your style, making the app more enjoyable to use.
Select Your Currency Option
To select your currency, navigate to the settings and tap on the currency option. Choose your preferred currency, such as Indian Rupee (₹), to ensure all your transactions are recorded accurately.
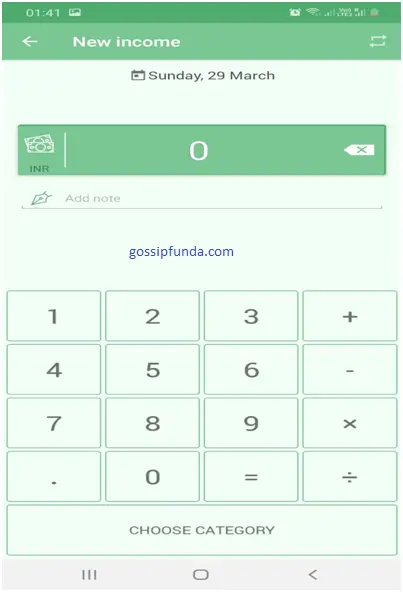
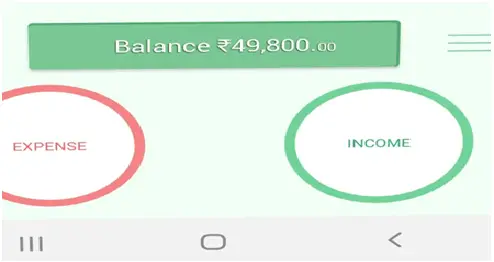
Add Your Income
To track your income, tap on the prominent green plus icon located at the bottom of the screen. This action will open a new screen where you can input the details of your income, including the date and the amount received. Properly recording your income is crucial for maintaining an accurate overview of your financial status.
Enter Income Description
Provide a detailed description of your income. This can include your salary, freelance earnings, or any other sources of income. You can also add notes for additional context and categorize your income under options like Deposit, Salary, or Savings to keep your records organized.
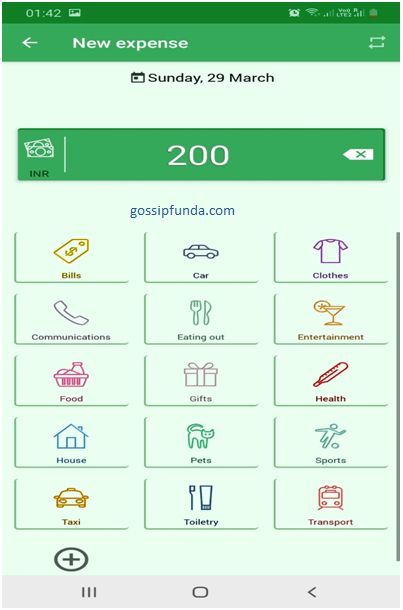
Add Expense
To record an expense, tap on the red minus sign located at the bottom left corner of the screen. A new screen will appear, allowing you to enter the amount spent, add a note describing the expense, and categorize it appropriately.
Enter Expense Description
When adding an expense, ensure you enter the correct amount and provide a clear description. Select a relevant category for the expense. If you can’t find an appropriate category, click on “Add More” to create a new one tailored to your specific needs.
Customize the Categories
To better organize your transactions, you can customize categories by tapping on the “Manage Categories” option. Here, you can add new groups, assign them relevant icons, and save them for future use. This feature allows you to tailor the app to your unique financial tracking needs.
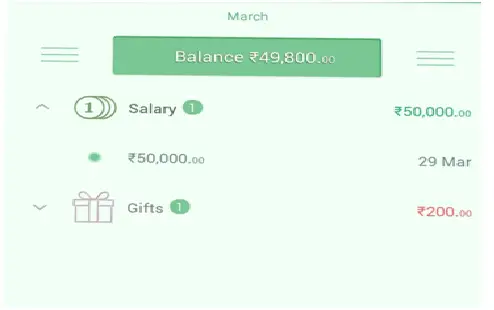
Check Transactions
Monitoring your transactions is simple with Monefy. Tap on the menu icon located at the top left corner and select the desired time interval to view your transactions. Whether you want to see daily, weekly, or monthly expenses, Monefy provides a clear and comprehensive overview.
Edit Transactions
If you need to make changes to any recorded transaction, simply tap on the menu button beside your balance, select the transaction you wish to edit, and update the necessary details. Remember to save your changes quickly to ensure they are reflected accurately in your records.
Transferring Cash to Cards
To transfer money to a card, tap on the transfer icon located at the top right corner of the screen. Next to the options icon, click on “Accounts” and then tap the “Add” button. Enter the amount you wish to transfer and select the payment option to complete the transaction seamlessly.
Enable Stop Boxing from Settings
For enhanced security across multiple devices, enable stop boxing from the settings menu. Navigate to settings, tick the dropbox option, and allow the necessary permissions. Please note that after the latest update, a premium account may be required to access this feature.
Summarize the Transactions
Monefy allows you to export your transaction data for better analysis. To generate a spreadsheet of your purchases over a specific period, go to settings and choose the “Export to File” option. Select your preferred export method, such as saving to Google Drive, Dropbox, ShareIt, Android Beam, Gmail, or Bluetooth. Choosing “Save to Drive” will add the transaction data to your Google Drive, where you can view it in an Excel sheet format. This organized data will help you understand your spending patterns more clearly.
Ensure that Dropbox and Google Drive are enabled to synchronize your files across devices, providing you with accurate totals and seamless access to your financial data.
Congratulations! You have successfully set up and navigated through Monefy. There are many other useful apps similar to Monefy, such as Expense Manager and Expensify, which will be covered in detail in our upcoming articles. Stay tuned to learn more about managing and saving your daily expenses effectively.
I’m Harshita Verma from Pune. Currency, I’m pursuing my second-year B.Com (Hons) from symbiosis college of arts and commerce. I’m also pursuing CFA and I can help you with financial as well as technical queries. I like books, deep talks and exploring life. I’d love to discuss your needs in this area as I m always looking for new challenges.