Since its release in 2008, Android has been an open-source project that has attracted many developers to contribute and enhance the user experience. Developers even added some functionalities which were never present in the original android version such as audio enhancement. But the most significant achievement of the developers is Custom ROM. In layman’s terms, custom ROM is like using features and functions of some other OS on your android smartphone. But with great technological development comes many errors and one of those errors is “ Signature Verification Failed Error 21 “. This error generally appears when you are trying to install a custom ROM on your android smartphone. Many people get panic when they see this error which is quite common but you don’t have to worry anymore, in this article we will see everything about this error and the ways to fix it.
What is Custom ROM?
Custom ROM is a customized version of android OS. These ROMs are developed with the contribution of many developers from across the globe. These customized operating systems can be installed on any smartphone. What makes these ROMs different from the stock ROMs is endless customization and extended update support. To install these ROMs on your smartphone all you need is a rooted android smartphone with an unlocked bootloader. Is it getting too much techie? Let’s see what rooting and bootloader are

What is Rooting?
Rooting is the process of getting complete control over your smartphone. I know you have command over your smartphone but what I mean is after rooting you can change even those settings which are kept hidden by the manufacturer. By default, some functionalities are not provided to the user to modify but with rooting, you have complete access to these settings. And to install custom ROM on your smartphone you must have a rooted smartphone.
What is Bootloader?
The bootloader is like the security guard of the android OS that guards the root functions in the android. It is responsible for the successful booting of the smartphone. By default, the bootloader is locked to prevent the user to tingle with the root directory of the android. However, if you have rooted your smartphone but forgot to unlock the bootloader then you won’t be able to boot your device. In this case, you might get stuck in a boot loop which is frustrating(trust me I have felt this).
So, to install a custom ROM you need a rooted smartphone + an unlocked bootloader. But you must know that unlocking the bootloader will wipe all your data stored therefore, it is advised to take a backup of your important data to another device.
Users sometimes get confused about whether unlocking the bootloader will void their smartphone’s warranty or not. Well, unlocking the bootloader by any means is not related to a void warranty. It’s rooting which will void the warranty. However, it varies from region to region but in many cases it is true.
What is Signature Verification Failed Error 21?
When you are trying to install a custom ROM but it somehow is not signed by the manufacturer. In this case, while installing the files authentication get fails and you see an error message “ Signature Verification Failed Error 21 “. This error is also known as Android Update Error 21.
There are two types of recovery in an android smartphone.
- Stock Recovery
This recovery comes inbuilt with every android smartphone. It is developed by the manufacturer itself so that users can fix some common issues like battery drainage, misbehaving of apps, etc.
- Custom Recovery
This recovery is developed by the contribution of many developers from across the globe. It is used when you want to install something which does not come with your smartphone. For example, if you want to install Gcam then you will use custom recovery for it. Custom recovery is also used to install custom ROMs and sometimes stock ROMs.
There are many custom recoveries on the internet, but some of the most trusted recoveries are Clockwork Mod Recovery and Team Win Recovery Project. These are popular because they are developed for almost every smartphone available in the market.
Clockwork Mod Recovery
It is one of the most widely used recoveries for an android smartphone. It supports almost every android version and smartphone available. But the only thing some users may find uncomfortable is it uses the power and volume buttons as navigation keys in its environment.
Team Win Recovery Project
TWRP is one of the popular custom recoveries when it comes to installing one. It features a touch-based navigation interface unlike the buttons based provided by CWM. This feature makes TWRP one of the most successful custom recoveries.
Now we are ready to fix the Signature Verification Failed Error 21.
How to fix Signature Verification Failed Error 21?
So when you try to install a new custom ROM in your smartphone, sometimes an error message “Sideload partition error” or “Signature Verification Failed Error 21” appears. This is mainly due to unsigned files of the ROM package that have you downloaded. No, you don’t have to download a signed one. All you need to do is turn the system verification OFF. And to achieve this we need a custom recovery as only custom recovery provides us to tingle settings that stock recovery doesn’t.
There are many custom recoveries available and a few are discussed above in this article also. However, you have to choose the recovery that is developed for your device only. Google “custom recovery for <your mobile device name>” without quotes and download the .img file for your device. After downloading the .img file, we have to install it. The installation process of a custom recovery is quite different from normal .apk files in android. To install a custom recovery, you need to unlock the bootloader of your phone else you get stuck in a boot loop. To unlock the bootloader in your device, there are many tutorials available on the internet. Just Google “ How to unlock bootloader in < your device name>” without quotes and follow the instructions.
There are two ways to install a custom recovery in an android smartphone. The first is by using the Official TWRP App which can be downloaded from Google Play Store and the other one is by using ABD tools and Fastboot. In this article, we will see both methods to install the custom recovery.
Important Message: If you somehow are unable to find the custom recovery for your smartphone then don’t try to use any other device’s .img file. This is a strict NO! Doing so will make your phone completely DEAD.
Official TWRP App
Official TWRP App is a third-party app available on Google Play Store that makes it super easy to install custom recoveries on your android smartphone. Just follow the simple steps given below.
- Step 1: Download the Official TWRP App from Google Play Store and open it.
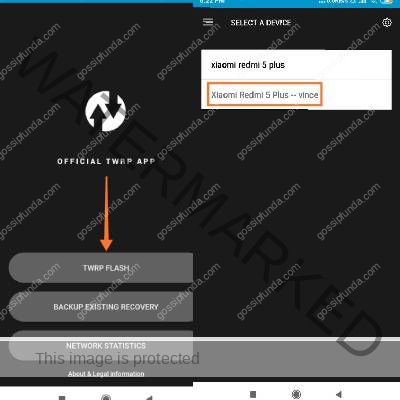
- Step 2: Now select TWRP Flash. Click on the pull-down menu of Select Device to choose the custom recovery .img file for your device. In the search device box, type your device name and select it.
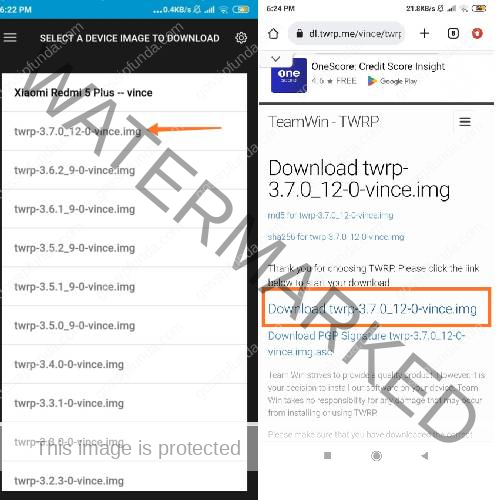
Step 3: Now you have to choose the latest version of custom recovery available for your device. After this, you will be redirected to the official page of TWRP to get your .img file downloaded.
Step 4: After downloading the .img file, open the Official TWRP App to install the custom recovery.
Using ADB Tools and Fastboot
If installing an app is a heavy task for you then you can try installing the custom recovery using Fastboot. For this method you need a USB cable to connect the smartphone to a PC/Laptop with USB debugging turned ON in it.
To turn ON USB debugging in your smartphone, go to Settings>About Phone>Build Number. Continuously touch on the build number and then you will see the message “You are now a Developer.” Now select the Developer options and toggle USB debugging to ON.
- Step 1: Download the fastboot.zip file from the internet and extract it on your PC/Laptop.
- Step 2: Download the custom recovery .img file designed for your smartphone from the internet. And rename it as recovery.img
- Step 3: Connect your smartphone to the PC/Laptop via USB cable with USB debugging ON.
- Step 4: Open the folder where you have extracted the fastboot.zip file and hold the shift key and press right-click in the space of the window. Select open command prompt here. A command prompt will get open.
- Step 5: Now reboot your smartphone in fastboot mode. Type the following command to do so.
ABD reboot bootloader
- Step 6: Now flash the custom recovery by typing the following command.
Fastboot flash recovery recovery.img
- Step 7: Now to fix the signature verification failed error 21 you need to reboot into the custom recovery. To do so, simply type the folloawing command.
Fastboot reboot recovery
Now after rebooting into TWRP recovery, you will see tons of options but don’t get panic. Find “install zip” and select it. Inside it you will find “toggle signature verification”, select it and you will see an enabled message at the bottom of the recovery screen. Hurray! You have successfully fixed the signature verification failed error 21. Now you can install the custom ROM as you were doing earlier and don’t worry you won’t see that error again.
Conclusion
If you follow the discussed steps carefully then this is an easy way to fix this signature verification failed error 21. However, you need to be extra careful while doing the above steps and you will be responsible for your actions. And make sure to download the .img file of the custom recovery designed for your mobile device only. If you face any problems, drop them in the comment section I will look at them.
FAQs
You can search for it on Google. Simply type “custom recovery for <your device name>” without quotes. Download it from only trusted sites.
You can find the steps to install a custom recovery on your device in the above article.