Is there anything more frustrating than trying to access your files on Windows and encountering a “File Explorer Not Responding” error? It’s a common issue that can bring your productivity to a screeching halt. But fear not, as we’re here to shed light on the reasons behind this problem and provide you with detailed solutions to get File Explorer back on track.
Understanding the File Explorer Not Responding Error
Before we dive into the solutions, let’s grasp what this error actually means. When you open File Explorer, it should smoothly display your files, folders, and drives. However, when it becomes unresponsive, you might notice that clicking, right-clicking, or even opening folders takes an eternity. This issue can manifest in various ways, like the infamous spinning circle or “Not Responding” message in the title bar.
Now, let’s explore the potential culprits behind this frustrating problem and, more importantly, how to fix them.
Reasons Behind File Explorer Not Responding
When you encounter the dreaded File Explorer Not Responding error on your Windows system, it’s essential to understand the underlying causes. Boldly stated, these are the reasons why your File Explorer might become unresponsive:
- Third-Party Shell Extensions: Certain poorly coded or incompatible third-party shell extensions can disrupt File Explorer’s smooth operation. These extensions integrate with File Explorer to provide extra features, but when they malfunction, they can render the application unresponsive.
- Corrupted System Files: The presence of corrupted or missing system files can significantly impact File Explorer’s performance. Windows relies on these files to function correctly, and if they’re damaged, you’re likely to encounter the “Not Responding” error.
- Software Conflicts: Conflicts between software applications can lead to instability in File Explorer. When multiple applications try to interact with it simultaneously, it can result in unresponsiveness. Identifying and resolving these conflicts is crucial.
- Disk Errors: Errors on your hard drive can have a cascading effect on various system processes, including File Explorer. Running into disk errors can cause slowdowns and unresponsiveness. Regularly checking and repairing disk errors is essential.
- Outdated or Incompatible Drivers: Drivers are the communication bridge between hardware and software. Outdated or incompatible drivers can disrupt this communication, causing File Explorer to hang or become unresponsive.
These are the key reasons behind the “File Explorer Not Responding” issue. Understanding these root causes is the first step in effectively troubleshooting and resolving this frustrating problem.
Don’t miss: Southwest Airlines error code 503999999
How to Fix File Explorer Not Responding?
Fix 1: Disabling Problematic Third-Party Shell Extensions
One common culprit behind the “File Explorer Not Responding” error is problematic third-party shell extensions. These extensions, designed to enhance File Explorer’s functionality, can sometimes lead to instability. Here’s how to identify and disable them:
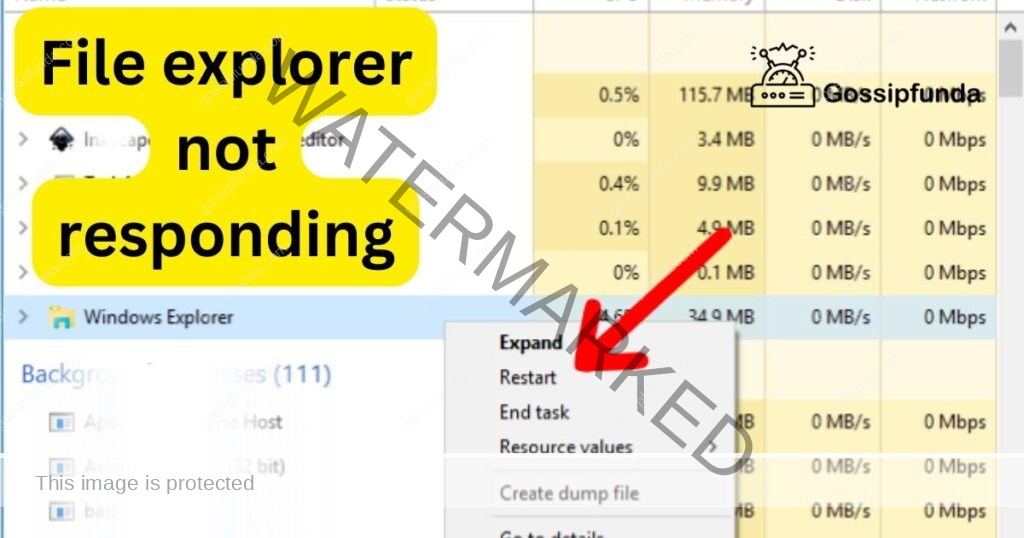
- Open Task Manager: Press Ctrl + Shift + Esc to open the Task Manager. This utility allows us to manage running processes.
- Restart Windows Explorer: Locate “Windows Explorer” in the list of processes under the “Processes” tab. Right-click on it and select “Restart.” This action will attempt to restart File Explorer and might resolve the issue.
- Check for Persistence: If the problem persists after restarting Windows Explorer, proceed to the next steps.
- Exit Windows Explorer: Still within the Task Manager, if the issue persists, right-click on “Windows Explorer” again and choose “End Task.” This will forcefully terminate File Explorer.
- Run File Explorer as Administrator: To continue, you’ll need to open File Explorer with administrative privileges. In Task Manager, click on “File” in the top left corner and select “Run new task.”
- Restart File Explorer: In the “Create new task” dialog box, type explorer.exe and check the box that says “Create this task with administrative privileges.” Click “OK” to run File Explorer as an administrator.
- Observe Functionality: Now that File Explorer is running with administrative privileges, check if it’s responsive. If it behaves correctly, the issue may indeed be related to third-party shell extensions.
- Disable Shell Extensions: To pinpoint the problematic extension, you’ll need to disable them one by one:
- Press Win + R: To open the Run dialog, press Win + R.
- Enter Shell Command: In the dialog box, type shell:extensions and press Enter. This command opens the Shell Extensions window.
- Disable Extensions: In the Shell Extensions window, you’ll see a list of installed extensions. Disable them by toggling their switches to the off position, one at a time.
- Test File Explorer: After disabling an extension, return to File Explorer and see if it’s now responsive. Repeat this process, disabling one extension at a time and testing File Explorer’s functionality until you identify the problematic one.
- Remove or Update Problematic Extension: Once you’ve identified the troublesome extension, consider either removing it or updating it to a newer, compatible version. Check the extension’s developer website or support resources for guidance.
- Revert Administrative Privileges: Finally, close File Explorer and return to Task Manager. Run File Explorer again without administrative privileges by typing explorer.exe and unchecking the “Create this task with administrative privileges” box.
By following these steps, you can potentially resolve the File Explorer Not Responding error caused by problematic third-party shell extensions. It’s a systematic way to identify and address the issue while ensuring that File Explorer functions smoothly.
Fix 2: Repairing Corrupted System Files
Corrupted system files can be a major underlying cause of the “File Explorer Not Responding” error. Fortunately, Windows provides a built-in tool to scan and repair these files. Here’s how to do it:
- Open Command Prompt as Administrator: Press Win + X to open the Power User Menu, and choose “Windows Terminal (Admin)” or “Command Prompt (Admin).” This will launch Command Prompt with elevated privileges, which are necessary for system file repairs.
- Run the System File Checker (SFC) Scan: In the Command Prompt window, type the following command and press Enter: sfc /scannow
The System File Checker will now begin scanning your system for corrupted or missing files. This process may take some time, so please be patient.
- Follow On-Screen Instructions: During the scan, you might be prompted to take specific actions, such as confirming file repairs. Follow any on-screen instructions provided by the System File Checker.
- Wait for Completion: Once the scan is complete, the tool will display a message indicating whether any issues were found and repaired. If it reports that it found and repaired issues, this could be the solution to the “File Explorer Not Responding” error.
- Restart Your Computer: After the scan is finished, it’s essential to restart your computer to ensure that the repaired system files take effect.
- Test File Explorer: After the restart, open File Explorer and see if it’s now responsive. If the issue was indeed related to corrupted system files, it should be resolved.
The System File Checker is a powerful tool for diagnosing and fixing problems related to system files. By following these steps, you can potentially resolve the “File Explorer Not Responding” error caused by corrupted files, ensuring the smooth operation of File Explorer.
Fix 3: Resolving Software Conflicts
Conflicts between software applications can lead to File Explorer becoming unresponsive. Here’s how to troubleshoot and resolve these conflicts:
- Open System Configuration: Press Win + R to open the Run dialog, type msconfig, and press Enter. This will open the System Configuration window.
- Disable Non-Microsoft Services: In the System Configuration window, go to the “Services” tab. Check the box that says “Hide all Microsoft services.” This will prevent non-Microsoft services from starting during boot.
- Disable Startup Items: Next, navigate to the “Startup” tab within the System Configuration window and select “Open Task Manager.”
- Disable Startup Applications: In Task Manager’s “Startup” tab, disable all startup items. This step prevents third-party applications from launching at startup.
- Apply Changes and Restart: Close Task Manager and return to the System Configuration window. Click “OK” and restart your computer.
- Gradually Re-enable Services: After the restart, gradually re-enable services and startup items one by one, testing File Explorer’s functionality after each re-enablement. This process will help you identify the conflicting software.
- Identify the Problematic Software: When you find that File Explorer becomes unresponsive after enabling a specific service or startup item, you’ve likely identified the problematic software. Consider updating, repairing, or uninstalling it to resolve the conflict.
- Perform Regular System Reboots: To prevent future conflicts, make it a habit to restart your computer regularly. This can help ensure that software conflicts don’t accumulate over time.
By systematically disabling and re-enabling services and startup items, you can identify and resolve software conflicts that may be causing the “File Explorer Not Responding” error.
Fix 4: Checking and Repairing Disk Errors
Disk errors can lead to slowdowns and unresponsiveness in File Explorer. Here’s how to check and repair disk errors:
- Open Command Prompt as Administrator: Press Win + X to open the Power User Menu and select “Windows Terminal (Admin)” or “Command Prompt (Admin).”
- Run the Check Disk Utility (CHKDSK): In the Command Prompt window, type the following command and press Enter: chkdsk /f
You may be prompted to schedule the check for the next system restart. Type Y and press Enter to confirm.
- Restart Your Computer: After scheduling the disk check, restart your computer to initiate the process. CHKDSK will scan and repair disk errors during the startup phase.
- Wait for Completion: Depending on the size of your disk and the extent of errors, the process may take some time. Allow CHKDSK to complete the scan and repair.
- Review the Results: After your computer restarts and the disk check is complete, open the Event Viewer to review the results. Look for any entries related to CHKDSK to ensure that errors were addressed.
- Test File Explorer: Once the disk check is finished, open File Explorer and check if it’s now responsive. Disk errors could have been a root cause of the issue, and resolving them should improve File Explorer’s performance.
Running CHKDSK can help address disk-related problems that might have been contributing to the File Explorer Not Responding error.
Fix 5: Updating Outdated or Incompatible Drivers
Outdated or incompatible drivers can disrupt the communication between your hardware and the operating system, leading to issues with File Explorer responsiveness. To address this problem, follow these steps to update your drivers:
- Open Device Manager: Right-click on the Start button and select “Device Manager” from the context menu.
- Identify Problematic Drivers: In Device Manager, look for any devices with a yellow triangle or an exclamation mark icon next to them. These symbols indicate that there’s an issue with the respective drivers.
- Update Drivers: Right-click on the device with driver issues and select “Update driver.” Choose the option that says “Search automatically for updated driver software.”
- Follow On-Screen Prompts: Windows will now search for and install the latest driver updates from the internet. Follow any on-screen prompts to complete the process.
- Repeat for Other Devices: Continue this process for any other devices listed in Device Manager with driver-related problems.
- Reboot Your Computer: After updating all necessary drivers, restart your computer to ensure that the changes take effect.
- Test File Explorer: Once your computer restarts, open File Explorer and verify if it’s now responding as expected. Updated drivers should resolve any issues related to driver compatibility.
Updating drivers is essential to maintain the stability and performance of your system. Outdated or incompatible drivers can be a common cause of File Explorer unresponsiveness, and keeping them up-to-date can help prevent such problems.
Fix 6: Creating a New User Profile
Sometimes, issues with File Explorer may be linked to your user profile. Creating a new user profile can help isolate and resolve these problems:
- Open Settings: Click on the Start button, then select the gear-shaped icon for Settings.
- Navigate to Accounts: In the Settings window, select Accounts.
- Add Someone Else to This PC: Under the “Family & other users” section, click on “Add someone else to this PC.”
- Create a Microsoft Account: Follow the prompts to create a new Microsoft account. You can use your existing email address or create a new one.
- Change Account Type: After creating the new account, click on it in the Other users section and select Change account type. Set it as an Administrator account.
- Sign Out: Sign out of your current user account and sign in with the newly created account.
- Transfer Files: To access your files, you may need to transfer them from your old user profile to the new one. You can do this by copying files from your old user profile folders to the corresponding folders in the new profile.
- Test File Explorer: Open File Explorer using the new user profile and check if it’s responsive. If File Explorer works correctly in the new profile, it suggests that the issue was specific to your old user profile.
Creating a new user profile can be an effective way to resolve issues related to user-specific settings or corruption in your existing profile. It provides a fresh start for File Explorer and other system processes.
Fix 7: Performing a Windows Repair Install
If all previous fixes have failed, and you’re still facing the “File Explorer Not Responding” issue, performing a Windows repair install may be your last resort. This process involves reinstalling Windows while preserving your files and applications. Here’s how to do it:
- Create Windows Installation Media: You’ll need a Windows installation media (USB drive or DVD) for this procedure. If you don’t have one, you can create it using the official Windows Media Creation Tool.
- Insert Installation Media: Insert the Windows installation media into your computer and restart it.
- Boot from the Media: During the startup process, you’ll need to boot from the installation media. You might need to press a key (usually F2, F12, or Del) to access the boot menu and select the installation media as the boot device.
- Select Language and Keyboard Preferences: Once the Windows setup screen appears, select your language, time, currency, and keyboard preferences, then click “Next.”
- Click “Install Now”: On the next screen, click “Install Now,” but don’t enter a product key if prompted.
- Choose “Custom: Install Windows Only”: Select the option that says “Custom: Install Windows only (advanced)” to proceed.
- Select Your Current Windows Installation: You should see a list of partitions. Choose the partition that contains your current Windows installation (usually labeled “Drive 0 Partition 2” or something similar) and click “Next.”
- Follow On-Screen Prompts: Follow the on-screen prompts to complete the repair install. Windows will reinstall the operating system while preserving your files, applications, and settings.
- Wait for Completion: The installation process may take some time, so be patient and allow it to complete.
- Restart Your Computer: After the repair install is finished, your computer will restart.
- Test File Explorer: Once your computer restarts, open File Explorer and check if it’s now responsive. The repair install should have resolved any underlying issues with Windows.
A repair install is a comprehensive solution that can address a wide range of system problems. However, it should be considered a last resort, as it involves reinstalling Windows and can take some time to complete. Be sure to back up your important data before attempting this fix.
Fix 8: Performing System Restore
If you’ve recently encountered the “File Explorer Not Responding” issue after making system changes or installing new software, using the System Restore feature can help revert your computer to a previous state when it was working correctly. Here’s how to perform a System Restore:
- Search for “System Restore”: Type “System Restore” into the Windows search bar and select “Create a restore point” from the search results.
- Open System Restore: In the System Properties window that appears, go to the “System Restore” tab and click the “Open System Restore” button.
- Choose a Restore Point: In the System Restore wizard, click “Next” to see a list of available restore points. Choose a restore point that predates the appearance of the “File Explorer Not Responding” issue.
- Start the Restore Process: Click “Next” and then “Finish” to start the System Restore process. Your computer will restart and begin the restoration.
- Wait for Completion: The restoration process may take some time. Your computer will restart automatically when it’s finished.
- Test File Explorer: After your computer restarts, open File Explorer and check if the issue is resolved. System Restore should bring your system back to a state where File Explorer was functioning correctly.
System Restore can be an effective way to undo recent changes that may have caused issues with File Explorer. However, it’s essential to choose a restore point that doesn’t remove critical files or applications you need.
Preventing the File Explorer Not Responding Issue
While it’s essential to know how to fix the File Explorer Not Responding problem, taking preventive measures can help you avoid encountering it in the first place. Here are some tips to keep File Explorer running smoothly:
- Regularly Update Windows: Ensure that your Windows operating system is up to date. Microsoft releases updates that include bug fixes and improvements that can address underlying issues with File Explorer.
- Keep Drivers Updated: Regularly update your hardware drivers, especially graphics and storage drivers. Outdated drivers can lead to compatibility issues and cause File Explorer to become unresponsive.
- Install Software Responsibly: When installing new software, be cautious about the sources you download from. Only download and install applications from reputable sources to reduce the risk of conflicts and system instability.
- Avoid Overloading Context Menus: Be mindful of adding too many items to File Explorer’s context menus through third-party applications. An overcrowded context menu can lead to performance issues.
- Organize Your Files: Maintain an organized file system. Having too many files and folders cluttered on your desktop or in your Documents folder can slow down File Explorer. Regularly clean up and organize your files.
- Use Antivirus Software: Install and regularly update reliable antivirus and anti-malware software. Viruses and malware can disrupt the functioning of File Explorer, so protecting your system is crucial.
- Monitor Startup Programs: Review and manage the programs that launch at startup. Unnecessary startup programs can consume system resources and potentially conflict with File Explorer.
- Be Cautious with Third-Party Extensions: If you use third-party shell extensions, be selective and keep them updated. Disable or remove any extensions that are causing problems.
- Maintain Adequate System Resources: Ensure your computer has enough RAM and disk space to handle the demands of File Explorer and other applications. Running low on system resources can lead to unresponsiveness.
- Create Regular Backups: Frequently back up your important files and system settings. In case you encounter issues with File Explorer, having backups can save you from data loss.
By following these preventive tips, you can minimize the chances of encountering the “File Explorer Not Responding” error and enjoy a smoother and more efficient computing experience.
Conclusion
Dealing with a File Explorer Not Responding error can be exasperating, but armed with the knowledge of its potential causes and solutions, you can navigate this issue with confidence. Whether it’s disabling problematic shell extensions, repairing corrupted system files, or resolving software conflicts, there are steps you can take to restore File Explorer to its responsive self.
By following the detailed procedures outlined in this guide, you’ll be better equipped to troubleshoot and resolve the issue, ultimately ensuring a smoother computing experience. Remember that patience is key when diagnosing and fixing these problems, and don’t hesitate to seek professional assistance if needed. Your files and productivity are worth it.
FAQs
It can happen due to conflicts, corrupted files, or problematic extensions.
Use Task Manager and disable them one by one.
Use System File Checker (SFC) to scan and repair them.
Run CHKDSK to check and repair disk errors.
Prachi Mishra is a talented Digital Marketer and Technical Content Writer with a passion for creating impactful content and optimizing it for online platforms. With a strong background in marketing and a deep understanding of SEO and digital marketing strategies, Prachi has helped several businesses increase their online visibility and drive more traffic to their websites.
As a technical content writer, Prachi has extensive experience in creating engaging and informative content for a range of industries, including technology, finance, healthcare, and more. Her ability to simplify complex concepts and present them in a clear and concise manner has made her a valuable asset to her clients.
Prachi is a self-motivated and goal-oriented professional who is committed to delivering high-quality work that exceeds her clients’ expectations. She has a keen eye for detail and is always willing to go the extra mile to ensure that her work is accurate, informative, and engaging.


