Android studio app keeps stopping & rename the project. If you are irritated why your android studio app keeps crashing, here you will get your answer. Keep reading to know more. I am working on an application and each time I try to run it, I receive the following message: Unfortunately, MyApp has stopped.
Each moment an Android application fails to function (or the entire Java application, for the matter) it is an Stack trace The console is logged to (in this instance logcat). This trace of the stack contains crucial information to resolve your problem. Click on the logcat trace to see it. You can also hit the alt + 6 . Check that your computer or other device has been chosen in the Devices panel. Then, you can try to locate the trace for the stack. There might be lots of data that is logged into logcat, therefore it may be necessary to scroll. The easiest way to find the trace of the stack is to delete your logcat (using the recycle bin to the right) and allow the application to crash.
Android studio app keeps stopping
Android studio app keeps stopping & renaming projects. Does your android studio app keep crashing? You have written all the codes right. Still, you are facing this issue again and again. Well, there are many reasons for them. We will see those reasons in this article and try to resolve them.
Android studio stops working because, due to some issues, it faces an unexpected exit. This unexpected exit can be due to many reasons. Or the other reason is that your app is not able to handle the exception thrown by the program. If the code is written in native java, the exception handling is thrown are SIGSEGV.
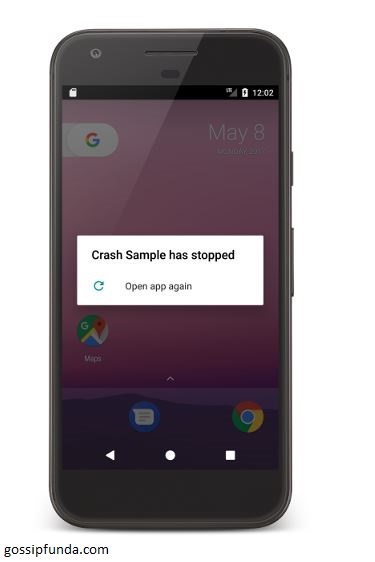
When this kind of exception handling happens, the app gets crashed and shows a message that the app has been crashed,
We are going to look into the causes of this crash, and we will resolve them.
Don’t Miss: Android studio Software keeps stopping
Clean your phone cache memory
If you are testing your app on your phone, one of the reasons to crash your app is your phone cache memory. It happens when your phone’s cache memory gets filled, and you don’t clean it. So, when you start running your new app, it needs some cache memory to run, and the app could not find it. So the app gets crashed.
To resolve this problem, you need to clear your phone cache memory. To clean your cache memory, go through these steps.
Step 1. Open your phone setting.
Step 2. Go to the phone store and open it.
Step 3. On the bottom of the page, you will find the cache. Tap on it.
Step 4. When you tap it, a pop-up message will appear, click OK. Now your cache memory will get clean in a moment.
Now you can again try to run your program.
Reinstall the app
Many of the times the issue happens it that when you try to install the app from the android studio, the app did not get installed correctly. In that case, the app keeps crashing. To resolve this problem, you need to reinstall the app on your phone.
First of all, you need to uninstall the app from the phone. To uninstall the app, tap on the app for a second, click on info, a new page will appear, then click on the uninstall app. This will uninstall the app from the phone.
Now you have to again install the app on your device. To install the app, you only have to click the run button on the android studio.
This will install the app on your device.
Network issues
One of the major problems is that if your app uses the internet to fetch data and your internet is not fast enough; your app will crash. To resolve this problem, all you can do is to have a good internet connection.
Issues in code
This is also one of the biggest issues. The issues in your code will crash your app because due to issue in code, the will now be able to compile, and it will generate the run time error and the app will exit. To resolve this, you need to check your code thoroughly and make sure that there is no issue in the code.
You can also take the help of a logcat to trace your issue. We have talked about logcat in another article. You can read it here.
Issues with emulator
When you use an android emulator, then also some issues happen when your app gets crashed. It is probably the not proper installation of the emulator. All you need to fix this problem is that you have to reinstall the emulator on your system. It will fix the problem.
If you still can’t fix the problem, then you need to check where the problem. We will now see how to do it.
Reading stack trace
If you have done all the things above we mentioned and you still can’t fix the problem now you need the trace the problem. To do that, you need to take the help of the stack trace. The stack trace will help you in finding the problems which are causing the crash. You can use the stack trace tool available in the logcat window.

The stack trace gives two kinds of information about the crash.
- The kind of exception happened
- Where the exception has happened in the entire code.
These two things will help to tace the problem and resolve it.
Memory errors
When you are using the emulator on a low memory computer, it leads to the crash of the app. You can fix it by fixing the memory usage of the emulator. You can do this by going to the emulator settings page and fix all the issues.
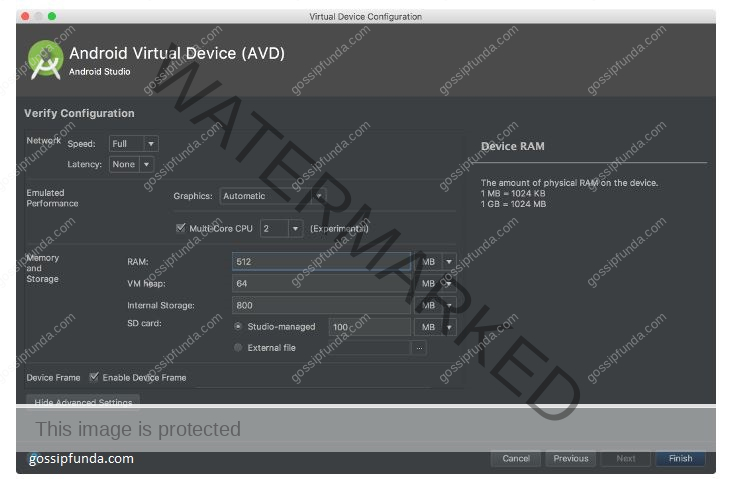
You can fix how much the amount of memory can be used by the app—the amount of graphics used by the app and a lot of other things.
This is all for the android studio app keeps stopping.
Android studio rename project
Android studio app keeps stopping & rename project. There comes a time when you want to rename your project, but you can’t because the android studio does not give direct access to change the name of the project. So here we are helping you to do it. There are multiple of the process to do it. We will see most of the methods. Keep reading to know about it.
METHOD 1
Step 1. Start your project.
Step 2. Open the manifest.xml file.
Step 3. android:label=”@string/app_name” write this code. On the place of app_name write the name of the project you want.
This is the first method of how you can change the name of the project.
METHOD 2
Step 1. Open the project.
Step 2. Select the project name and click the setting button.
Step 3. Click on hide empty middle package.
Step 4. Right-click on the androidride folder. Then click on the setting button
Step 5. Click on the refactor and then on the rename.
Step 6. A warning message will pop-up. Click on rename.
Step 7. Input the name of the applicationt. I will keep it abc.
Step 8. Click refactor and then click do refactor.
Step 9. Right-click on the myapplication folder. Then click on the setting button
Step 10. Click on the refactor and then on the rename.
Step 11. A warning message will pop-up. Click on rename.
Step 12. Input the name of the application. I will keep it test.
Step 13. Click refactor and then click do refactor.
Step 14. Now you have to change application id, click on build.gradle, then on change application id.
Step 15. Now a page opens there find application id change it to com.abc.text
Step 16. Hit the sync now option.
Now the name of your application has been renamed.
METHOD 3
In this method, we are going to use the old project name to demonstrate things.
Step 1. Right-click on the package name which is com.abc.text.
Step 2. Hit on refactor and then select move.
Step 3. Select move package “com.abc.txt,” to another package.
Step 4. Click OK.
Step 5. Now when you click OK, you will get a list of warning messages with the list of folders to move. Hit Yes.
Step 6. A new dialog box will appear for entering the name of the project. Enter the name of the project except for the last part. For example, if you want to name the project “com.abc.def” enter till “com.abc”.
Step 7. Now a new pop-up will appear asking for the folder does not exist want to create a new folder. Hit Yes.
Step 8. Hit do refactor.
Step 9. Now we will enter the last part of the name for the project. To do so, right-click on the application folder name.
Step 10. Now, you have to hit refactor and then click on the rename option.
Step 11. Again you will get some warning; click OK.
Step 12. Enter the new name, def. And click OK.
Step 13. Now again, you have to click on do refactor.
Step 14. Now if you want you can remove those old files. You can select multiple of packages at once and press the delete button.
Conclusion
Android studio app keeps stopping & rename project. We have seen how to resolve the problem related to the android studio app, not working. We tried to make easy to tackle those problems. It is not hard to resolve them. We have also seen how to rename the project. These things are quite easy to do. I hope you liked the post.
I am Abhinav Mishra. I’m from Bhagalpur, Bihar, B.tech from Computer Science. Apart from writing I also work as a Web Developer. Technology is my passion, and writing is my hobby for me. I love it that’s why I do it.


