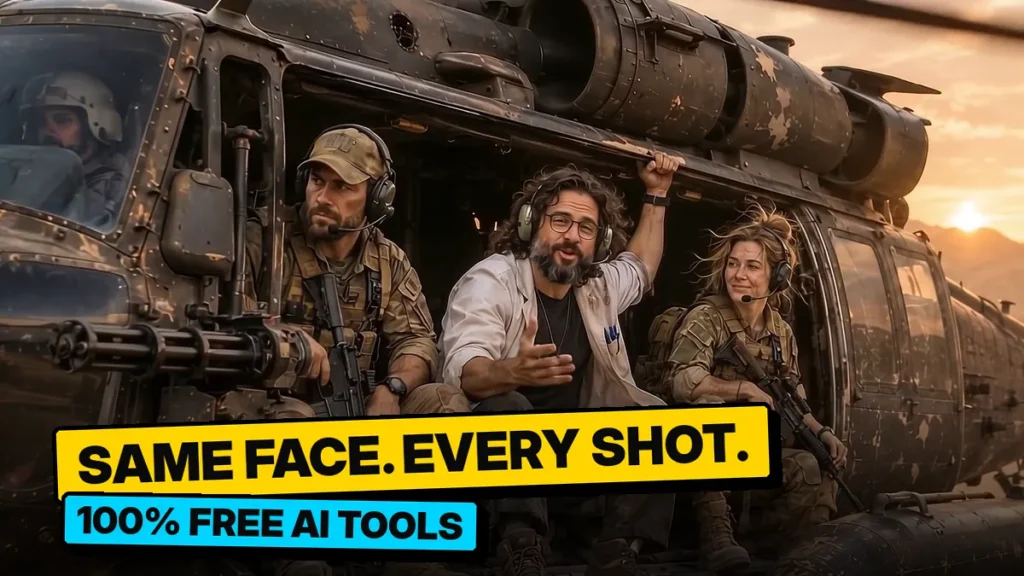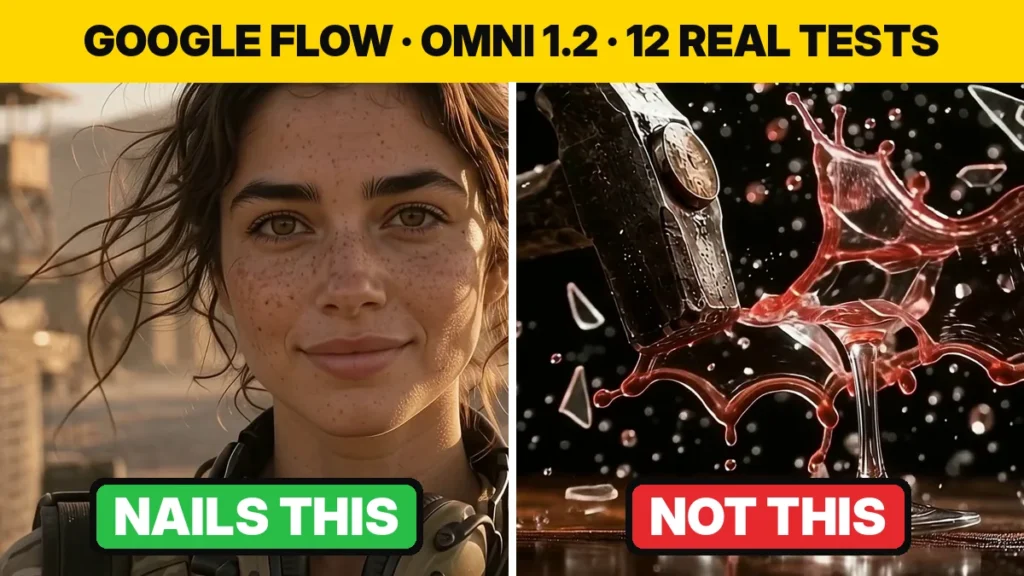

An AI avatar video lets one character appear in every clip with the same face and the same voice, and with Google Flow and Gemini Omni you can make one without filming yourself. In this tutorial I made the official Flow avatar (the @me avatar), then switched to an AI character I made in ChatGPT, kept his face from every angle with a character sheet, and put him on a green screen so he can stand anywhere. Every prompt I used is below.
Quick answer: Google Flow has two ways to put a person into an AI avatar video. Way 1: open Flow on your computer, click your profile picture, choose Create avatar, scan the QR code with your phone and record your face and voice; then type @me in a prompt. Way 2 (no real face): make a character image in ChatGPT, add it in Flow under Agent settings → Agent instructions → + Reference, and describe the face, clothes and voice once. In my tests (Google AI Pro, 15 November 2026) an 8-second clip made with Omni 1.2 Flash cost 24 credits.
Two ways to put a person into an AI avatar video
Way 1: Flow avatar (@me) | Way 2: your own AI character | |
|---|---|---|
| What you record | Your real face (head turns) and your voice (numbers read aloud) | Nothing. One image from ChatGPT or another tool |
| How you call it | Type @me in the prompt | Saved in Agent instructions with a reference image |
| Face | Your own | The AI character |
| Works in | Flow and the Gemini app (same avatar) | The Flow project where you save it |
| Best for | Creators who want to appear themselves | Faceless channels and privacy |

I use Way 2 for my channel because I don’t want to show my real face. In the screenshots below, my real face is covered with my AI character for privacy. Every video in this tutorial was generated in Flow with the Omni 1.2 Flash model (Omni Flash 1.2), the default in my Agent settings.
Way 1: Create your Google Flow avatar
According to Google’s Flow avatar help page, an avatar is a visual and audio likeness of yourself that you can use as a reference in Flow. The same page says avatars are not available in the EEA, the UK or Switzerland.
Before you start, check three conditions from Google’s Gemini help page on avatars:
- Plan: creating the avatar only needs a personal Google Account, but making a video with it needs a Google AI plan.
- Language: avatars are currently supported in English only.
- Age: you must be 18 or older.
I tested on a Google AI Pro plan on 15 November 2026.
Step 1: Start on your computer
- Open Google Flow, click your profile picture (top right) and click Create avatar.

- A dialog asks you to scan the QR code with your phone or tablet. If the scan doesn’t work, type the short link shown under the code into your phone’s browser.
- Use the same Google account on the computer and the phone. The dialog says so too.

My tip: the Flow app on my phone didn’t show me the option, so I started on the computer and used the QR code. That worked first time.
Step 2: Agree and read the tips on your phone
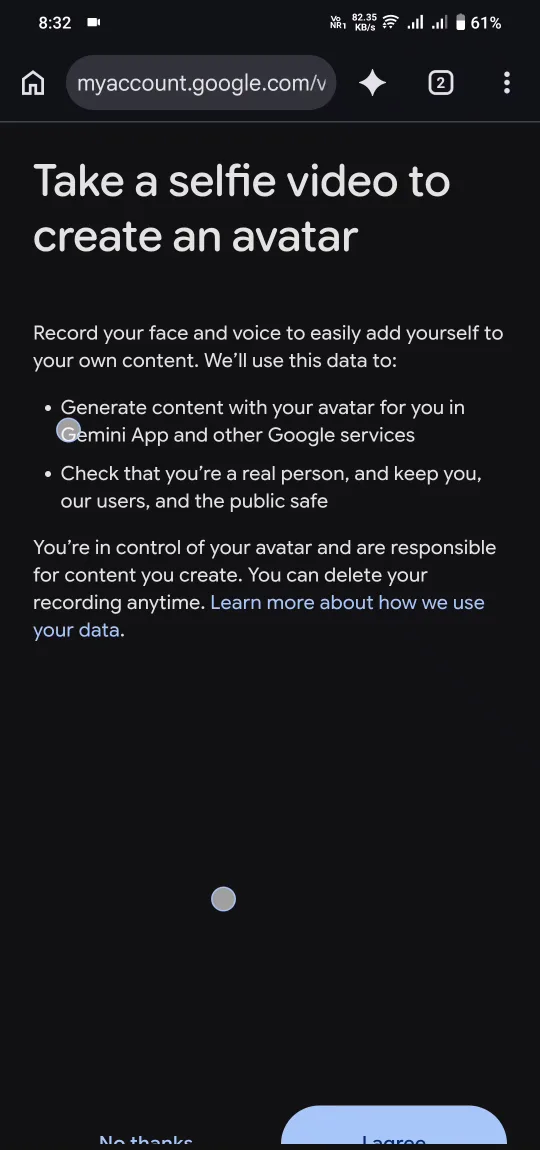
The phone opens a page called Take a selfie video to create an avatar. Tap I agree.
The next screen lists the tips that decide how good your avatar looks:
- Hold the phone at eye level.
- Use lighting that isn’t too dim or too bright.
- Glasses are fine, but no sunglasses, masks or hats.
- Choose a quiet place with no other voices.
- No people or images of faces in the background.
- It must be done by the account owner, and minors aren’t allowed to record themselves.

Step 3: Turn your head, then read the numbers
- Tap Start, allow the camera and microphone, and keep your face inside the circle.
- Turn your head right, back to the centre, then left, and back again. Each step finishes when the dot turns green.

- Read the numbers out loud in English as they appear.

- When the phone says You can now return to your other device, you’re done.
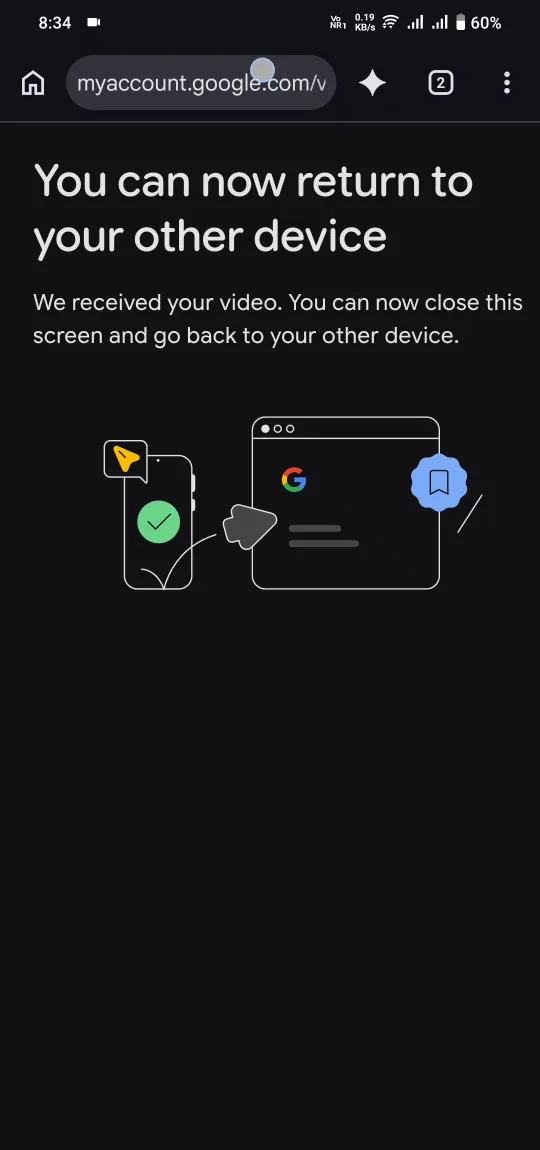
If you screen record this part, your phone may show a tip that sound from the microphone can’t be recorded while Record screen is on. That’s expected: the recording of your screen has no voice, but the avatar recording still works.

Step 4: Use the avatar with @me
Back on the computer, Flow sets up the avatar and shows: “Use your avatar by typing @me in your prompt, or add it from the asset menu.” You can also Replace or Delete it here.

Step 5: Make a video with @me
- In the agent’s prompt box, type
@. The asset menu opens with your avatar at the top, labelled Me · Avatar. - Select it and click Add to prompt. It appears in the text as a small Me chip.

- Write the rest of the prompt: the scene, your line in English, and the voice you want.
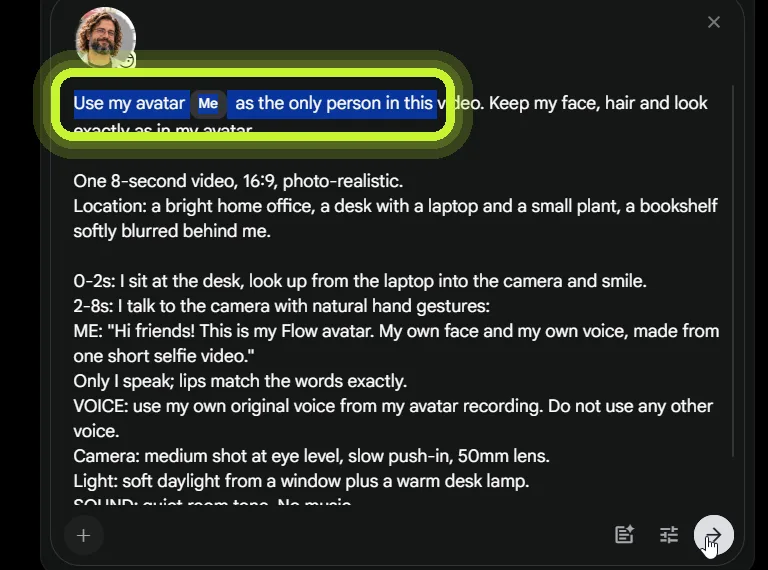
This is the prompt I used:
Use my avatar @me as the only person in this video. Keep my face, hair and look exactly as in my avatar.

One 8-second video, 16:9, photo-realistic.
Location: a bright home office, a desk with a laptop and a small plant, a bookshelf softly blurred behind me.

0-2s: I sit at the desk, look up from the laptop into the camera and smile.
2-8s: I talk to the camera with natural hand gestures:
ME: "Hi friends! This is my Flow avatar. My own face and my own voice, made from one short selfie video."
Only I speak; lips match the words exactly.
VOICE: use my own original voice from my avatar recording. Do not use any other voice.
Camera: medium shot at eye level, slow push-in, 50mm lens.
Light: soft daylight from a window plus a warm desk lamp.
SOUND: quiet room tone. No music.
No subtitles, no text.
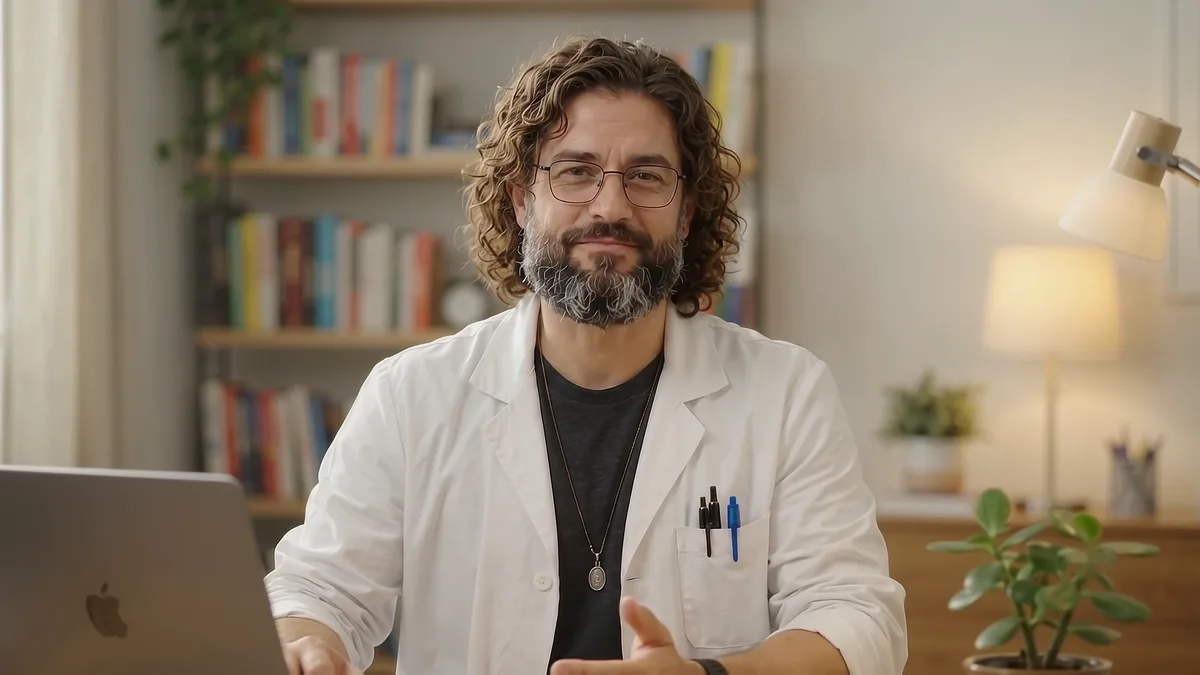
The agent described the plan (“an 8-second video of your avatar speaking in the bright home office using your default video model Omni 1.2 Flash”) and asked to start 1 video for 24 credits.

The result was very close to the real me: by my own estimate about a 99% match for the face and about 98% for the voice, and the line was spoken word for word. As everywhere in this tutorial, the frame below shows my AI character in place of my real face.
Tip: you can also add your avatar as a + Reference in Agent instructions, so the agent uses it in every prompt without typing @me each time.
Google’s account help page on avatars says an avatar created in Gemini can also be used in Google Flow, and the other way round.
Way 2: Make an AI avatar without your real face
This is the route I use for my channel. The face comes from an image, not from a recording of you.
Step 1: Make the character image
I made my character, Awill, in ChatGPT: a man with curly hair, a beard, glasses and a white lab coat. Any image tool works; what matters is one clear, front-facing photo. For a full walkthrough, see my guide to making a realistic AI character for free.
Step 2: Save him in Agent instructions
- In your Flow project, click the sliders icon, open Agent instructions and click + Add instruction.
- Click + Reference, pick the image and click Add to instruction.
- Add a short guideline for the agent in the text box.

What I actually used: the face in all three videos came from these reference images, not from a recording of me. I also had a Flow avatar on the same account, so my original prompts carried the words “Avatar @me” and “as per Avatar voice”. The face in the results was still the reference character. I didn’t pick the voice myself, and I can’t tell you whether Flow generated it or took it from my avatar recording.
You don’t need an avatar for Way 2. The prompts below are the versions for readers: I removed “@me” and wrote a voice description instead. Apart from those two lines they are the prompts I ran; I have not re-run the edited versions.
Step 3: Video 1, a talking avatar in a studio
Use the AWILL reference image from the project instructions. Keep his face, hair, beard, glasses and white lab coat exactly the same.

One 8-second video, 16:9, photo-realistic.
Location: a cozy creator studio, a wooden desk with an open laptop, a bookshelf and a warm desk lamp behind him, softly blurred.

0-2s: Awill sits at the desk, looks up from the laptop into the camera and smiles.
2-8s: he talks to the camera with natural hand gestures:
AWILL: "Hi friends! This is my AI avatar. Same face, same voice, in every video. Let me show you how."
Only Awill speaks; lips match the words exactly.
AWILL'S VOICE: warm, confident American man, mid-forties, friendly.
Camera: medium shot at eye level, slow push-in, 50mm lens.
Light: warm lamp light plus soft window light.
SOUND: quiet room tone, a soft chair creak. No music.
No subtitles, no text.
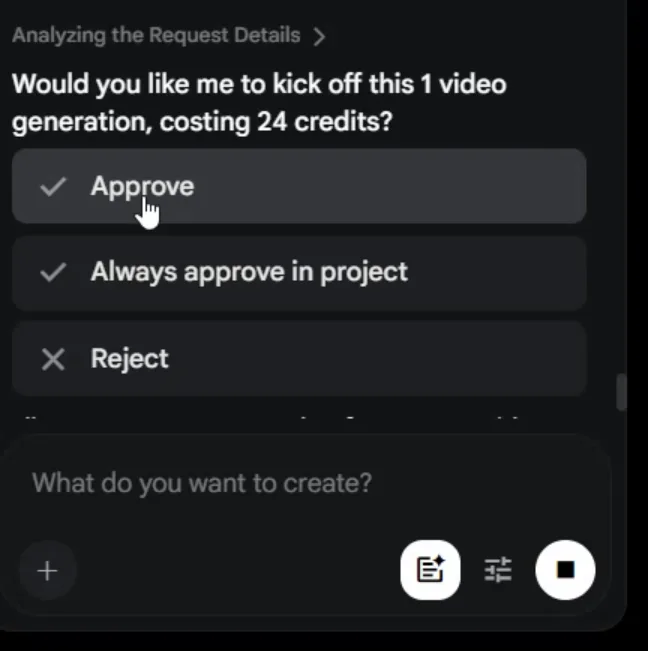
The price card asked to start 1 video for 24 credits. I approved it and downloaded the clip as 1080p (upscaled). The face matched the reference, and he said the line word for word.

Step 4: Video 2, the same avatar on a green screen
Use the AWILL reference image from the project instructions. Keep his face, hair, beard, glasses and white lab coat exactly the same.

One 8-second video, 16:9, photo-realistic.
Background: a perfectly flat, evenly lit chroma-key green background, solid pure green, no shadows, no wrinkles, no gradient, for the whole video.

0-2s: Awill stands in the center, waist-up, and smiles at the camera.
2-6s: he points to his left (the right side of the frame) with one hand and says:
AWILL: "Look over here. This is where your tutorial screen goes."
6-8s: he lowers his hand and nods at the camera with a confident smile.
Only Awill speaks; lips match the words exactly.
AWILL'S VOICE: warm, confident American man, mid-forties, friendly.
Camera: locked-off medium shot from the waist up, eye level, 85mm lens. The camera does not move.
Light: soft even front light plus a gentle white rim light on his hair and shoulders. No green reflected on his skin or coat.
SOUND: quiet room tone. No music.
No subtitles, no text.
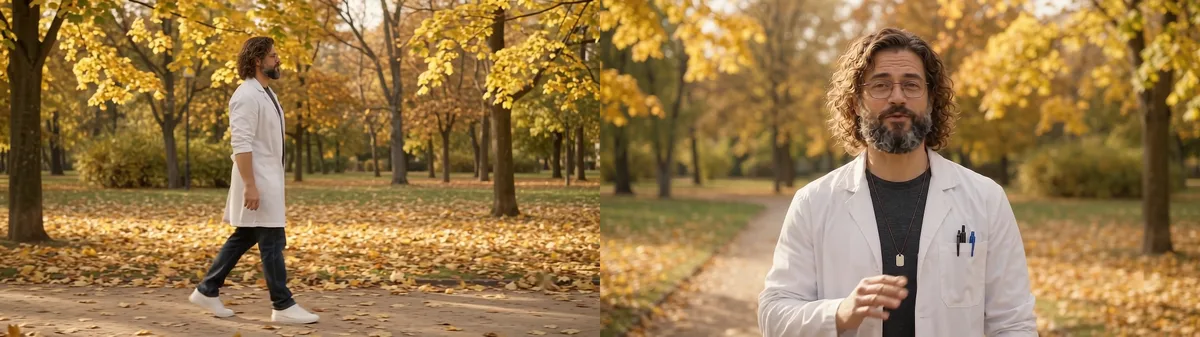
It cost the same 24 credits. The green stayed flat for the whole clip, which is exactly what you need for keying later.
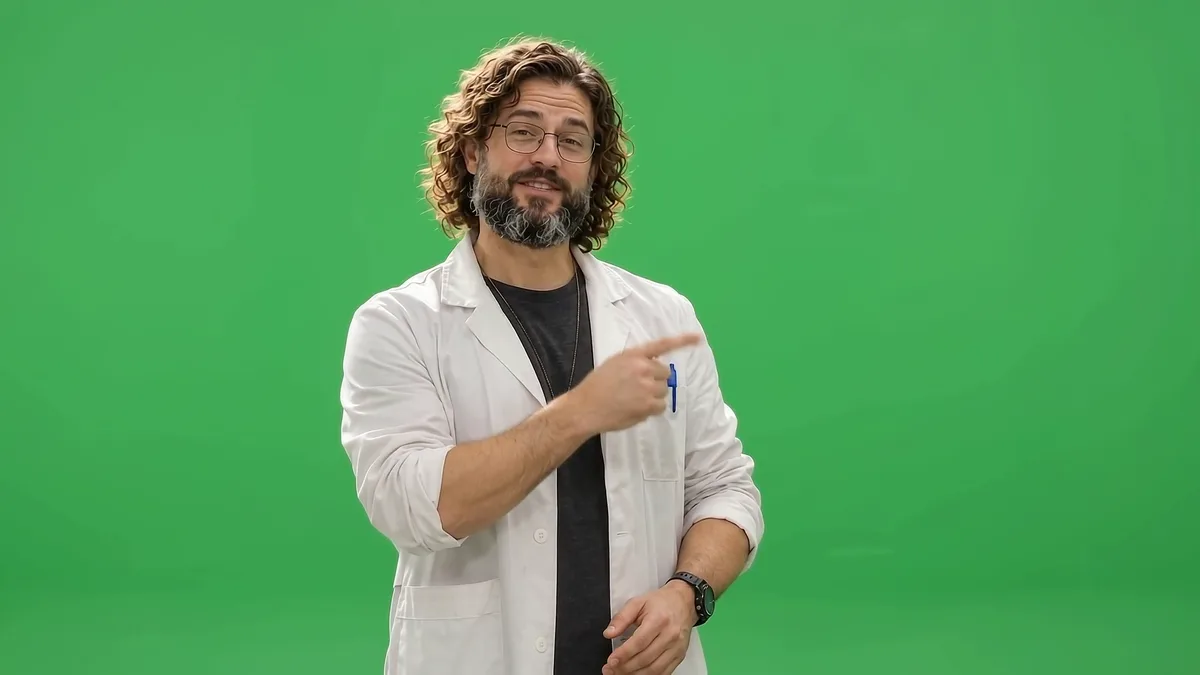
In the video above I play the line from Video 1 and the line from Video 2 back to back, so you can hear for yourself whether the voice stays the same.
Same face from every angle: the character sheet
One photo only shows the front. For side and back shots, add a character sheet as a second reference: four full-body views (front, three-quarter, side, back) and four expressions of the same person. I explain how to build one step by step in my guides to keeping a consistent AI character for free and making a realistic AI character, so here is only the prompt I used in ChatGPT, with the front photo attached as @image1:
Use @image1 as the exact man: the same face, curly shoulder-length brown hair, full beard, glasses, white lab coat over a dark charcoal t-shirt, two pens in the chest pocket, a black watch on his left wrist and a thin necklace. Same man in every panel.

Create a clean, photo-realistic CHARACTER REFERENCE SHEET, 16:9, on a plain light-grey studio background with soft even lighting.

TOP ROW (full body, standing, neutral pose, arms relaxed, white sneakers, dark jeans), left to right:
1. front view
2. three-quarter view facing left
3. side profile facing left
4. back view

BOTTOM ROW (head and shoulders close-ups, same lighting), left to right:
5. friendly smile, looking at the camera
6. talking, mouth slightly open, one eyebrow raised
7. surprised, eyes wide
8. thinking, hand on chin

All 8 panels are the same height and evenly spaced, with the same face, hair, beard, glasses and clothes in every panel. Real skin texture, sharp focus, true-to-life colors.
No text, no labels, no numbers, no logos, no watermark.
In Flow, add the sheet to the same instruction card with + Reference, and put this line in the card:
The character sheet shows Awill from every angle (front, side, back, expressions). Use it so his face, hair and clothes stay identical from any camera angle.A false policy alarm on a harmless prompt
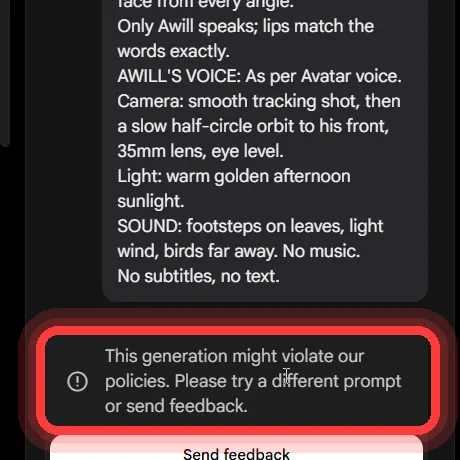
My first Video 3 prompt was a harmless scene: a man walking in a park. It started with “Use the AWILL Avatar (@me) and his character sheet from the project instructions.” Flow answered: “This generation might violate our policies. Please try a different prompt or send feedback.”
I changed only the first line to point at the character sheet in the project instructions, and it went straight through (24 credits):
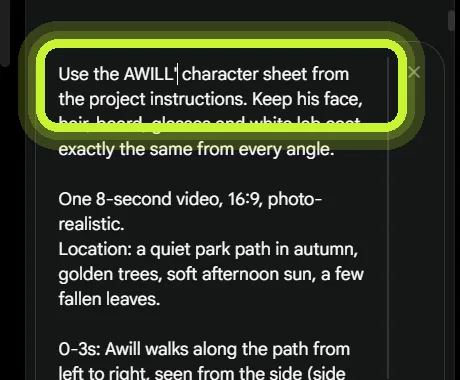
Use the AWILL's character sheet from the project instructions. Keep his face, hair, beard, glasses and white lab coat exactly the same from every angle.

One 8-second video, 16:9, photo-realistic.
Location: a quiet park path in autumn, golden trees, soft afternoon sun, a few fallen leaves.

0-3s: Awill walks along the path from left to right, seen from the side (side profile), looking ahead.
3-5s: the camera circles slowly around him to the front as he stops and turns toward the lens.
5-8s: he smiles and says to the camera:
AWILL: "Side, back or front. Same face from every angle."
Only Awill speaks; lips match the words exactly.
AWILL'S VOICE: warm, confident American man, mid-forties, friendly.
Camera: smooth tracking shot, then a slow half-circle orbit to his front, 35mm lens, eye level.
Light: warm golden afternoon sunlight.
SOUND: footsteps on leaves, light wind, birds far away. No music.
No subtitles, no text.
My original Video 1 and Video 2 prompts also contained “@me” and were not blocked, so I can’t confirm what triggered this one; Flow doesn’t say. If you get the same message on a harmless prompt, send it again or rewrite the line that names your character, and use Send feedback if it keeps happening. (As above, the voice line here is the reader version; mine said “As per Avatar voice”.)
Put your avatar anywhere with a green screen (Filmora)
- Put your background video on the first track and the green avatar clip on the track above it.
- Click the green clip, go to Video → AI Tools and turn on Chroma Key.
- Pick the green with the colour picker. My settings were Tolerance 51, Offset 20, Edge Thickness −2, Edge Feather 2.
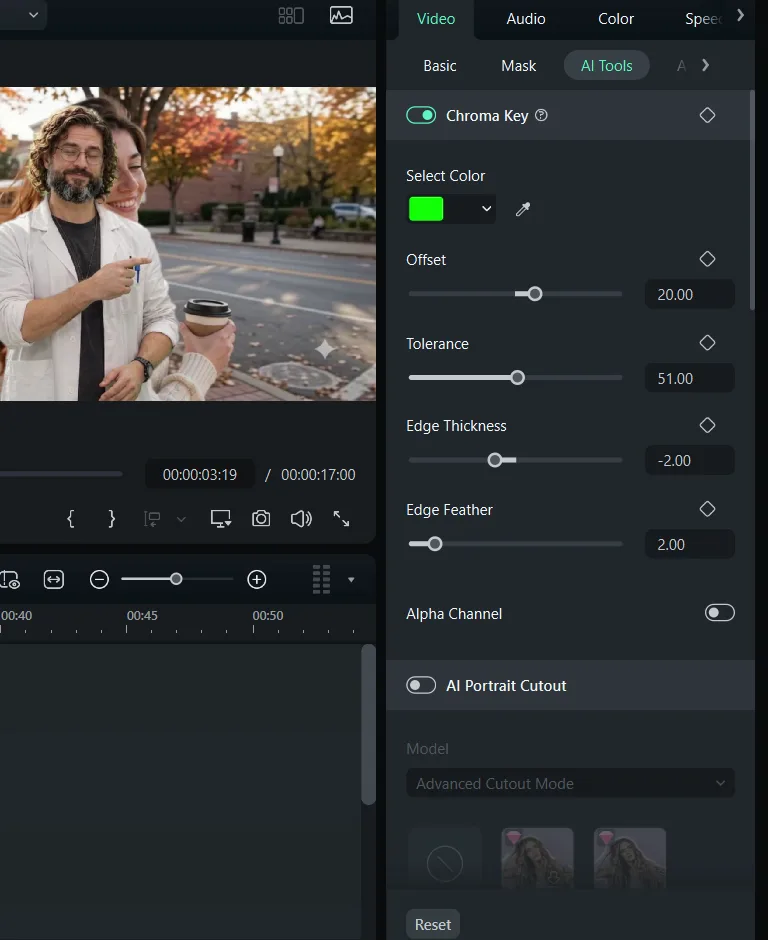
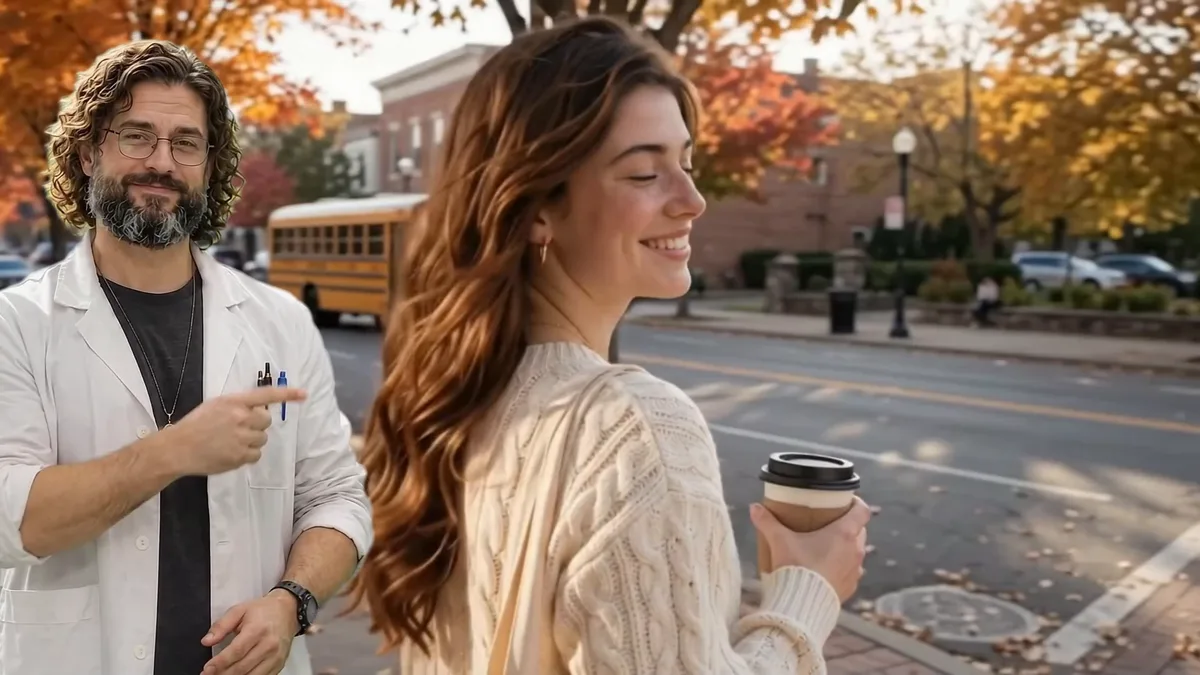
The green disappears and the avatar stands inside the other video. I placed him next to Mia, a character from my Omni Flash 1.2 tutorial.
How to delete your avatar
In the Gemini app, open Settings → Avatar and tap Delete. It opens the Selfie video page in your Google Account, which shows the recording and where you’ve used it (“in Gemini and Google Flow”). Tap Delete and confirm. The recording I delete in this screenshot is an older one I had made in the Gemini app; the steps are the same.

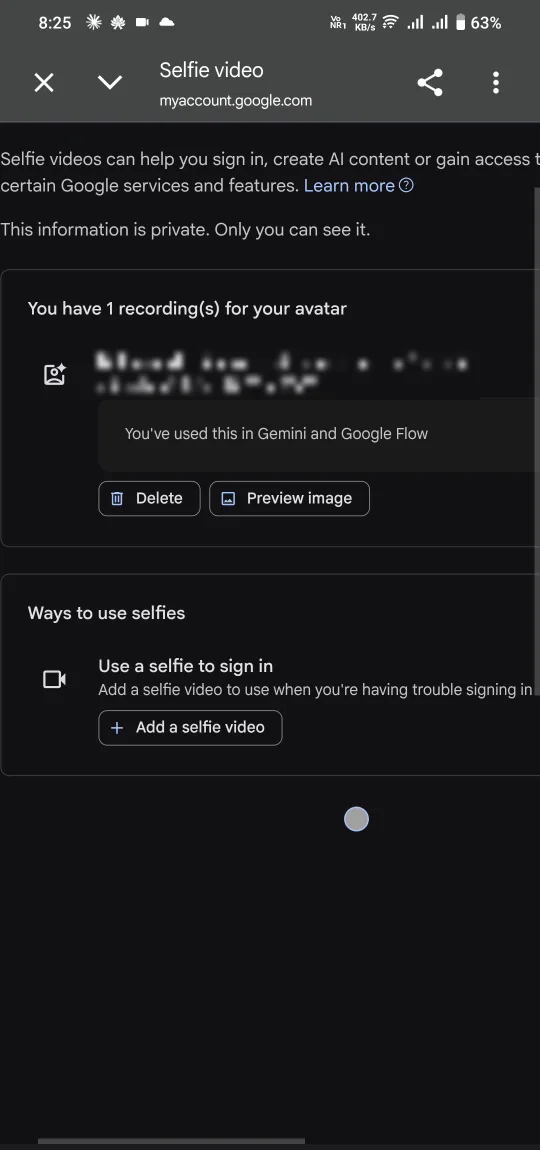
Google’s account help page says deleting the recording stops you from making new content with that avatar, and that content you already published is not deleted by it.
Mistakes and fixes
| Problem | Fix |
|---|---|
| The phone app doesn’t show Create avatar | Start on your computer: profile picture → Create avatar → scan the QR code |
| The QR scan doesn’t open | Type the short link from the dialog into your phone’s browser |
| Screen recording has no sound during the selfie | Expected; the phone blocks the mic for screen recording |
| “This generation might violate our policies” on a harmless character prompt | False alarm: send it again, or rewrite the line that names the character so it points at the reference or character sheet |
| Side or back shots don’t match the face | Add a character sheet as a second reference |
FAQ
Yes. The official Flow avatar needs your own face and voice recording, but you can skip it: save an AI character image in Agent instructions and use it as the reference in every prompt.
Google’s Gemini help page says creating the avatar only needs a personal Google Account, but making a video with it needs a Google AI plan. It also says avatars are currently supported in English only. I tested on Google AI Pro.
Type <code>@</code> in the agent’s prompt box, pick your avatar (<strong>Me · Avatar</strong>) and click <strong>Add to prompt</strong>. Then describe the scene and your line in English and generate. You can also add the avatar as a reference in Agent instructions.
Yes. Google’s account help page says an avatar created in Gemini can also be used in Google Flow, and the other way round.
Google’s Flow help page says avatars are not available in the EEA, the UK or Switzerland, and Google’s account page says the feature is not yet available in all regions.
On my account, each 8-second avatar video showed 24 credits on the price card. Always read the card before you approve.
The filter sometimes flags harmless prompts, and Flow doesn’t say why. In my test it appeared on a park-walk prompt; rewriting the first line to “Use the AWILL’s character sheet from the project instructions” went through. No credits were spent on the blocked attempt.
In the Gemini app: Settings → Avatar → Delete, then delete the recording on the Selfie video page in your Google Account.
Next step
Start with one clear character image and make one 8-second test clip before you plan a series. If you’re new to Flow, my step-by-step Omni Flash 1.2 tutorial covers prompts, editing by typing and credit costs, and the guide to keeping a consistent AI character for free shows more ways to keep one face across videos.

Awill Misra (Known as Awill Guru) holds a B.Tech in Electronics & Communication Engineering and an M.Tech in VLSI design, along with NIELIT O and A Level certifications. He also has an M.A. in Sociology and a B.Ed. He has been writing troubleshooting guides for Android phones, TVs, apps and gadgets on Gossipfunda since 2018, and teaches mathematics.