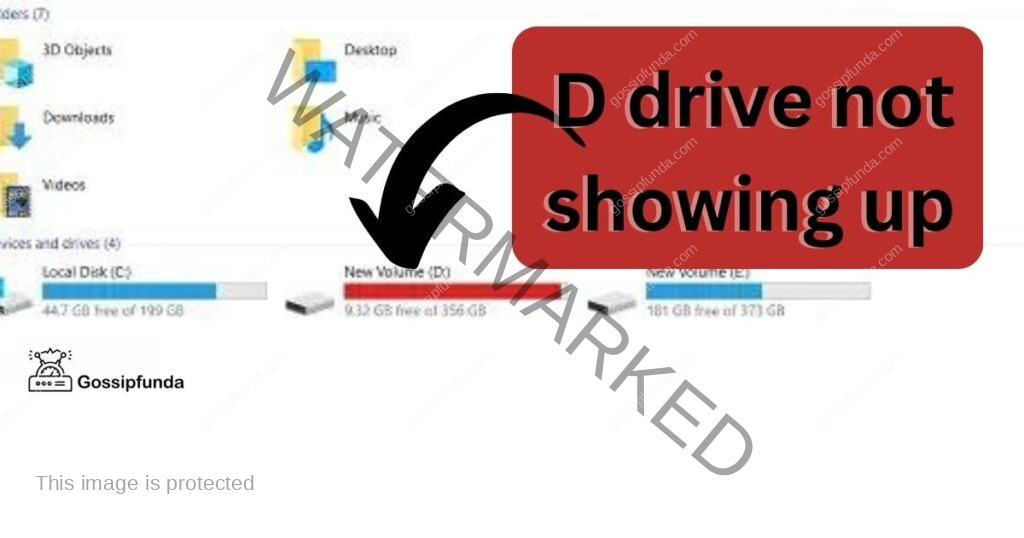
Is your D drive mysteriously missing from your computer? Fret not, as we’ve got you covered! In this comprehensive troubleshooting guide, we’ll unravel the perplexing issue of your D drive not showing up. Whether it’s a loose connection, software glitch, or something else entirely, we’ll dive into the depths of the problem and equip you with practical solutions to restore your D drive’s visibility.
Get ready to embark on a journey of discovery as we explore the reasons behind this enigma and unravel the secrets to getting your precious data back. Bid farewell to frustration and embrace the burst of knowledge that awaits you in the following sections. So, let’s set sail and reclaim the missing treasure of your D drive!
Reasons behind the error of D Drive not showing up
- Loose Connections: One of the common reasons for the D drive not showing up is loose connections. If the cables connecting the drive to the motherboard are not securely plugged in, the drive may go undetected.
- Power Supply Issues: Problems with the power supply can also cause the D drive to be unrecognized. A faulty power cable or an issue with the power source can lead to the drive not showing up.
- Drive Failure: In some cases, the D drive itself may have failed. Physical damage, wear and tear, or manufacturing defects can result in the drive becoming unresponsive and not appearing on the computer.
- Drive Letter Conflict: Drive letter conflicts can occur when multiple drives have been assigned the same drive letter. This conflict can prevent the D drive from showing up on the system.
- Disabled or Hidden Drive: Sometimes, the D drive may be disabled or hidden in the operating system settings. This can happen accidentally or due to certain configurations, causing the drive to be inaccessible.
- Disk Partition Issues: Problems with disk partitions can also lead to the D drive not showing up. If the drive has unallocated space or an incorrect partition configuration, it may not be recognized by the computer.
- Corrupted File System: A corrupted file system on the D drive can make it unreadable by the operating system, resulting in the drive not being visible.
- Virus or Malware Infection: Viruses or malware can interfere with the detection and visibility of the D drive. In some cases, malicious software can affect the drive’s functionality and make it disappear from the system.
Identifying the underlying reason for the D drive not showing up is crucial in order to apply the appropriate solution and resolve the issue effectively.
How to fix D drive not showing up?
Fix 1: Checking and Fixing Loose Connections
If your D drive is not showing up, the first step is to check for any loose connections. Follow these detailed steps to ensure all the connections are secure:
- Step 1: Power off your computer and unplug it from the power source for safety.
- Step 2: Open the computer case by removing the screws or latches, depending on the model.
- Step 3: Locate the cables connected to the D drive. There are typically two cables: the data cable (SATA or IDE) and the power cable.
- Step 4: Ensure that both cables are firmly plugged into the D drive. Gently push them in until they are securely seated.
- Step 5: Follow the cables from the D drive to the motherboard. Make sure they are also properly connected at the motherboard end.
- Step 6: If the cables appear loose, disconnect them completely and then reconnect them, ensuring a snug fit.
- Step 7: Once all connections are secure, close the computer case and tighten the screws or latches.
- Step 8: Plug in your computer and power it on.
- Step 9: Check if the D drive is now visible in the File Explorer or Disk Management.
By checking and fixing any loose connections, you can eliminate this common issue and potentially restore the visibility of your D drive. If the problem persists, proceed to the next fix for further troubleshooting.
Fix 2: Updating and Reinstalling Drivers
Outdated or faulty drivers can often cause the D drive to not show up on your computer. Follow these steps to update and reinstall the drivers, ensuring they are functioning correctly:
- Step 1: Press the Windows key + X on your keyboard and select “Device Manager” from the menu that appears.
- Step 2: In the Device Manager window, expand the “Disk drives” category to view the list of disk drives connected to your computer.
- Step 3: Right-click on the D drive (if it is visible) and select “Update driver” from the context menu. If the D drive is not listed, proceed to step 4.
- Step 4: Right-click on any device listed in the Device Manager and select “Scan for hardware changes.” This action will prompt your system to detect and reinstall all the drivers.
- Step 5: If the D drive is still not visible, right-click on it and select “Uninstall device” from the context menu.
- Step 6: Confirm the uninstallation and restart your computer.
- Step 7: After restarting, your computer will automatically reinstall the drivers for the D drive. If prompted, provide the necessary permissions to complete the installation.
- Step 8: Once the drivers are installed, check if the D drive appears in the File Explorer or Disk Management.
Updating and reinstalling drivers can resolve compatibility issues and ensure that the D drive is properly recognized by the operating system. If the issue persists, continue to explore the remaining fixes to troubleshoot the problem further.
Fix 3: Resolving Drive Letter Conflict
In some cases, a drive letter conflict can prevent the D drive from showing up. Follow these steps to resolve this issue and assign a new, unused drive letter to your D drive:
- Step 1: Press the Windows key + R on your keyboard to open the Run dialog box.
- Step 2: Type “diskmgmt.msc” into the dialog box and press Enter. This will open the Disk Management utility.
- Step 3: In Disk Management, locate your D drive. It may be labeled as “D” or have no assigned letter.
- Step 4: Right-click on the D drive and select “Change Drive Letter and Paths” from the context menu.
- Step 5: In the Change Drive Letter and Paths window, click on the “Change” button.
- Step 6: Select a new, unused drive letter from the drop-down menu. Make sure the selected drive letter is not already assigned to any other drive.
- Step 7: Click “OK” to confirm the changes.
- Step 8: Check if the D drive is now visible in the File Explorer or Disk Management.
By resolving drive letter conflicts, you can ensure that the D drive is correctly identified by the operating system and becomes visible on your computer. If the issue persists, continue exploring the remaining fixes to determine the root cause of the problem.
Fix 4: Enabling the D Drive in Disk Management
Sometimes, the D drive may be disabled or hidden in the operating system settings, preventing it from showing up. Follow these steps to enable the D drive in Disk Management:
- Step 1: Press the Windows key + X on your keyboard and select “Disk Management” from the menu that appears.
- Step 2: In the Disk Management window, locate your D drive. It might be listed as “Offline” or have a black bar indicating that it is disabled.
- Step 3: Right-click on the D drive and select “Online” from the context menu. If the option is not available, proceed to the next step.
- Step 4: If the D drive is listed but without a drive letter, right-click on it and select “Change Drive Letter and Paths” from the context menu.
- Step 5: In the Change Drive Letter and Paths window, click on the “Add” button.
- Step 6: Choose a drive letter for the D drive from the drop-down menu and click “OK.”
- Step 7: Check if the D drive is now visible in the File Explorer or Disk Management.
By enabling the D drive in Disk Management, you ensure that it is active and accessible within the operating system. If the issue persists, there may be other underlying causes that require further troubleshooting.
Fix 5: Checking for Disk Partition and Formatting Issues
Disk partition and formatting issues can also lead to the D drive not showing up. Follow these steps to address partition and formatting problems:
- Step 1: Press the Windows key + X on your keyboard and select “Disk Management” from the menu that appears.
- Step 2: In the Disk Management window, locate your D drive. Look for any partitions labeled as “Unallocated” or with incorrect formatting.
- Step 3: If you find unallocated space, right-click on it and select “New Simple Volume” from the context menu.
- Step 4: Follow the on-screen instructions of the New Simple Volume Wizard to create a new partition on the unallocated space. Assign a drive letter and choose the desired file system (such as NTFS).
- Step 5: If the D drive has a partition but appears as RAW or has an incorrect file system, right-click on the partition and select “Format” from the context menu.
- Step 6: In the Format window, choose the desired file system (such as NTFS), provide a volume label if needed, and ensure that the “Quick Format” option is selected.
- Step 7: Click “OK” to begin the formatting process. Note that formatting will erase all data on the D drive, so ensure you have a backup if necessary.
- Step 8: After the formatting is complete, check if the D drive is now visible in the File Explorer or Disk Management.
By addressing disk partition and formatting issues, you can ensure that the D drive is properly partitioned and formatted, allowing it to be recognized and accessible on your computer. If the issue persists, consider seeking professional assistance or contacting the drive manufacturer for further guidance.
Read more: AMD Driver Timeout After Video
Fix 6: Scanning for Virus or Malware Infections
Viruses or malware infections can sometimes interfere with the detection and visibility of the D drive. Follow these steps to scan and remove any potential threats:
- Step 1: Ensure that you have a reliable and up-to-date antivirus or antimalware program installed on your computer. If you don’t have one, consider downloading and installing a reputable security software.
- Step 2: Open the antivirus program and navigate to the scanning options.
- Step 3: Perform a full system scan to thoroughly check for any viruses, malware, or other malicious software on your computer.
- Step 4: If the antivirus program detects any threats, follow the instructions provided to quarantine or remove the infected files.
- Step 5: Once the scan and removal process is complete, restart your computer.
- Step 6: After restarting, check if the D drive is now visible in the File Explorer or Disk Management.
- Step 7: If you recently connected any infected external devices or USB drives to your computer, disconnect them and perform a separate scan on those devices as well.
By scanning for viruses and malware, you can ensure that your computer is free from any malicious software that might be causing the D drive to not show up. Regularly updating and running scans with your antivirus software can help prevent future infections and maintain the overall security of your system.
Fix 7: Checking BIOS Settings
If none of the previous fixes have resolved the issue of the D drive not showing up, it may be worth checking the BIOS settings. The BIOS (Basic Input/Output System) is responsible for managing hardware settings on your computer. Follow these steps to check the BIOS settings:
- Step 1: Restart your computer and immediately press the key indicated on the screen to enter the BIOS setup. The key to access the BIOS varies depending on the computer manufacturer (common keys include Del, F2, F10, or Esc).
- Step 2: Once you enter the BIOS setup, navigate through the menus using the arrow keys on your keyboard. Look for a section related to storage devices or SATA configuration.
- Step 3: Ensure that the D drive is enabled in the BIOS settings. If it is disabled, use the corresponding keys (usually “+” or “-“) to enable it.
- Step 4: Save the changes and exit the BIOS setup. This will restart your computer.
- Step 5: After the computer restarts, check if the D drive is now visible in the File Explorer or Disk Management.
By checking and adjusting the BIOS settings, you can ensure that the D drive is properly recognized and enabled at the hardware level. If the issue persists after adjusting the BIOS settings, it may be necessary to seek professional assistance or contact the computer manufacturer for further support.
Fix 8: Seeking Professional Assistance
If none of the previous fixes have resolved the issue of the D drive not showing up, it might be necessary to seek professional assistance. A computer technician or data recovery specialist can provide expert guidance and support to diagnose and fix the problem. Here are the steps to follow:
- Step 1: Research and identify reputable computer repair services or data recovery specialists in your area. Look for professionals with experience in resolving hardware and software issues related to storage devices.
- Step 2: Contact the chosen professional and explain the problem you’re experiencing with your D drive. Provide any relevant details and answer their questions to the best of your ability.
- Step 3: Schedule an appointment to bring your computer or the D drive to the professional for evaluation and repair.
- Step 4: When you meet with the professional, explain the steps you’ve already taken to troubleshoot the issue. Provide any additional information they may need.
- Step 5: Allow the professional to examine the hardware and perform diagnostic tests to determine the cause of the problem.
- Step 6: Based on their assessment, follow their recommendations for repairing or recovering the D drive. This may involve hardware repairs, data retrieval, or other specialized procedures.
- Step 7: If necessary, authorize the professional to proceed with the recommended repairs or recovery processes. Be sure to discuss any associated costs and potential outcomes beforehand.
- Step 8: Once the repairs or data recovery procedures are completed, the professional will inform you of the results and provide the necessary instructions to access and use the D drive.
By seeking professional assistance, you can benefit from their expertise and specialized tools to address complex issues related to the D drive not showing up. Remember to choose a reputable professional or service provider to ensure the best possible outcome for your situation.
Prevention tips: Ensuring visibility of your D Drive
To avoid encountering the frustrating issue of your D drive not showing up, follow these preventive tips to maintain its visibility and functionality:
- Regularly Check Connections: Periodically inspect the cables connecting your D drive to ensure they are securely plugged in. Loose connections can disrupt the connection and lead to the drive being undetected.
- Keep Your System Updated: Stay on top of system updates, including operating system updates and driver updates. Outdated drivers can cause compatibility issues and prevent the D drive from being recognized.
- Scan for Malware Regularly: Implement robust security measures and perform regular scans for viruses and malware. Malicious software can interfere with the detection and functionality of your D drive.
- Safely Remove External Devices: When using external devices like USB drives or external hard drives, always follow the proper “eject” or “safely remove hardware” procedure. Abruptly removing these devices can lead to data corruption and potential issues with the D drive.
- Avoid Forceful Removal: Whether it’s internal or external storage devices, avoid forcefully disconnecting them from the computer. Always use the appropriate methods to safely remove or disconnect drives.
- Backup Your Data: Regularly back up your important files and documents stored on the D drive. This precautionary measure ensures that even if the drive encounters issues, your data remains safe and accessible.
- Maintain Optimal System Health: Take steps to maintain your system’s overall health, such as running disk cleanup and disk defragmentation utilities. These actions help optimize the performance of your drives, including the D drive.
By implementing these preventive measures, you can reduce the chances of experiencing the inconvenience and frustration of a D drive not showing up. Stay proactive in maintaining your system and storage devices to ensure smooth operations and data accessibility.
Conclusion
In conclusion, the issue of the D drive not showing up can be perplexing and worrisome, but it can often be resolved through careful troubleshooting. By checking for loose connections, updating drivers, resolving drive letter conflicts, and addressing other potential causes, you can restore the visibility of your D drive. In some cases, seeking professional assistance may be necessary for more complex issues.
Remember to take preventive measures such as regular system updates, malware scans, and safe removal of external devices to maintain the optimal functioning of your D drive. Stay proactive and backup your important data to safeguard against any unexpected problems. With patience and the right steps, you can overcome the challenges and regain access to your valuable files stored on the D drive.
FAQs
Possible reasons include loose connections, power supply issues, drive failure, or disabled settings.
Troubleshoot by checking connections, updating drivers, resolving conflicts, or seeking professional assistance if needed.
Create a new partition on the unallocated space using the Disk Management utility.
Use the Command Prompt to run the “chkdsk” command and repair the file system errors.
Yes, perform a thorough system scan with reliable antivirus software to eliminate any potential infections.
Explore other fixes, such as checking BIOS settings, seeking professional assistance, or considering hardware repairs.
Regularly check connections, keep your system updated, scan for malware, and safely remove external devices.
Prachi Mishra is a talented Digital Marketer and Technical Content Writer with a passion for creating impactful content and optimizing it for online platforms. With a strong background in marketing and a deep understanding of SEO and digital marketing strategies, Prachi has helped several businesses increase their online visibility and drive more traffic to their websites.
As a technical content writer, Prachi has extensive experience in creating engaging and informative content for a range of industries, including technology, finance, healthcare, and more. Her ability to simplify complex concepts and present them in a clear and concise manner has made her a valuable asset to her clients.
Prachi is a self-motivated and goal-oriented professional who is committed to delivering high-quality work that exceeds her clients’ expectations. She has a keen eye for detail and is always willing to go the extra mile to ensure that her work is accurate, informative, and engaging.


