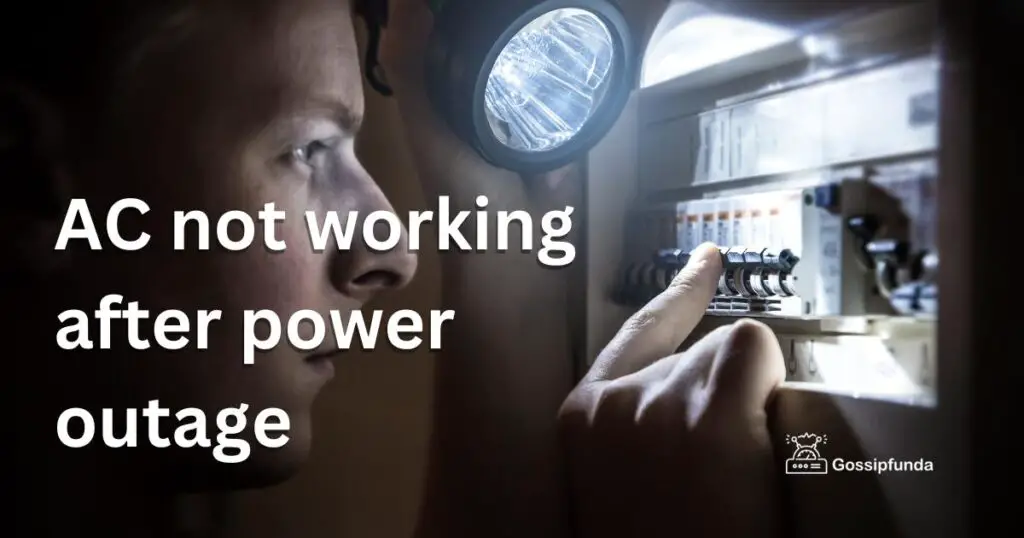
A malfunctioning air conditioner can be frustrating, especially during hot summer months. If you own a Honeywell AC and it’s not working properly, there could be several reasons behind the issue. In this troubleshooting guide, we’ll explore common causes and provide step-by-step solutions to fix your Honeywell AC. Whether it’s a cooling problem, unusual noises, or a complete failure, we’ve got you covered. By following our expert advice, you can regain the comfort of a fully functional air conditioning system in no time.
Reasons Behind Honeywell AC Not Working
- Power supply issues: Tripped breakers or blown fuses can disrupt the power flow to your Honeywell AC, causing it to stop working.
- Faulty thermostat: A malfunctioning thermostat may not send the correct signals to the AC unit, preventing it from turning on or cooling effectively.
- Clogged air filters: Dirt and debris can accumulate in the air filters, obstructing airflow and reducing the cooling capacity of the Honeywell AC.
- Refrigerant leaks: Leaking refrigerant can lead to insufficient cooling or warm air blowing from the vents, indicating a problem with the AC’s refrigerant levels.
- Condenser unit issues: Obstructions around the condenser unit, such as plants or debris, can hinder its ability to release heat, affecting the cooling performance.
- Faulty compressor: A malfunctioning compressor can cause the Honeywell AC to stop working or produce warm air instead of cool air.
- Frozen evaporator coils: If the evaporator coils freeze due to poor airflow or refrigerant issues, the Honeywell AC may fail to cool effectively.
- Blocked condensate drain: A clogged condensate drain can lead to water accumulation, which can trigger an automatic shut-off feature in the AC system.
- Worn-out fan motor: A worn-out or faulty fan motor may prevent the proper circulation of air, resulting in the Honeywell AC not working efficiently.
- Electrical component failure: Any failure or malfunction in the electrical components of the AC system, such as relays or capacitors, can cause the unit to stop working.
- Sensor problems: If the sensors responsible for monitoring temperature or humidity levels malfunction, the Honeywell AC may not operate correctly.
- Lack of regular maintenance: Neglecting regular maintenance tasks, such as cleaning and inspections, can lead to various issues that cause the AC to stop working.
By understanding the reasons behind your Honeywell AC not working, you can take appropriate steps to troubleshoot and resolve the issues, ensuring your AC functions optimally.
How to fix Honeywell AC not working?
Fix 1: Check Power Supply Issues
If your Honeywell AC is not working, the first step is to check for power supply issues. Follow these steps to address potential power-related problems:
- Inspect the circuit breaker or fuse box: Locate the circuit breaker panel or fuse box in your home. Check if any breakers are tripped or fuses are blown. If you find any, reset the breaker or replace the fuse with one of the same amperage.
- Turn on the AC’s power switch: Ensure that the power switch for your Honeywell AC unit is in the “on” position. It is usually located near the indoor air handler or on the unit itself.
- Check the thermostat settings: Verify that the thermostat is set to the desired cooling temperature and mode (e.g., cool, auto). Make sure the thermostat display is functioning correctly.
- Inspect the thermostat batteries: If your thermostat has batteries, check if they need replacement. Replace them with fresh batteries if necessary. This step ensures that the thermostat is receiving power and functioning properly.
- Ensure proper wiring connections: Examine the wiring connections between the thermostat and the AC unit. Loose or disconnected wires can prevent the AC from turning on. If you find any loose wires, carefully reconnect them.
- Test the AC unit: After completing the above steps, turn on your Honeywell AC and check if it starts running. Ensure that cool air is flowing from the vents and that the unit is functioning as expected.
If your AC still doesn’t work after completing these steps, there may be other underlying issues that require further troubleshooting or professional assistance.
Fix 2: Clean or Replace Clogged Air Filters
Clogged air filters can restrict airflow and hinder the performance of your Honeywell AC. Follow these steps to clean or replace the air filters:
- Locate the air filters: The air filters are typically located behind the front panel of your Honeywell AC unit or inside the air handler unit. Refer to your AC’s user manual if you’re unsure about the exact location.
- Turn off the AC: Before removing the air filters, turn off your Honeywell AC unit to ensure safety.
- Remove the air filters: Gently remove the front panel of the AC unit to access the filters. Slide out the filters from their slots or unclip them, depending on the design of your AC.
- Inspect the filters: Examine the air filters for dirt, dust, and debris accumulation. If they appear dirty or clogged, it’s time to clean or replace them.
- Clean the filters: If your air filters are reusable, you can clean them. Vacuum the filters using a brush attachment to remove loose debris. If the filters are washable, rinse them under lukewarm water with mild soap. Avoid using harsh chemicals that can damage the filters.
- Allow the filters to dry: After cleaning, let the filters air dry completely. Ensure they are completely dry before reinstalling them.
- Replace the filters: If your air filters are disposable or too damaged to be cleaned, it’s best to replace them. Purchase compatible filters from a hardware store or HVAC supplier. Insert the new filters into their designated slots, ensuring they fit securely.
- Reassemble and turn on the AC: Once the filters are cleaned or replaced, reattach the front panel of the AC unit. Turn on the AC and check if the airflow has improved and the cooling performance is restored.
Regularly clean or replace the air filters every one to three months to maintain the efficiency and longevity of your Honeywell AC system. Clean filters promote better indoor air quality and ensure optimal cooling performance.
Fix 3: Check for Refrigerant Leaks and Recharge
If your Honeywell AC is not cooling properly or is blowing warm air, it may indicate a refrigerant leak. Follow these steps to check for leaks and recharge the refrigerant:
- Safety first: Before proceeding, ensure your safety by turning off the power to the AC unit. Locate the electrical disconnect switch near the outdoor condenser unit and switch it off.
- Locate the refrigerant lines: The refrigerant lines connect the indoor and outdoor units of your Honeywell AC. Inspect the lines for any signs of oil stains or refrigerant leaks. Leaks often appear as oily or frosted patches around the joints or connectors.
- Contact a professional technician: Refrigerant leaks are complex and require the expertise of a qualified HVAC technician. It is not recommended to attempt repairing refrigerant leaks yourself, as it involves handling hazardous substances.
- Schedule a service call: Contact a reputable HVAC technician to schedule a service call. Inform them about the suspected refrigerant leak and the symptoms you have observed with your Honeywell AC.
- Diagnosis and repair: The technician will arrive and perform a thorough inspection of your AC system. They will locate the source of the leak using specialized tools and equipment. Once identified, they will repair the leak by replacing or repairing the affected component.
- Recharge the refrigerant: After fixing the leak, the technician will recharge the refrigerant to the appropriate levels. They will use the manufacturer’s specified refrigerant type and quantity for your Honeywell AC system.
- System performance check: Once the refrigerant recharge is complete, the technician will test your AC system to ensure it is functioning optimally. They will monitor the cooling performance and make any necessary adjustments.
- Preventive measures: To prevent future refrigerant leaks, ask the technician about preventive maintenance measures. Regular AC maintenance, including checking for leaks and performing system inspections, can help identify and address potential issues before they worsen.
Remember, refrigerant leaks require professional attention. Attempting to fix them without proper knowledge and equipment can be dangerous and may lead to further damage to your Honeywell AC system.
Fix 4: Clean the Condenser Unit and Check the Fan Motor
If your Honeywell AC is not working correctly or providing insufficient cooling, there may be issues with the condenser unit or the fan motor. Follow these steps to clean the condenser unit and check the fan motor:
- Turn off the power: Locate the electrical disconnect switch near the outdoor condenser unit and switch it off. This ensures your safety while working on the unit.
- Clear obstructions: Inspect the area around the condenser unit and remove any debris, plants, or objects that may obstruct the airflow. Ensure there is at least two feet of clearance around the unit.
- Clean the condenser coils: Gently spray the condenser coils with a garden hose to remove dirt, dust, and debris. Start from the top and work your way down. Avoid using excessive water pressure, as it may damage the coils.
- Remove stubborn debris: For stubborn debris stuck in the coils, use a soft brush to gently dislodge it. Be careful not to bend the delicate fins of the coils.
- Check the fan motor: Inspect the fan motor located inside the condenser unit. Ensure it is free from dirt, dust, and debris. Clean it using a soft brush or vacuum cleaner with a brush attachment.
- Inspect the fan blades: Examine the fan blades for any signs of damage or imbalance. If the blades are bent or damaged, they may need to be replaced.
- Test the fan motor: Turn on the power to the condenser unit and observe the fan motor. It should start spinning smoothly and without any unusual noises. If the fan motor does not turn on or makes grinding sounds, it may require professional repair or replacement.
- Reassemble and restore power: After cleaning the condenser unit and ensuring the fan motor is functioning correctly, reattach any panels or covers that were removed. Turn on the power to the condenser unit using the electrical disconnect switch.
Regularly cleaning the condenser unit and checking the fan motor helps maintain proper airflow and cooling performance. However, if the issues persist or if you encounter any complex problems, it is recommended to seek assistance from a professional HVAC technician to ensure proper diagnosis and repair.
Read more: Hatch Sound Machine Not Working? Here’s What to Do
Fix 5: Check and Reset the High-Pressure Limit Switch
If your Honeywell AC is not working or the system keeps shutting off abruptly, the high-pressure limit switch might be triggered. Follow these steps to check and reset the high-pressure limit switch:
- Turn off the power: Locate the electrical disconnect switch near the outdoor condenser unit and switch it off. This ensures your safety while working on the AC system.
- Locate the high-pressure limit switch: The high-pressure limit switch is usually located on the outdoor unit near the refrigerant lines. Refer to your AC unit’s manual or consult a professional technician if you’re unsure about its exact location.
- Inspect the switch: Examine the high-pressure limit switch for any visible signs of damage or debris. Ensure that the switch is properly connected and that the wires are intact.
- Reset the switch: If the switch appears fine, gently press the reset button on the switch. This button is typically red and can be pressed using a small tool like a paperclip or a pen tip. Hold the reset button for a few seconds to reset the switch.
- Check for airflow restrictions: Ensure that there are no obstructions blocking the airflow around the outdoor unit. Clear any debris, vegetation, or objects that might impede the proper flow of air.
- Inspect the outdoor coil: Examine the outdoor coil for dirt, dust, or debris buildup. Clean the coil using a soft brush or a vacuum cleaner with a brush attachment. Be gentle to avoid damaging the fins.
- Restore power: After resetting the high-pressure limit switch and cleaning the outdoor coil, restore power to the AC system by switching on the electrical disconnect switch.
- Observe the AC system: Turn on the AC and monitor its operation. Check if it runs smoothly without shutting off unexpectedly. Ensure that cool air is being circulated effectively.
If the AC system continues to experience issues or the high-pressure limit switch keeps triggering, it is advisable to seek professional assistance from an HVAC technician. They can perform a comprehensive inspection, identify any underlying problems, and provide the necessary repairs or replacements to restore proper functioning to your Honeywell AC system.
Fix 6: Replace Faulty Capacitors
If your Honeywell AC is not working or experiencing electrical issues, faulty capacitors could be the culprit. Follow these steps to diagnose and replace faulty capacitors:
- Turn off the power: Locate the electrical disconnect switch near the AC unit and switch it off. This ensures your safety while working on the electrical components.
- Locate the capacitors: Capacitors are typically located inside the outdoor condenser unit or on the indoor air handler unit. Consult your AC unit’s manual or seek professional guidance to identify the capacitors.
- Identify faulty capacitors: Inspect the capacitors for any signs of physical damage such as bulging, leaking, or burned marks. Faulty capacitors may also fail to hold a charge or exhibit other electrical issues.
- Discharge the capacitors: Capacitors store electrical energy, so it is crucial to discharge them before handling. Use an insulated screwdriver with a rubber handle to short the terminals of each capacitor, bridging the connections to discharge any stored charge. Take caution not to touch the metal parts of the screwdriver.
- Remove and replace faulty capacitors: Carefully remove the faulty capacitors from their mounting brackets or clips. Take note of the wiring connections or take pictures to ensure proper reinstallation. Replace the faulty capacitors with new ones of the same specifications.
- Connect the new capacitors: Attach the wires to the corresponding terminals of the new capacitors, ensuring a secure connection. Double-check the wiring against the pictures or notes taken during the removal process.
- Reassemble and restore power: After replacing the capacitors, reassemble any panels or covers that were removed. Turn on the power to the AC unit using the electrical disconnect switch.
- Observe the AC system: Turn on the AC and monitor its operation. Check if it starts working properly and cools the air as expected. Listen for any unusual noises or electrical malfunctions.
If you are unfamiliar with handling electrical components or are unsure about capacitor replacement, it is strongly recommended to seek professional assistance from a qualified HVAC technician. They have the expertise and tools necessary to safely diagnose, replace, and ensure the proper functioning of capacitors in your Honeywell AC system.
Fix 7: Check and Reset the Low-Pressure Switch
If your Honeywell AC is not working or is not cooling efficiently, a triggered low-pressure switch might be the issue. Follow these steps to check and reset the low-pressure switch:
- Turn off the power: Locate the electrical disconnect switch near the outdoor condenser unit and switch it off. This ensures your safety while working on the AC system.
- Locate the low-pressure switch: The low-pressure switch is typically located on the suction line near the outdoor condenser unit. Refer to your AC unit’s manual or consult a professional technician if you’re unsure about its exact location.
- Inspect the switch: Examine the low-pressure switch for any visible signs of damage or debris. Ensure that the switch is properly connected and that the wires are intact.
- Check the refrigerant levels: Low refrigerant levels can trigger the low-pressure switch. Contact a professional HVAC technician to perform a refrigerant pressure check and ensure it is within the manufacturer’s recommended range.
- Reset the switch: If the switch appears fine and the refrigerant levels are adequate, you can try resetting the low-pressure switch. Locate the reset button on the switch, which is usually a small lever or button. Press and hold the reset button for a few seconds to reset the switch.
- Inspect the refrigerant lines: Inspect the refrigerant lines for any visible signs of leaks, such as oil stains or refrigerant residue. If you notice a leak or suspect one, contact a professional technician to address the issue.
- Restore power: After resetting the low-pressure switch and inspecting the refrigerant lines, restore power to the AC system by switching on the electrical disconnect switch.
- Monitor the AC system: Turn on the AC and monitor its operation. Check if it runs smoothly and efficiently, providing adequate cooling. Observe for any abnormal sounds or performance issues.
If the low-pressure switch continues to be triggered or if you encounter any persistent cooling problems, it is recommended to seek professional assistance. An HVAC technician can diagnose the root cause of the low-pressure switch issue, perform necessary repairs, and ensure the proper functioning of your Honeywell AC system.
Fix 8: Reset the Air Conditioning System
If your Honeywell AC is not working or is experiencing erratic behavior, resetting the system can help resolve certain issues. Follow these steps to reset the air conditioning system:
- Turn off the power: Locate the electrical disconnect switch near the outdoor condenser unit and switch it off. This ensures your safety while resetting the AC system.
- Turn off the thermostat: Set the thermostat to the “Off” position or adjust it to a temperature higher than the current room temperature. This ensures that the AC unit is not receiving any signals to run.
- Wait for a few minutes: Allow the AC system to remain powered off for at least 5-10 minutes. This waiting period allows any residual power to dissipate and allows the system to reset completely.
- Turn on the power: Switch on the electrical disconnect switch to restore power to the AC system. You should hear the unit start up and the fans begin to spin.
- Set the thermostat: Set the thermostat to your desired cooling temperature and mode (e.g., cool, auto). Ensure that the thermostat is functioning correctly and displaying the desired settings.
- Observe the AC system: Monitor the AC system as it operates after the reset. Check if the cooling is restored, and the unit is running smoothly. Pay attention to any unusual sounds or malfunctions.
- Check for error codes: Some Honeywell AC models may display error codes on the thermostat or control panel. Refer to the AC unit’s manual to interpret any error codes and take appropriate action if necessary.
Resetting the air conditioning system can help clear minor glitches or software-related issues that might be affecting the performance of your Honeywell AC. If the problems persist or if you encounter more significant issues, it is advisable to contact a professional HVAC technician for further diagnosis and repairs.
Preventing AC Issues: Tips for Maintaining Your Honeywell AC System
Proper maintenance and care can help prevent many common issues with your Honeywell AC system. Follow these tips to keep your AC running smoothly and avoid potential problems:
- Regularly clean or replace air filters: Clean or replace the air filters every one to three months, or as recommended by the manufacturer. This prevents dirt and debris from obstructing airflow and ensures optimal cooling performance.
- Keep the condenser unit clear: Regularly clear any debris, leaves, or vegetation around the outdoor condenser unit. Maintain at least two feet of clearance around the unit to allow for proper airflow.
- Schedule professional maintenance: Arrange annual or bi-annual maintenance visits with a qualified HVAC technician. They can inspect and tune up your Honeywell AC system, identifying any potential issues before they become major problems.
- Monitor refrigerant levels: Low refrigerant levels can impact the cooling efficiency of your AC system. Have a professional technician check and replenish refrigerant levels as needed to maintain optimal performance.
- Clean the condenser coils: Periodically clean the condenser coils to remove dirt and debris. Use a soft brush or vacuum cleaner with a brush attachment to gently clean the coils, promoting efficient heat transfer.
- Check and clean the evaporator coils: Inspect the evaporator coils for dirt and debris buildup. If necessary, clean the coils using a coil cleaner recommended by the manufacturer. Clean coils improve cooling efficiency.
- Inspect and clean the condensate drain: Regularly check the condensate drain to ensure it is clear of blockages. A clogged drain can cause water backup and potential damage to your AC system.
- Keep the thermostat calibrated: Periodically check the accuracy of your thermostat and recalibrate it if necessary. A properly calibrated thermostat ensures accurate temperature readings and efficient cooling operation.
- Avoid excessive strain on the system: Avoid setting the thermostat to extreme temperature settings or constantly adjusting it. This reduces unnecessary strain on the AC system and promotes longevity.
- Protect the outdoor unit: Use a cover or shade structure to protect the outdoor condenser unit from direct sunlight, extreme weather conditions, and debris accumulation.
By following these preventive tips, you can maintain the performance and extend the lifespan of your Honeywell AC system. Regular maintenance and care reduce the risk of unexpected breakdowns and ensure a comfortable indoor environment throughout the year.
Conclusion
In conclusion, troubleshooting and fixing a Honeywell AC that is not working can be achieved by addressing common issues like power supply problems, faulty thermostats, clogged air filters, refrigerant leaks, condenser unit malfunctions, faulty capacitors, low-pressure switch triggers, and performing system resets. By following the steps provided, you can effectively diagnose and resolve these issues, ensuring a comfortable and efficiently functioning AC system. Regular maintenance, preventive measures, and professional assistance when needed will help keep your Honeywell AC in optimal condition, providing you with the desired cooling during hot summer months. Take charge of your AC’s performance and enjoy a refreshing indoor environment.
FAQs
Check for tripped breakers, blown fuses, and ensure the AC’s power switch is on.
Possible causes include refrigerant leaks, frozen evaporator coils, or faulty compressors.
It is recommended to clean or replace the air filters every one to three months.
Refrigerant leak repairs require professional expertise due to the complexity and safety concerns involved.
Unusual noises may indicate fan motor issues, loose components, or debris in the system.
Turn off the power, wait for a few minutes, and then turn the power back on.
Check the high-pressure limit switch, low-pressure switch, or schedule a professional inspection.
Prachi Mishra is a talented Digital Marketer and Technical Content Writer with a passion for creating impactful content and optimizing it for online platforms. With a strong background in marketing and a deep understanding of SEO and digital marketing strategies, Prachi has helped several businesses increase their online visibility and drive more traffic to their websites.
As a technical content writer, Prachi has extensive experience in creating engaging and informative content for a range of industries, including technology, finance, healthcare, and more. Her ability to simplify complex concepts and present them in a clear and concise manner has made her a valuable asset to her clients.
Prachi is a self-motivated and goal-oriented professional who is committed to delivering high-quality work that exceeds her clients’ expectations. She has a keen eye for detail and is always willing to go the extra mile to ensure that her work is accurate, informative, and engaging.