Welcome to Gossipfunda! Today, we’re unlocking the full potential of your Android device with a deep dive into Fastboot and the critical fastboot oem device-info command. Whether you’re a developer, modder, or curious user, this 2023 guide will equip you with everything from setup to advanced commands—without the jargon. Let’s get technical!
fastboot oem device-info to check bootloader status.What is Fastboot? (And Why It Matters)
Fastboot is a protocol for modifying your Android device’s firmware directly from a computer. Unlike ADB (Android Debug Bridge), which works within the OS, Fastboot operates at the bootloader level, making it indispensable for:
- Unlocking bootloaders (prerequisite for rooting/custom ROMs)
- Flashing partitions (recovery, boot, system)
- Debugging boot loops or bricked devices
- Installing factory images (stock OS restoration)
Fastboot vs. ADB: When to Use Each
| Fastboot | ADB |
|---|---|
| Requires bootloader mode | Requires USB debugging enabled |
| Modifies firmware partitions | Debugs apps & OS |
Commands: flash, oem, boot | Commands: install, shell, logcat |
Step-by-Step: Installing Fastboot & ADB (2023)
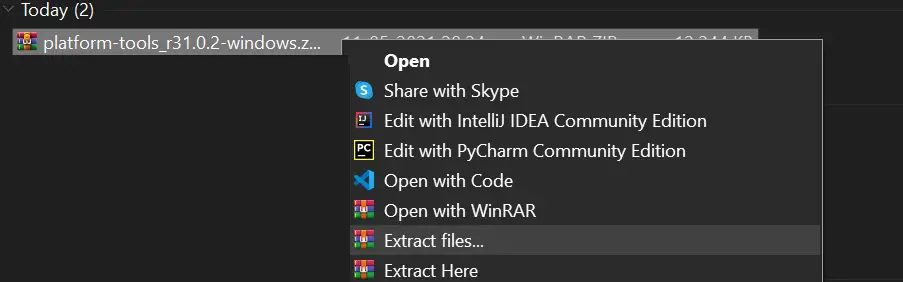
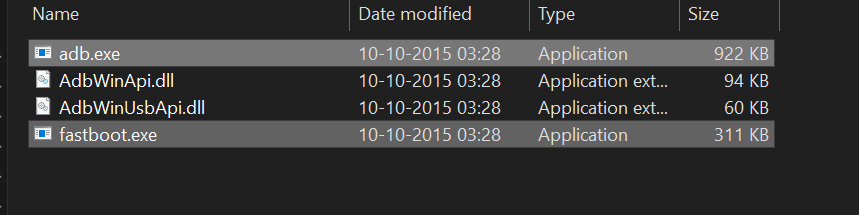
- Download Platform Tools: Get the latest ZIP from Google’s official site.
- Extract Files: Save to
C:\platform-tools(Windows) or~/platform-tools(Mac/Linux).
- Install Drivers: Use Google’s official USB drivers (avoid third-party tools).
- Enable USB Debugging:
- Go to Settings > About Phone.
- Tap Build Number 7 times to unlock Developer Options.
- Enable USB Debugging and OEM Unlocking.
Mastering fastboot oem device-info
This command reveals your device’s bootloader status and security settings. Note: Works on Google Pixel, OnePlus, and Motorola. Samsung/Xiaomi require alternative methods.
- Boot to Fastboot: Power off, then hold Volume Down + Power.
- Connect to PC: Use a high-quality USB cable.
- Open Terminal: Navigate to your
platform-toolsfolder.
Run these commands:
fastboot devices # Check connection
fastboot oem device-info # Get bootloader details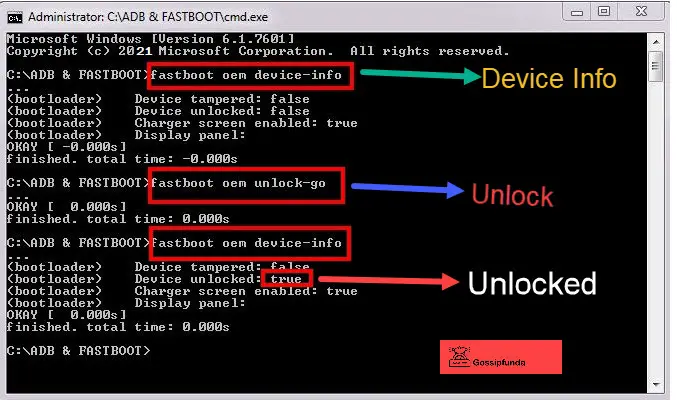
Understanding the Output:
Device unlocked: true= Bootloader is unlocked (required for rooting).Verity mode: disabled= Allows custom OS installations.Charger screen enabled: false= Bootloader won’t display charging status.
Advanced Fastboot Commands (2023)
# Flash a custom recovery (e.g., TWRP)
fastboot flash recovery twrp.img

# Unlock bootloader (CAUTION: Wipes data!)
fastboot flashing unlock

# Relock bootloader (restore warranty)
fastboot flashing lock

# Boot temporary recovery without flashing
fastboot boot twrp.img
Essential ADB Commands
# Install split APKs
adb install-multiple app.apk

# Screen recording (Android 11+)
adb shell screenrecord /sdcard/video.mp4

# Pull error logs
adb logcat -d > log.txt

# Remove bloatware (requires root)
adb shell pm uninstall -k --user 0 com.bloatware.package
⚠️ Critical Risks & Safety Tips
WARNING: Fastboot can permanently brick your device if misused!
- Backup First: Use Google Drive or
adb backup. - Avoid Unofficial Tools: Stick to Google’s Platform Tools.
- Check Device Compatibility: Samsung’s Odin and Xiaomi’s Mi Unlock have unique processes.
- Warranty Void: Unlocking bootloader invalidates warranty on most devices.
Troubleshooting Common Issues
- “Device Not Detected”: Install drivers, try another USB port/cable.
- “OEM Unlock Missing”: Connect to internet for 7 days (Samsung).
- “Command Failed”: Use
fastboot flashing unlockinstead ofoem unlock.
Conclusion
You’ve just leveled up your Android modding skills! For more advanced guides, explore our tutorial on fixing TWRP boot issues. Share this guide with fellow tech enthusiasts and stay tuned for cutting-edge Android tutorials!

I am a self-learned coder, and I love reading, writing, and listening all about the new and hot tech in the market. I am a big video game fanatic. From 1987’s Metal Gear to 2015’s Metal Gear Solid V I’ve played them all. I first got interested in programming when I played around with the software PC Logo (the one with the turtle). I don’t think a single day has passed since then without me learning something new in this field.