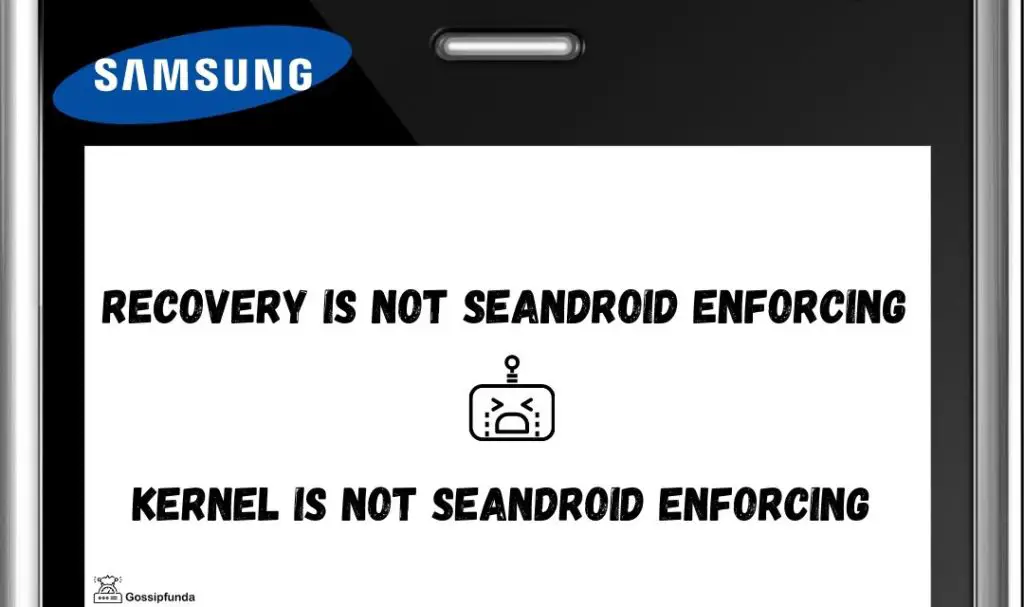
Recovery is not Seandroid Enforcing
Installing a new OS on a PC is a cakewalk, but things are quite tricky with a smartphone. Before you create a judgment, I repeat my words: tricky, not difficult, or herculean. The task is tricky because you can end up with a bricked device through marginal mistakes. Well, that is the worst-case scenario. Most users end up with an error message or get stuck at the logo screen. Today we are discussing how to fix a common issue “Recovery is not Seandroid Enforcing or Kernel is not Seandroid Enforcing” faced while rooting a Samsung device or Installing a custom OS/ROM. First of all, let’s talk in brief about rooting a phone and flashing a custom ROM.
Recovery and Custom ROMs
Android devices come with pre-installed recovery software. Recovery software basically allows android devices to install update packages. Also, it helps smartphones restore default settings after a factory or master reset. The recovery software helps in performing diagnostic tasks as well.
Stock recovery is the recovery software you receive from your manufacturer. It comes with limited features. So it doesn’t let you change core files. This promotes the need for some third party recovery. So that tasks like installing custom ROM(s) can be performed on your android device.
TWRP, Philz, and CWM are the most widely used custom recoveries. A discussion about each of them’ pros and cons demands a separate article, so I leave it for some other day. However, each one of them is good to go.
The ability to install custom ROMs on Android devices is one of their best features. Just as Stock recovery, android phones also come with stock ROMs. Custom ROMs are customized and developed unofficially. These come with juicy features like no bloatware, latest android versions. They are even using the different Custom OS on one smartphone(not simultaneously).
I can go on and on describing various custom ROMs and their benefits. But, our major concern here is the error message that is your current headache.
So, if your device is displaying the heading of this article, you have reached your destination of finding a remedy. Before diving deeper into the “How tos” of solving this problem, let’s know what the problem is about.
Breakdown of the Error message
Recovery is not Seandroid enforcing is displayed when you try to install a custom ROM on your Samsung device. This error occurs typically for two reasons. Either the recovery you installed was the incorrect one. Or perhaps you are trying to install a custom ROM that is incompatible with your device. Well, either of the issues is resolved so as not to worry.
Methods of resolving: Recovery is not Seandroid Enforcing
If you Google the error right now, you’ll probably get numerous methods to resolve it. Here I discuss three best methods to get rid of this problem.
Factory Reset:
Perhaps the easiest method to resolve the error. Though this is the easiest way to overcome the obstacle we are talking about. It comes at a hefty price. You are going to lose all your data in doing so. But since you are rooting your smartphone, I believe you must have already taken a backup of your data. In this method, you first got to put your phone into recovery mode. After that, perform a Factory Reset. You are performing a reset yield to the factory version of your device. As stated earlier, this is the cakewalk method of resolving the error. So just within three steps, you are good to go. Follow the chronology of steps stated below:
- Step1 Hold Your Samsung device and switch it off.
- Step2 uses the combination of Vol Up + Home + Power buttons in order to enter the recovery mode.
- Step3 Within the Recovery mode, Wipe Data/Factory Reset has to be chosen.
Note: If using TWRP custom recovery, the option Wipe and then Swipe to Factory Reset has to be selected.
Despite being the easiest method, many of the users found recovery mode inaccessible. That is, the device directly boots up, displaying the error message. No worries if your case is similar. Definitely, the other two methods will be effective for you to fix it up.
Using a Firmware Flashing Tool
If you are reading the article till now, it means the first method couldn’t fix up your device. In that case, you need to use a firmware flashing tool to resolve the error message. A Firmware flashing tool is used to install the original firmware of the device. The tool comes into use when the process of rooting goes wrong. Tools such as Odin indir, SP Flash, and the Firmware Flash by Codan Communications can be used for the task. Here I discuss the process of firmware flashing through Odin mode. This is because Odin is developed and used internally by Samsung itself. Follow the steps stated below to flash stock firmware on your device.
Pre-Requisites
First of all, you need to download Odin3 software from the official website. Along with it, the correct stock firmware of your device has to be downloaded on the computer. Also, assure the availability of Samsung USB drivers on your computer. After confirming all the prerequisites, move on to the first step of the method.
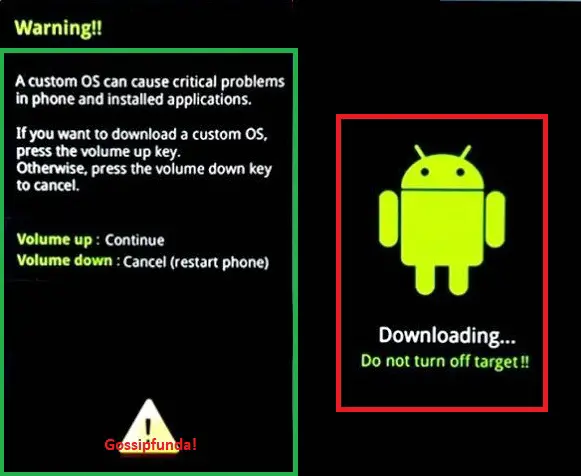
STEP 1 The Download Mode
Entering the download mode on your device is the first step to flash the stock ROM. To do so, just follow the steps stated below.
- Switch off the device.
- Press and keep holding the combination of Volume Down, Home, and Power buttons. Release the power button when the phone vibrates while holding the remaining ones.
- A warning will be displayed. When it is shown, use the Volume Up button to enter the Download Mode finally.
STEP 2 Flashing with stock firmware
- Using the USB cable, connect your smartphone to the computer.
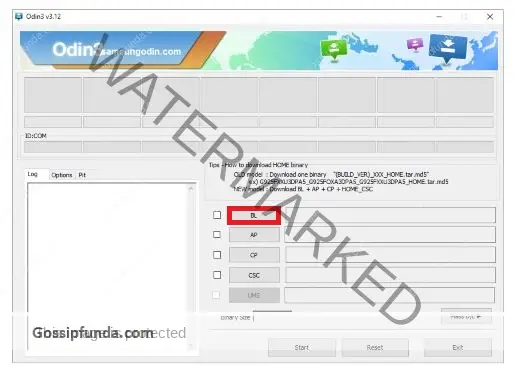
- Launch Odin3 on your computer
- After successful detection of your device, the Added!!! The message can be seen in the Log section. Also, the ID: COM section contains a light-blue box which can be used to view it.
- Click “PDA” or “AP,” and select the ROM file or the stock firmware that you downloaded.
- On Clicking the “Start button”, the software begins “flashing the ROM.”
CAUTION: Avoid moving or operating your device during this process.
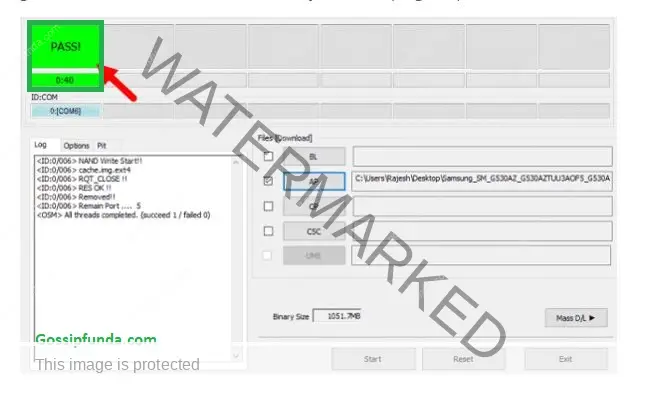
Flash Successful
On a successful flashing process, your device will restart. Also, you will see PASS(colored in green) on the Odin software screen. Unplug your machine from the computer after this.
Flash Failure
Try the following measures to initiate the flashing process again:
- Download the Firmware file again and ensure the compatibility of the file with your device
- Update your computer with the latest driver definitions.
- Allow Admin access to Odin3.
- Try using another cable or another USB port on the PC.
- Reboot your PC
Using the tool by FonePaw:
FonePaw is a platform where you can get tools and tricks for most of your problems with smartphones. Whether the issues are related to software or hardware, the solutions are easy to find.
Another way to fix the error is by using a tool by FonePaw. The tool suggested is “FonePaw Broken Android Data Extraction“. It can be used to extract data from bricked or broken Android phones. Also, the tool comes into use for fixing phones that get stuck. Another feature of this tool is that it reboots Android phones normally without wiping off the phone’s memory. The tool can fix Samsung devices as well that displays the error message Recovery/Kernel is not seandroid Enforcing
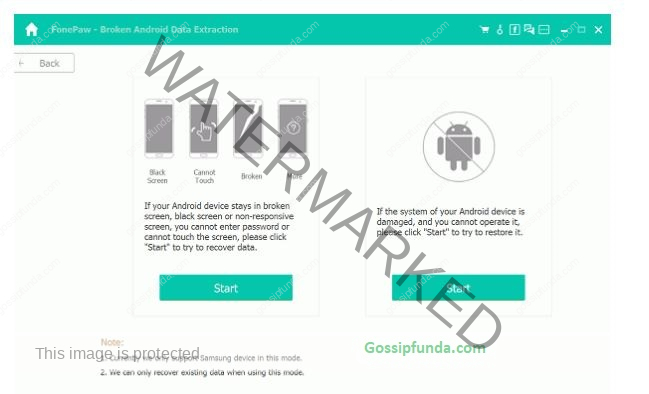
- First of all, you need to download the appropriate version of the tool for your PC.
- Enter the Download mode on your smartphone
- Connect your device to the PC via a USB cable. I have already discussed the procedure of entering the download mode on your Samsung Device. If the steps do not work, remove your phone’s battery(if it is removable). Place it after waiting for a few seconds, and then try entering the Download Mode.
- Run the Broken Android Data Extraction tool on your PC
- Select Broken Android Data Extraction
- Click on Start to restart the phone with existing system problems.
- Select the option Stuck in Download Mode.
- The program will initiate the process of fixing up your device when you click on Next.
- After the completion of the task, your device will be restarted. When the error is fixed, you can then install the right recovery. Also, the phone can be rooted again using the correct recovery and appropriate custom ROM file.
Conclusion
In conclusion, I advise you to avoid rooting your smartphone at least until it is supported with software updates from the manufacturer. Though flashing the device with custom ROMs adds features to your device. It should be done after proper information gaining correct knowledge. Also, in the near future, check the accurate recovery and custom ROM file for your device. Also, ensuring the compatibility of your device is necessary. And the fact that you can end up having a bricked device should be kept in mind. Though, you can visit our platform to get your issues resolved anytime.
Try following the steps of rooting your smartphone correctly. It is considered that rooting the device solves many issues such as battery consumption, bloatware, etc. But it is not the case with every smartphone. The effects of rooting vary with the device in use. In specific devices, you may experience an increase in performance while others rooting may result in poor battery life and overheating issues. In my opinion, you should go for custom ROMs once you stop receiving android updates on your smartphone. Also, if you are using an outdated device, rooting is the best option to upgrade the performance without a cost.

Myself Utkarsh Sharma, I am an Engineer by my education and aspire to be an entrepreneur by profession in the near future. Enthusiastic in learning about Science, Technology, and Marketing. I try my best to be a problem creator as well as a solution provider to guide others regarding the same cause I get enthralled by the feeling of being praised by others. A programmer and technical writer under the name Logan, cause that is the best character I have met so far in the two decades of my life. Perhaps I am someone with lesser knowledge but definitely more curiosity than others that sets me apart from others. I create YouTube content and as a part of my recreational activities and am working on my skills as a web developer
Technical writing is one of my hobbies, which would now be turned into a profession. My words have a touch of wit and tend to strike the bull’s eye.


