As the document flow in many institutions gets more and more digitized, so does our interaction with those documents. There is a great number of various papers you might use for all kinds of applications that you can fill in without a single pen stroke. As much as some people prefer handling documents in a more old-fashioned manner, sometimes there’s simply no other option but to go digital. If that is the case for you, then you may find this guide useful. Here we shall show you how to fill in virtual documents, properly edit photos and say a few words about digital signatures.
Fill in the Blanks
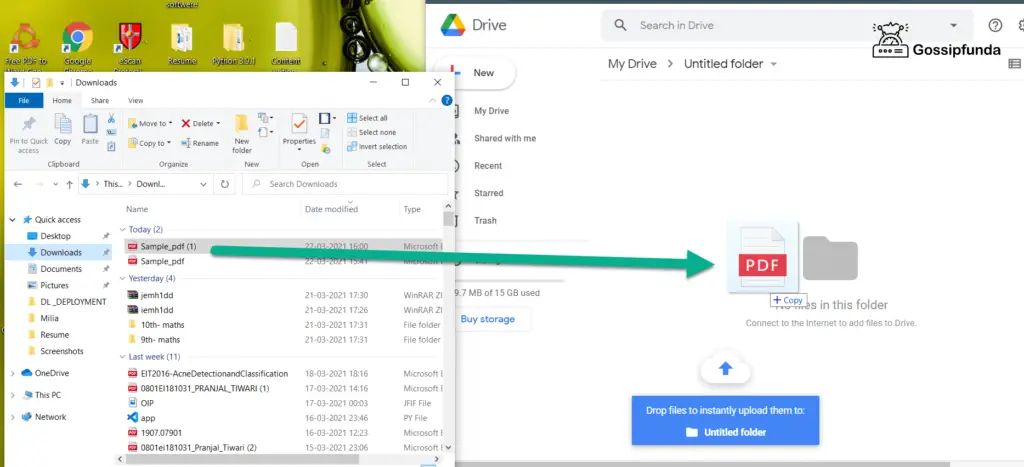
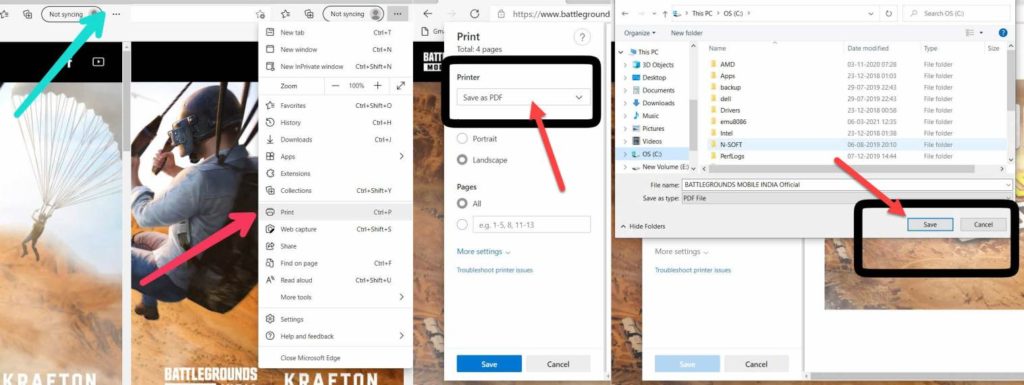
If a document that you have to work with is in a text format, such as RTF or DOCX, then you’re lucky – those are easily editable with a text processor. However, you have a PDF on your hands, that all depends on whether your file is editable or not. In case it is, here’s what you can do:
- Install a PDF editor. In this instance, we will be running with Adobe Acrobat Reader – it is free, and well reviewed.
- Find your form on your PC or download it, if you haven’t already. Then right-click it and go Open with > Adobe Acrobat Reader DC.
- Click on the fillable fields and type your text.
In case your document is unfillable, or “flat”, you can still use the Fill & Sign tools to create the input fields yourself.
Add a Signature
Another requirement that’s getting more and more common is a digital signature. This is not complicated either, and Adobe Acrobat can help here as well.
- Open your PDF in Adobe Reader.
- Click the Tools tab in the top portion of the window.
- Select the Fill & Sign option.
- Click the Sign icon. A drop-down list will pop up.
- Then select Add Signature to open the signature form.
- Type in your first and last name, and the app will stylize your text to appear like handwriting.
- Click Apply.
- Select a place for your signature, then click there.
- Save the signed version of your document.
Take and Edit a Picture
Along with text, you may need to include a photo in your document. The main perk of doing it all digitally is that you don’t have to spend money on printing services, and you can easily make a proper photo at home.
Firstly, you have to take a photo. Requirements may differ from document to document, you’ll just have to do what is necessary. Then you’ll have to edit a photo properly. That’s where a dedicated app will help greatly. Passport Photo Maker, for example, has your back whenever you need to print passport photos or edit pictures for your passport, visa, ID card, etc. Here’s how to edit your pictures with it:
1. Choose the pic. Most ID pics must have a white background, no direct light to avoid shadows, and a neutral facial expression. Sometimes there are additional requirements. Pick a pic that fits them the most. Then run Passport Photo Maker and drag your photo into the program window.
2. Crop the photo. Make sure the yellow horizontal line goes through the center of the eyes, the vertical line marks the center of the face, and the red lines mark the chin and the crown. On the Settings panel, enter the required width and height values.
3. Save your edited photos. When everything looks as intended, go to the File tab, select Save File, and choose a destination folder.
Now you have an image ready to be imported into a form you need. You can also read a more in-depth guide on how to print a passport photo at home, in case you require a physical one after all.
Conclusion
Thanks to online document flow becoming more and more ubiquitous, printing passport photos at home (or anything anywhere, for that matter) becomes more of a thing of the past, as time goes on. But this transition does not have to be troublesome. And with the help of modern software and a handful of comprehensive guides, filling a PDF should be a matter of a few button presses.
I am passionate about my work. Because I love what I do, I have a steady source of motivation that drives me to do my best.
I’m not comfortable with settling, and I’m always looking for an opportunity to do better and achieve greatness. I have a keen interest in the technical field. Apart from this, I am a social media influencer.