How to backup Google Drive? You are seeing this notice Google Drive’s bin is changing from 13 October 2020, items will be automatically deleted forever after they’ve been in your bin for 30 days. that is why you need to BackUp Google Drive.
Do you want to back up your data on Google Drive? Are you looking to keep your data safe and avoid getting lost? We got you covered with whole smartphone data backup with minimal work. Learn how you can backup all your data and keep it safe from prying eyes. Do you know how long a backup lasts on Google server? Learn what happens to your backup once it expires! Learn how you can backup your images.
Backup Google Drive
If you have an Android device, specifically you must already know the importance of the Google Drive backup function. No wonder Google takes great care of its customers and always provides them with the cool functions. Keeping in mind the various types of customers it has all around the world, in all the different countries, speaking a variety of languages, Google never forgets to keep the simplicity and the usability of any product they launch. Their way of designing any product is so incredible and reliable that no Tech Giant yet has been able to take the place of Google in the market.
And one of such products is Google Drive. And there is no way that you wouldn’t have used drive yet or know about it. But still, if you are not so well aware of what is Google Drive, worry not. Drive launched by Google in April of 2012, mainly for backing up different types of documents such as photos, videos, documents, and various other types of files on the cloud. And later on, you can get back to all these backup files from Google Drive anytime and anywhere. On the drive, you can have many other functions other than Backing up the files. Such as creating excel sheets, word files, slides, and so on.
How to Backup Google Drive on Android device, computer, or Apple Device?
As we saw that Drive has tens and hundreds of advantages free of cost, which definitely we won’t want to lose at any chance. Now let’s see how we can back up files in every type of device and use this great function of Google.
Backup Google Drive on Android devices
For backing up data and using all the exclusive functions of Google Drives on any Android devices, you must use at least an Android 6.0 version or above. You can back up many things which includes
- Apps or any type of application
- The entire history of calls and messages
- Settings of the device system
- Complete contacts present in the device
- Information on the calendar
- Photos, Videos, and other documents.
For finding your backups and managing follow these few simple steps:
Step 1) Open the home screen of your android device
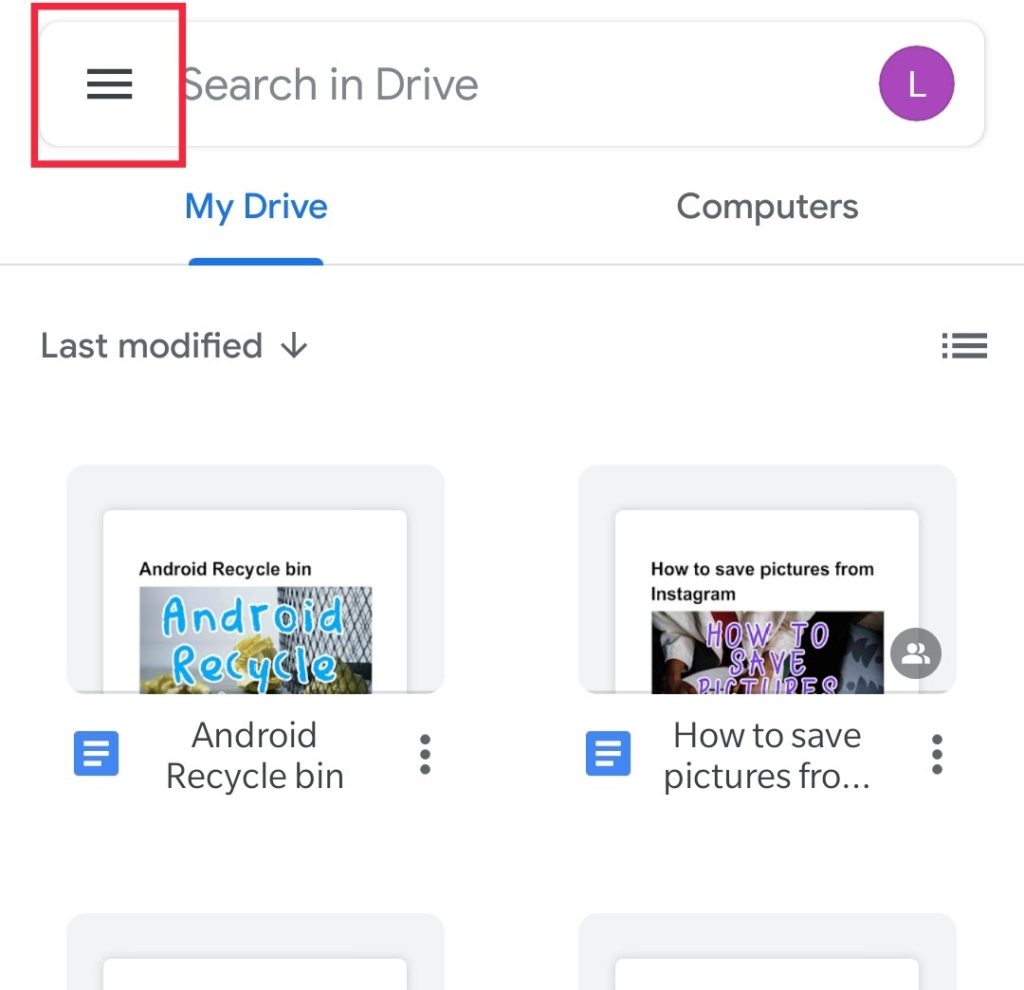
Step 2) Find the Google Drive app on the home screen. Tap on it.
Step 3) Now find three parallel lines on the left side of the screen and tap on it.
Step 4) A slide bar will appear. Find the option “Backups” option.
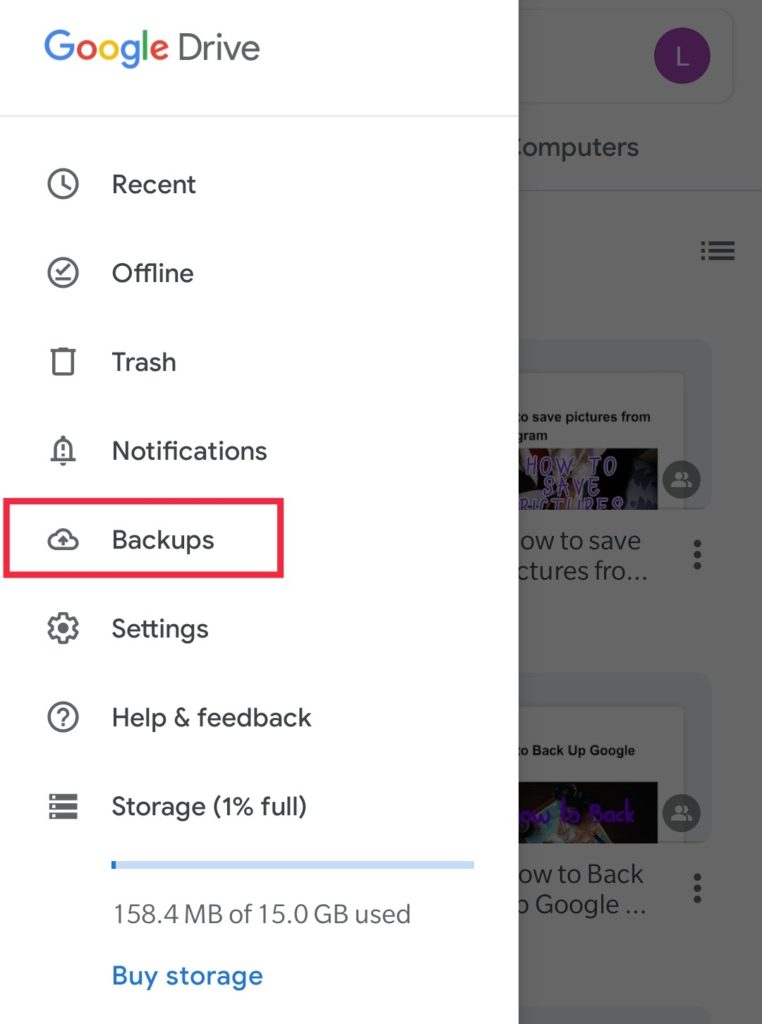
Step 5) Tap on the list of files you wish to edit. Finally, you have a backup of Google Drive.
Backup Google Drive on desktop
Now you can check the backup status, choose to backup your entire smartphone, or even backup your chats in Google Drive. But let’s now see how we can restore the backup and which device you are allowed to choose. Now you can not back up everything on the drive, there are some limitations, you can upload the following.
NOTE: You decide to delete backup for any reason, then you CAN NOT get the backup back even if you want to.
- Android device backups
- Whatsapp data
- Find and manage backups
Follow the following steps:
Step 1) Click here to visit Google Drive, once the site opens choose your Google account.
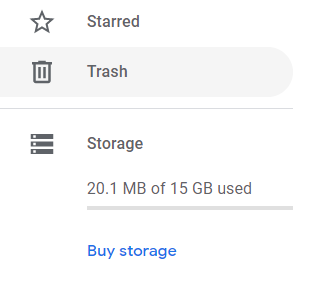
Step 2) Now look for “Storage” and under it, you will find storage numbers and click on it.
Step 3) Now click on “Backups” which should be located at the top right corner of the screen.
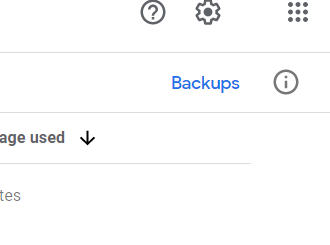
Step 4) Click on “view details about a backup” and right-click on the backup to preview it.
Step 5) Now you can decide to set up the WhatsApp data (chats) on your Google Drive. If the option was enabled before then you will be able to restore your messages on the WhatsApp help center.
Step 6) Keep in mind that your backups will not use your Google Drive meaning the limited storage(15 GB). So you can use your WhatsApp backup to restore your messages to WhatsApp (application).
NOTE: This is up to you as you can choose to stop backups or even delete them. No matter the case, you can not open the file itself and see what’s inside the backup file.
What happens when your Android backup expires
This can be a problem for some users when you create a backup on the Drive, the backup will stay as long as you are active on the Drive. From active we mean you open it periodically and make some changes, do some activity on your account. But if you DON’T USE DRIVE FOR 2 WEEKS then you can see the backup expiration date. With the expiration date, we can see till when the backup will stay. This is very useful for users to see whether they require any additional action or not.
NOTE: If you still don’t do anything then after 57 days your backup will be deleted automatically.
So make sure that you periodically open your Google Drive and see if it is still in place and you didn’t lose any valuable data. But if you want to know more about the WhatsApp help center, like if you can do anything about lost backup.
Backup Google Drive on iPhone and iPad
Now let’s see how we can backup for our iPhone counterparts, it is fairly simple to backup data on iPhones and iPads. Let’s see how to backup your content now on iCloud and Google Backups. You can do the following backups:
- Images and videos on Google Photos
- Important dates on Google Calendar
- All your contacts on Google Contacts
Now you should keep some things in mind before starting the backup. Your iPhone or iPad should be connected to a fast and stable WiFi network, for most backups.
If the upload is taking place again and again then you should not worry as only new images or videos will be backed up. Now the dates and contacts will be overlapped so there will not be any data duplication. NOTE: If you place images and video in custom albums then they will NOT BE BACKED UP on Google Photos. Also, contacts and important dates from apps like Facebook will also not be backed up. Follow these steps to backup your data:
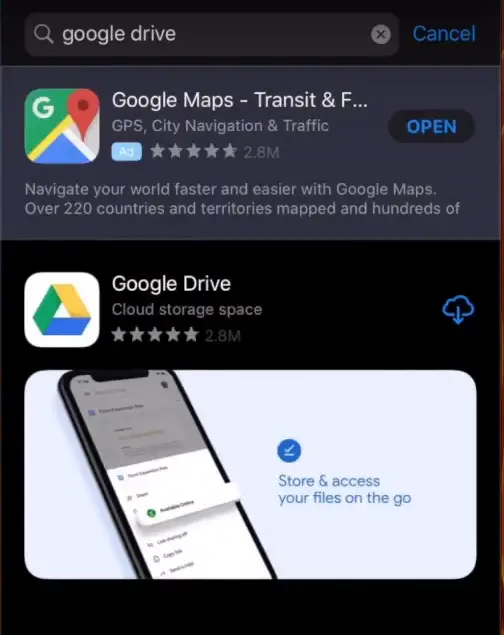
Step 1) Open your iPhone and go to “Apps Store”, download and install the “Google Drive app”. Click here to open the Google Photos in App store.
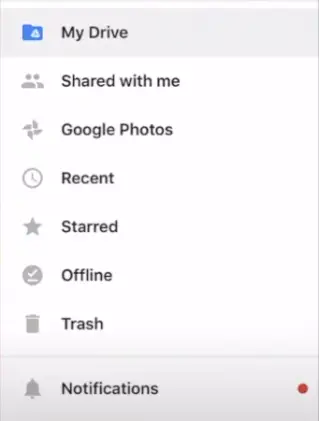
Step 2) Now open the Google Drive and tap on “Menu”, it should be located on the top left corner of the screen.
Step 3) Now simply tap on “Settings” and then on “Backup”.
Step 4) Once you have followed all the previous steps, tap on ”Start backup” and your back up should start soon. (Keep your iPhone connected to any WiFi network).
Back up photos & videos
We saw about backing up different data on different platforms, but now see how to backup photos and videos. With Google Photos you can directly upload photos and videos to the cloud, we will show you how to in this part.
What you need to know about backup and sync, it is cloud storage which can be used for storing images and videos. Once you upload them, you can see these images and videos from your Google account or Google Photos app. But you need to login to your Google Account and then you can easily access the images and video.
Advantages of using Google Photos
- Unlimited storage (at slightly lower quality)
- Data is most safe on the cloud
- Anytime access to the images and videos
- Hardware independent
- Automatic upload or back up
- The best thing is that you don’t have to manually upload every single image, but still you have the option to do so.
- Also if you made any change to the original image, the new one will also be backed up, and duplicate image, not a problem as you can delete them later.
- You have the option to search for images and videos by name, face, location, time, and more. In short, Google Photos are amazing and we would highly recommend you using the app.
- Google Photos automatically creates customized images for you which you can decide to save. Even creates gif and slide show from images, this all is done by the AI (Artificial Intelligence).
Things to keep in mind before starting
- Connect your device over WiFi with good internet speed.
- You need to download the Google Photos app.
- Don’t use custom albums
- Photos should be less than 150-200 MB.
- Videos should not be larger than 10 GB
- The image should be greater than 256 x 256.
File types that can be backed up
This is important if you happen to use different formats for storing images and videos. See the following formats do make sure your media is in the following formats:
Photos: .jpg, .png, .webp, .gif, and some RAW files.
Live photos for iPhones and iPad can be backed up with the help of the Google Photos app.
Videos: .mpg, .mod, .mmv, .tod, .wmv, .asf, .avi, .divx, .mov, .m4v, .3gp, .3g2, .mp4, .m2t, .m2ts, .mts, and .mkv files.
Now if your images and video are in any other format than they will not be uploaded on the cloud. Most people save their images in RAW format, now there are different types of RAW files that you can back up. iPhone saves different RAW type compared to android or the computer, keep this in mind. Now let’s see how you can back up such files.
- Step1) Install backup and sync, open the Google Photos site, click here to visit the site.
- Step2) Now you can upload photos from the browser.
- Step3) You can even set up important dates from the Google Calander, click here to visit the site. You can even sync the dates with the PC so you will be aware of important dates.
- Step4) You can even choose an entire folder for uploading, by first open the folder and select all the images.
Change the backup settings:
Now, this is only for iPhones and Android, you should change the backup settings from “only over WiFi” to “use cellular data”. This is important as if you are not connected to any WiFi network then your images and videos will not be backed up. This can be a huge disadvantage or we can say bummer for most people. Let’s now see how you can do this.
- Step1) Open the Google Photos app and tap on your account icon.
- Step2) Now, tap on “Photos Settings” and you will see “Back up & sync”.
- Step3) Now, tap on it and you have the following settings:
- Upload size
- Cell data usage
- Back up device folders
Now you can change the settings according to your needs, and this is the last step in the guide.
Summary
We saw how we can use the Google Photos and Google Drive app. Even how to set up the app according to our needs and what other things affect the backup process.

I am a Computer Science Engineer, have a passion for coding, sketching, and teaching. I took part in various college technical activities and was Mr. Fresher in the 1st year along with the college’s face. Spends most of the time learning new things and coding small codes for little fun and also as academic, keeping Python 3, Android as priority language for coding.
I love writing tech tips with 100% success and enjoying this new side of life. Finding a passion for new things and letting unlock my creativity and hoping to learn new scientific stuff on the journey of life and being grateful for smaller things.


