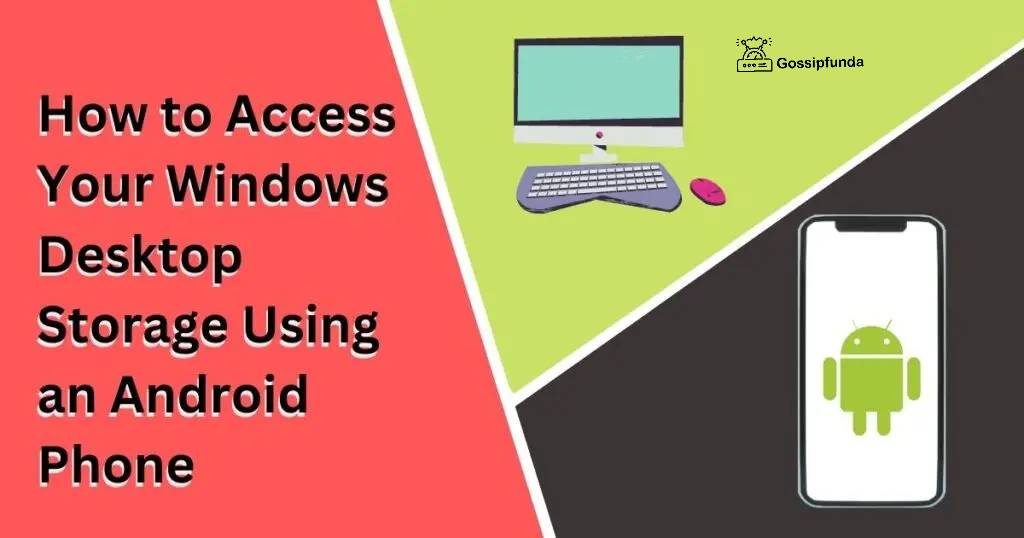
There are a number of reasons why you might want to access your Windows Desktop storage using an Android phone. Perhaps you need to retrieve a file from your desktop that you forgot to bring with you. Or maybe you want to share some photos or videos from your desktop with your friends. Whatever the reason, it’s actually quite easy to do. In order to access your Windows Desktop storage using an Android phone, you will need to configure the network connection, log in to the desktop, and browse the desktop storage. You may also need to configure your desktop storage, depending on how it is set up. Finally, you will need to connect your Android phone to the network.
Your Windows desktop storage is one of the most important places on your computer. It’s where you keep all of your important files, photos, and documents. So, it’s only natural that you would want to be able to access your Windows desktop storage from your Android phone. Fortunately, there are a few different ways that you can do this. In this article, we’ll show you how to access your Windows Desktop storage using an Android phone. First, you’ll need to configure the network connection. Then, you can log in to the desktop and browse the desktop storage. Finally, you can connect your Android phone to the desktop storage.
What is an Android phone?
An Android phone is a smartphone that runs on Google’s Android operating system. It has a touchscreen display, apps, and a camera. The most popular versions of the operating system are 4.4 KitKat and Lollipop. Android phones work just like iPhones or iPads in some ways. They can be used to check emails, browse the web, listen to music, play games, and watch videos. But they also have some unique features that make them stand out from other smartphones. They have a large number of apps available for download from the Google Play Store. And they have access to the Google Play Store’s app store where you can find more apps than you would find on an iPhone or iPad.
They have access to thousands of free apps through Google’s Play Store which means that you don’t have to pay for any apps when you purchase an Android phone! The answer to this question depends on what you mean by “Android phone.” If you’re talking about a phone that runs on Google’s Android operating system, then the answer is pretty simple It’s an Android phone. If, however, you’re referring to a smartphone that runs not only the Android operating system but also Google’s own apps (like Gmail). Then it starts to get a little bit more complicated. An Android phone is a mobile device running on Google’s Android platform. Android is an open-source operating system that has been developed through Google and utilized in different applications and devices.
History of Android
Android is an operating system developed by Google and has been used in many devices. The first Android phone was the T-Mobile G1, which was launched in 2008. Android is based on Linux, the same operating system that powers millions of computers worldwide. The name “Android” comes from a play on words. In addition to referring to a mobile operating system platform, “android” also refers to a person who works with computers or software (a computer engineer). The name was meant to convey the idea of working with computers but also being very human-like at the same time.
In the beginning, there was nothing. Then, all of a sudden, there was something. And then there were two things: Android and iOS. Android was the first open-source mobile operating system to be released for phones and tablets (as opposed to just for smartphones). Which means that anyone could download it and use it for their device. It also meant that anyone could modify the code to add their own features or change how things worked.
This is what makes Android so flexible! One of these features is called “Material Design,” which was introduced in 2014 by Google on Android Lollipop 5.0, and is still being used today. Material Design has a flat look that makes your apps feel like they’re running on paper instead of plastic or glass. In addition to this, Google added one more feature called “Lollipop,” which brings us up to date with all the latest technology available today!
What is Windows Desktop Storage?
Windows Desktop Storage is a feature that allows you to store files, documents, and other content on the local hard drive of the PC. It is part of Windows 7, 8, and 10. The Windows Desktop Storage feature was introduced in Windows 7 and 8, and it is available in all editions of these operating systems except for the Starter edition. This feature gives users the ability to store files and other content on their local hard drives without having to worry about losing them or moving them around. Windows Desktop Storage is one of the most useful features that gives users access to their stored data even when they are not using their PCs. This means that if someone else has access to your computer, they will have access to all the information stored there as well!
Windows Desktop Storage is a way to manage your files and folders on your computer, using the Windows operating system. It allows you to connect to a remote location, like a networked drive or cloud service, and manage those files from the comfort of your desktop. You can use this feature to share files with other people, as well as access them from any device that has access to the internet. For example, if you store all of your photos on your computer’s hard drive but want to access them from your phone, this feature lets you do that seamlessly. Windows Desktop Storage also allows you to organize your files into folders and subfolders, which makes it easier for you to find what you need when browsing through them.
History of Windows Desktop Storage
The history of Desktop Storage is long and full of ups and downs. In Windows 95, the main drive was a floppy disk. The files were stored on the floppy disk and when you wanted to copy a file, you had to copy it onto another floppy disk and then back to your computer. The next version of Windows was Windows 98, which introduced the concept of folders. In this version, you could store all your files in one folder and then access them with a single click instead of having to search through hundreds of folders. Windows 2000 was the next major release after Windows 98 and introduced the ability to save files directly from programs without having to go through folders first.
This allowed users more flexibility when saving their files since they didn’t have to worry about where their files were located in order for them to be accessible later on if needed. Windows XP introduced a new way for users to save their files called “backing up,” which allowed users an easier way of saving their data. Without having to worry about losing any important information due to power outages or other problems with their computers at home or work during those times when no one’s around in case something happens unexpectedly. In the past, cloud storage was the main way to store large files on a computer. But now, with the introduction of Windows desktop storage, this has changed. Now you can use it to store large files like videos, documents, and images on your computer as well.
How to access your Windows Desktop Storage using an Android phone
You want to download the app: PC Remote Receiver on your laptop and PC Remote for your Android phone. Both apps are unfastened to use, and the Android app has alternatives for in-app purchases. First, download PC Remote Receiver on your computer from Google Play Store, or look for it in other app stores. You can also get it from our website by clicking here! Then open the app and log in with your Microsoft account using the login credentials you used when setting up the Receiver software. Once logged in, select the tab that says “My Computer” or “Remote Server” depending on which one you want to manage from this app. Then click on “Add Device” and choose whether you want to connect directly or via a network drive (if available). And you are ready to access it.
One of the great features of Windows 10 is the ability to access your desktop storage from your mobile phone. This can be a great way to quickly transfer files between your devices or to access documents while you’re on the go. To access your Windows storage from your Android phone, you’ll need to first set up the Microsoft Remote Desktop app. Once you have the app installed, you can then connect to your desktop using the phone’s built-in Remote Desktop client. Once you’re connected, you’ll be able to access all of your Windows storage folders and files. You can even copy and paste between your devices, making it easy to transfer files between your phone and your desktop.
Steps to access
Losing your phone can be frustrating, not only because it’s a costly device, but also because it contains a lot of important files and data. If you’re a Windows user, you can easily access your desktop storage from your Android phone using the steps below:
- Download and install the Microsoft Remote Desktop app from the Google Play Store.
- Open the app and sign in with your Microsoft account.
- Select the PC you want to connect to from the list of available options.
- Tap the “connect” button and enter the PIN that is displayed on your screen.
- Once you’re connected, you’ll be able to access your Windows desktop storage from your Android phone.
This process is quick and easy, and it will allow you to keep your important files and data safe. There are a few different ways to access your Windows Desktop Storage using an Android phone. The easiest way is to use a file manager app, which can be found in the Google Play Store. Once you’ve installed a file manager app, simply open it and navigate to the “Network” or “Storage” section. From here, you should be able to see your Windows Desktop Storage. If you’re using a wireless connection, you may need to enter a password to access your files.
Prerequisites
The phone must be rooted. You can check if it is rooted by going to Settings > About Phone > Build Number and seeing if the number is different from the original. You need to enable USB Debugging on your phone. To do this, go to Settings > Developer Options > USB Debugging Mode, and enable it. It will look like a flashing light when enabled. Download any app from the Play Store. Some phones may not allow the installation of apps from unknown sources so make sure to check before installing any new app! Once installed, select “Clear Data” and then open the app again (it will have disappeared). Connect your Android phone to your computer via a USB cable and wait for the device driver installation to complete automatically or manually install drivers if needed (depending on your operating system).
Make sure you are connected as ADB should show up in Windows Device Manager under Other Devices > Android Composite ADB Interface (COMX). You can access your Windows computer storage with the usage of an Android phone in case you follow these. Download the free app called PC Remote Receiver. Once you’ve downloaded the app, open it up and tap the “Settings” button at the top of your screen. Tap “Storage,” then tap “Enable Google Drive.” That’s it! Now you can access your desktop storage from any computer or phone that has Internet access over cellular data networks, regardless of where you are in the world!
Make sure that you have the following
To use Windows desktop storage on your Android phone, you’ll need to make sure that you have the following:
- Make sure your phone is connected to the same network as your computer.
- The device must be unlocked and have a SIM card installed in it.
- Install the app from Google Play Store or App Store on your phone and connect it to your PC/Mac via a USB cable or Wi-Fi hotspot, then run the app on your phone.
Configuring the Network Connection
If you have an Android phone and you want to access your Windows Desktop Storage, you’ll need to configure the network connection. On your Android phone, go to Settings > Wireless & Networks > More > Network settings. You’ll see a list of available networks in your area and you can select the one that’s closest to where you are. Now, go back to the same screen where you just selected a network and tap “Settings.” This will take you to the Network & Internet settings page on your device. You’ll want to make sure that DHCP is selected as your networking protocol (the default selection) so that your computer can automatically detect and connect with it when it’s turned on.
Now all that’s left is for you to enter the correct password for this network connection. Which is typically found next to the password field in Windows’ Network Connections window (also accessible by right-clicking on My Network Places in Windows Explorer). Once this has been done successfully, open up Internet Explorer from File Explorer on your computer and type in “Windows Storage” into the browser bar at the top of the window. In order for this process to work, you must have an active internet connection on your phone as well as on your computer so that they can detect each other and allow you access.
Steps to configure
Accessing your Windows Desktop Storage using an Android phone is a fairly simple process. You will need to have a computer with the Microsoft Remote Desktop app installed and your Android phone connected to that computer. To access your Windows Desktop Storage on an Android phone:
- Open the Microsoft Remote Desktop app on the computer you want to access (Windows 10, 8.1, or 7 users can use the Windows Remote Desktop application).
- Click the “Connect” button in the top right corner of your screen.
- In the next window, enter your username and password for the remote computer and click “OK.”
- Your Android device should now be connected to that remote computer! You can access files on that computer just like any other desktop computer would allow you to do so.
Logging in to the Desktop
If you’re like us, you’ve been using the desktop on your phone for a while now. But what if you want to access that desktop storage from your Android phone? Well, it turns out there’s an easy way! All you need is the desktop app for Windows and an Android device. Download the Desktop app for Windows. Once downloaded, open it up and follow these steps.
- Click Start > Settings > Personalization > Change appearance and sound > “Use your personal picture or screen saver” checkbox .
- Click Start > Settings > Personalization > Change appearance and sound again .
- Click Start > Settings > Personalization > Choose how to change apps on the Start menu.
- Click Start > Programs and Features (or Apps) install/update from a list of available options as shown below in red text.
Are you logging in to your Windows Desktop Storage with the usage of an Android phone? If so, you need to know that there’s a new feature coming out soon that will allow you to do just that. The new feature is called “Desktop-to-Android Collaboration,” and it’s designed to help users access their desktops from their Android devices. Users can access their desktops by signing into their regular desktop accounts from their Android devices. Which will then redirect them to the desktop. The user won’t be able to see anything on the Android device, but they can access files through a browser and use applications like Microsoft Office or Adobe Photoshop. This feature is already available for some users at least, but it’s expected to roll out broadly by the end of this month.
Steps to log in to the desktop
If you want to access your Windows Desktop Storage on an Android phone or tablet, you’ll need to log in to the Desktop. Here’s how:
- Open the Windows Settings app on your device.
- Select Accounts and choose to Add an account.
- Select Other and then sign in using your Microsoft account. You can also use a local user account if you prefer!
- Enter your password when prompted and choose whether or not you’d like to save the password for later use (if you don’t want to save it, skip this step).
- Tap Sign In at the bottom of the screen. If your device asks for permission to access text messages and emails on your device. Tap Allow for each one before continuing with step 6 below!
- Select Use my Microsoft account from my devices (or Local user account if preferred).
- Tap Let’s go! and enter your password again when prompted by the app.
Browsing the Desktop Storage
If you’re trying to access the Desktop Storage on your Android phone and it’s not working, here’s what you can do. Make sure your phone is connected to Wi-Fi and then open up Settings > Wi-Fi. Make sure that the correct network is selected in the list of networks that appear. If you see a blue arrow pointing down, tap it to select the network you’re currently connected to.
Tap Advanced Settings > Storage Manager and make sure that “Enable desktop apps” is checked (it should be). If it isn’t, tap Set Default and then go back up to Advanced Settings by tapping the gear icon next to Storage Manager in the upper right corner of your screen. Now select Enable desktop apps again and then OK out of this menu when prompted by Windows 8/10/7/8/2012/10/2016/etc. Now start installing apps again by going back into Settings > Apps > All Apps & Features > Get More Apps From Windows Store!
Steps to create
If you’re on the hunt for a new way to access your Windows Desktop Storage, you’re in luck! No more prying off your old computer’s hard drive and replacing it with a new one just because there’s suddenly a need for more storage space. Also, No more fumbling around with cables and cords. No more trying not to break your phone when you’re connecting it to your laptop. And no more wondering how you’ll use all of those pictures and videos that are taking up space on your phone. All of those problems are solved by PC Remote Receive. It’s an Android app that lets you access your Windows Desktop Storage from anywhere, using just a few simple steps:
- Download PC Remote Receive from Google Play Store
- Install it on your Android device
- Connect your phone to the computer
- Log into the app using the account you use on Windows, or create one
- Navigate all of your files on the phone
- Enjoy!
Ways of Configuring Your Desktop Storage
If you want to access your Windows Desktop Storage using an Android phone, there are a few things you need to do first. First, you’ll need a USB OTG cable. This is the cable that allows you to connect your phone to a USB port on your computer (or another device). Next, download the free PC Remote Receive app from Google Play or iTunes and install it on your Android phone. Once installed, launch the app and choose “Add Device” from the menu on the left side of the screen. You’ll then be asked to choose your desktop storage from a list of devices that have been connected via USB OTG cables to your computer or another device. Select your desktop storage and click “OK” to add it as a new device for accessing Windows Desktop Storage with this app!
If you have an Android phone and are using it to access your Windows desktop storage, then this article is for you. Before doing anything, make sure that your phone is set up with a USB OTG cable. This means that there should be a USB port on the side of your phone for connecting other devices (like a mouse or keyboard), as well as another USB port on one side of the cable itself. If you don’t have one of these cables. Once your USB OTG cable is ready, plug it into your phone and then plug it into any free USB port on your computer. If you don’t see any free ports available, there might be an issue with how much power your computer is sending out to its ports.
Steps to configure
Making your Android phone access the Windows desktop is a simple process. It is important to note that this will only work with Windows 10, but it will work on all devices running Windows 10.
- Step 1: First, you need to open the Settings app on your Android phone. Find the System section and select “Storage” from the list of options.
- Step 2: Next, select “USB Device Storage Access” from the bottom left corner of the screen.
- Step 3: Finally, choose “Enable USB Device Storage Access” and follow any additional prompts that appear on the screen.
Once finished, you should now be able to access your storage from within Windows 10!
Connecting Your Android Phone
Connecting Your Android Phone to Access Your Windows Desktop Storage Using an Android Phone. If you own an Android phone and are looking for a way to access your Windows laptop or desktop storage from the comfort of your couch, there is no need to worry. We will show you how. In this tutorial, we will discuss how to connect your Android phone to access your Windows desktop storage using a USB cable. This will allow you to easily access the files stored on your PC using the File Explorer app on your smartphone.
To get started, make sure that both devices are connected by using a USB cable. Then open File Explorer and navigate to “My Computer,” where you should see two options: Computer and Device Disk (where Device Disk is your computer). Select Device Disk and copy all of the files from it into the same directory where they are located on your smartphone’s storage. With the release of Windows 10, you can now access your Windows Desktop Storage from an Android phone. This tutorial will show you how to connect your Android phone to access your Windows Desktop Storage using an Android phone.
Steps to connect
This is a quick and easy tutorial on how to connect your Android Phone to access your Windows Desktop Storage using an Android phone.
- Step 1: Open the app called “File Manager” on your Android.
- Step 2: Go to “Storage” and tap on it.
- Step 3: Go to “SD Card” and tap on it.
- Step 4: Tap on “Connected USB Storage” and then tap on the folder that you want to access.
- Step 5: Now you can access all of your files on your SD Card from anywhere on your Android phone!
Using Your Desktop Storage
We know you’re used to using your desktop storage on your Windows desktop to access all of your files, but we’ve got a better idea. If you have an Android phone, why not take advantage of the fact that you don’t have to have a wi-fi connection and just download the app PC Remote Receive? Then use your phone as remote storage for accessing all of your files on the desktop. It’s fast, easy, and free! That way, when you’re on the go and need to access some file or other but don’t have time for a long Wi-Fi connection, just pull up PC Remote Receive, log in with your username and password (which you can find on the app’s website), and get right back to work.
If you want to access your Windows desktop storage on an Android phone, you’ll need to first download a file manager app. I recommend File Explorer, which is available for free in the Google Play Store. Once you have File Explorer installed, connect your phone to your computer (or just start up File Explorer on your Android device). Then open File Explorer, select the drive where your Windows files are located, and tap the arrow next to “View” at the top of the screen. When you do this, you should see a list of folders and files that have been saved onto your Android device.
Accessing Desktop Storage from an Android Phone
It’s easy to get your desktop storage on an Android phone. Open the App drawer and tap the “Settings” icon (three horizontal lines). Tap “Storage”. Tap “Enable USB debugging”. Connect your phone to your computer with a USB cable. On your computer, open the “Developer options” menu and enable USB debugging for the “Android Debugging” option under “Developer options”. You will see a yellow exclamation mark next to that option, indicating that it is enabled/turned on. Open up File Explorer or Finder on your computer and navigate to the folder where your Android device is plugged in. This should be accessible via shared folders in Windows 7 or 10’s “Computer Management” toolkit (it depends on whether you’re using a Mac). If you can’t find it there, make sure that you unplugged the device before continuing.
Few things to consider
In this tutorial, we’ll show you how to access the desktop storage on your Android phone.
- Open up a web browser on your phone and go to PC Remote Receive from Google Play Store.
- Click on “Desktop Storage” in the top-right corner of the screen, and then click “Enable.”
- Your phone will ask you if you want to allow USB debugging on your device. Click “Yes.”
- You should now see a prompt asking if you want to allow USB debugging again. Click “Yes” once more (you may have to repeat this step if it doesn’t pop up right away). This time, you’ll see a new option appear under “ADB,” which is Android Debug Bridge. The program allows us to communicate with our phones through ADB devices like these!
- Now simply connect an external hard drive or SD card reader that has an empty slot in it (or use whatever means necessary) and plug it into one of your computers’ USB ports or SD slots. Your computer will recognize the device as if it were plugged directly into its own port, so just click open when prompted by Windows Explorer or whatever program.
Copying or Moving Files to the Desktop Storage
If you’re using Windows, the easiest way to access your desktop storage is with a USB flash drive or external hard drive. To copy or move files to the desktop storage. Plug in your USB flash drive or external hard drive, and then open File Explorer (Windows Explorer) on your computer. In File Explorer, click on “This PC” and then click “This PC > This PC Drive.” If prompted by UAC (User Access Control), click Yes. In This PC Drive, right-click on the folder that contains the files you want to copy/move, and select “Copy” or “Move” from the context menu that appears. Enter an appropriate destination folder and click OK when done. Your files should now be copied to your desktop storage! If you have a Windows computer, then you can access your Windows Desktop Storage using an Android phone.
- First, download the File Explorer app on your Android device.
- Then, open the File Explorer app on your Android device and go to “Storage.”
- Locate and tap the folder you want to save to your Desktop Storage (it will be named “Windows Documents”).
- Tap the folder where you want to save it and then tap “Save” in the bottom-right corner of the screen (or just drag and drop it over there).
Use an FTP server
To access your Windows Desktop Storage from an Android phone, you’ll need to install the FTP server app on that device. Open the Settings menu and scroll down to find a section called “Internet.” Tap the “Mobile networks” option here, then tap “Set up new APN.” Enter the following settings: Name: “FTP Server,” APN type: IPv4, APN protocol: TCP/IP (UDP not supported), Proxy server: none, Username: root (you can choose a different username if you want), Password: your FTP password (you can change this later if you want).
Make sure that the Use default server is selected on this screen, too it’s important! Tap the Save button when done making these changes. Then return to your Android phone’s home screen and open up Google Maps by tapping its icon on the left-hand side of your home screen. By swiping up from the bottom of any other screen where it appears it’s usually near Other icons on top of all other icons at the bottom of your screen.
Steps to use an FTP server
You can access your Windows Desktop Storage using an Android phone by going to the FTP server and installing a program called FileZilla. This will allow you to use an FTP client to connect to the FTP server from your Android phone and then upload files from your computer to your phone.
- Download FileZilla on your computer.
- Open the FileZilla program on your computer.
- Click “FTP” on the left-hand side of the screen and then “Connect.” You will be prompted for a username, password, and hostname (which is the address of your FTP server). Enter those settings in order to connect to your FTP server.
- Select a directory where you want to save files from your computer and click “Connect.” Then you can browse through folders until you find what you’re looking for!
Mount your Windows Desktop as a drive
You can mount your Windows Desktop as a drive on your Android phone. On your Android device, open the File Manager app. Navigate to the “Internal storage” folder, which is located in the root directory of your device’s storage partition (not the file system). Tap “Mount” at the top of this screen, then select “Change drive letter and mount point”. Enter a drive letter for your Windows Desktop (e.g., D:), then tap “OK”. If you’re looking for a way to mount your Windows Desktop as a drive on an Android phone, here’s a quick tutorial.
- Open Settings on your Android phone.
- Go to Storage > USB Storage.
- Select the device that you want to mount as a drive, and tap “Mount.”
The benefits
The benefits of accessing your Windows desktop storage using an Android phone. If you have a Windows-based tablet, and you want to access the contents of its hard drive, you can do so by connecting your computer to your tablet via USB. But what if you don’t have a Windows-based tablet? Or what if you’re looking for an easy way to access the contents of your computer’s hard drive on another device? Luckily, there are apps that let you do just that. Here’s what they can do for you:
- Access files on your computer from within the app. You can edit or view documents, photos, and other files stored on your computer in real-time. It’s like having a second monitor!
- Use cloud storage to store files on a server that is shared across multiple devices. This can be useful if you want to share documents with colleagues or friends who may not have the same software installed on their computers as yours does (for example).
- You can use it as a remote access tool for accessing files over remote networks such as home Wi-Fi networks or office networks (for example).
Why is it important
It is important to access your Windows desktop storage using an Android phone because it allows you to take advantage of the cloud storage features of the operating system. Cloud storage services like OneDrive, Dropbox, Google Drive, and iCloud are used by millions of people around the world. These services have provided a way for people to store their files in the cloud instead of on their computers or hard drives. This has made it possible for users to access the files from anywhere they have an internet connection. The problem with this kind of storage is that it can be expensive if you want to store large amounts of data. The prices vary depending on how much data you need to store and how many people will be accessing it at any given time.
If someone else needs access to your file then they may need access too which means that there will be more people using your files than anticipated when planning out how much space would be needed. Using an Android phone instead gives you access to all these features without having to pay anything extra for them. Since Android phones already come with cloud storage built in! This means less money spent on expensive subscriptions or subscriptions that don’t include everything you need such as email accounts or photo editing software.
How to troubleshoot problems
If you’re having trouble accessing your Windows desktop storage from an Android phone, try the following. Make sure your phone is connected to the same network as your PC. You can check this by looking for a Wi-Fi icon in your notification bar at the top of your screen. If it’s not connected, go to Settings > Wi-Fi and connect to a known network. Check that both devices are using the same version of the software and that they have compatible hardware (such as an SD card reader). Try restarting both devices, then check that they are able to communicate with each other again by going through these. On your phone: Go to Settings > Apps > App Data > Google Play Store > Clear Data; then tap OK twice when prompted. On your PC: Open Settings > Apps > All apps; then tap Google Play Store and clear data; then tap OK twice when prompted.
Tips for using Windows Desktop Storage
Now that you’ve got your Windows 10 desktop installed, you might be wondering how to access it from an Android phone. The good news is that it’s not as hard as you might think! Here’s how. Make sure your phone is connected to Wi-Fi. Open up the Settings menu on your phone and scroll down to “Developer options.” Turn on USB debugging. This will allow you to connect your phone to a computer and transfer files between them, which is what we need for this tutorial.
On your Android phone, open up the Settings menu again and scroll down to “About Phone.” Tap on this option until it says “You are now a developer!” A message will appear on your screen saying “Congratulations!” You’re done! You can now see all of your Windows files on the desktop of any computer with an internet connection (as long as both devices have Developer options turned on).
Conclusion
In conclusion, you can access your Windows desktop storage using an Android phone by following the steps outlined in this article. First, you need to install a remote desktop application on your phone. Once the application is installed, you can then connect to your desktop using your phone’s internet connection. Once you are connected, you will be able to access your files and folders just as you would on your desktop computer. you can use an android phone to access your Windows desktop storage by following the steps in this article. Set up a VPN, and then connect your android phone to the VPN. Once you have done this, you will be able to access your Windows desktop storage from your android phone. Happy reading cheers.
Hi, I’m Neha, an avid reader and writer of technology tips and tricks, and an expert on smartphone apps. I have been writing for Android, iOS, and Windows tips for a long time. I love to help people learn more about technology so that they can be more productive and comfortable with their devices.
When not writing articles about technology tips and tricks and sharing them with others, I spend my time traveling around the world, searching for new places to explore myself. I’m currently on a mission to get off the beaten path, and explore some of the most technology hidden on our planet before it’s too late!