Destiny 2 is a popular online multiplayer game developed by Bungie. Like any other game, Destiny 2 may encounter errors that can disrupt your gameplay experience. One of the most common errors that Destiny 2 players encounter is the STORK error code. In this article, we will discuss the STORK error code, its causes, and possible solutions to fix it.
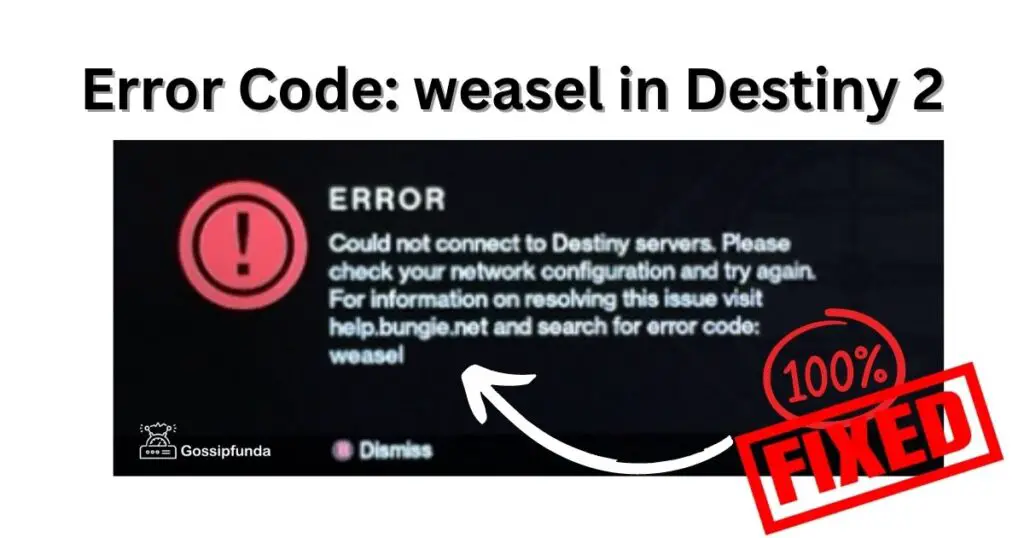
It is worth noting that while the Bungie Error Stork is one of the most common networking errors in Destiny 2, it is not the only one. Other error codes, such as Error Code Arugula and Error Code Weasel, can also occur due to various networking issues. These error codes can be just as frustrating and disruptive to gameplay as the STORK error code. To fix these errors, players can try many of the same techniques used to troubleshoot the STORK error code, including optimizing their connection and using advanced troubleshooting techniques such as UPnP, port forwarding, and checking their NAT type.
What is the STORK error code?
The STORK error code is a general networking error that occurs when Destiny 2 players encounter connectivity issues. This error code usually appears when there is a problem with the player’s internet connection or the Destiny 2 servers.
Causes of the STORK error code
There can be several reasons why a player may encounter the STORK error code while playing Destiny 2. Here are some of the most common causes of the STORK error code:
- Network Connectivity Issues: One of the most common reasons for encountering the STORK error code is network connectivity issues. These issues can include slow internet speeds, intermittent connections, or network outages.
- Firewall or Antivirus Software: Another common cause of the STORK error code is Firewall or Antivirus software blocking Destiny 2’s connections. Firewalls or Antivirus software can sometimes perceive Destiny 2 as a potential threat and block its connections.
- Destiny 2 Server Issues: The STORK error code can also occur due to Destiny 2 server issues. When the servers are down or experiencing maintenance, players may encounter connectivity issues.
- Corrupted Game Files: Corrupted game files can also cause the STORK error code. These files can cause issues with the game’s performance and connectivity.
How to fix the Destiny 2 Error Code Stork?
Now that we know the causes of the STORK error code, let’s discuss possible solutions to fix it. Here are some of the most effective solutions:
- Check Network Connection: The first step to fixing the STORK error code is to check your network connection. Ensure that your internet speed is stable, and there are no outages or connectivity issues. You can also try resetting your router or modem to see if it resolves the issue.
- Disable Firewall or Antivirus Software: If your Firewall or Antivirus software is causing the STORK error code, try disabling them temporarily. You can also add Destiny 2 to the exception list to allow it to connect to the internet without interference.
- Check Destiny 2 Server Status: Another possible solution to the STORK error code is to check the Destiny 2 server status. If the servers are down or experiencing maintenance, you may encounter connectivity issues. You can check the server status on Bungie’s official website or social media handles.
- Verify Game Files: If the STORK error code persists, you can try verifying the game files to ensure that they are not corrupted. To do this, open the Steam client and right-click on Destiny 2. Click on Properties, then select the Local Files tab. Click on Verify Integrity of Game Files, and the client will verify the game’s files.
- Reinstall Destiny 2: If none of the above solutions work, you can try reinstalling Destiny 2. This can help fix any corrupted game files or installation issues that may be causing the STORK error code.
Optimizing Connections: Improving Latency and Packet Loss
If you are experiencing the STORK error code in Destiny 2, optimizing your connection to reduce latency and packet loss can help resolve the issue. Here are some steps you can take to optimize your connection:
- Use a Wired Connection: Using a wired connection rather than a wireless connection can help reduce latency and packet loss. Wired connections are more stable and provide a faster and more reliable connection.
- Close Background Applications: Applications running in the background can use up bandwidth and cause latency and packet loss. Close any unnecessary applications to free up bandwidth for your game.
- Update Drivers: Outdated drivers can cause latency and packet loss issues. Make sure that your network card and motherboard drivers are up to date.
- Disable QoS: Quality of Service (QoS) settings can sometimes interfere with your connection and cause latency and packet loss. Try disabling QoS to see if it improves your connection.
- Port Forwarding: Port forwarding can improve your connection by allowing incoming and outgoing traffic to bypass firewalls and other network obstacles. Look up the ports used by Destiny 2 and forward them on your router.
- Use a VPN: A VPN can help reduce latency and packet loss by routing your connection through a faster and more stable server. However, not all VPNs are created equal, so make sure to choose a reputable VPN provider.
- Upgrade Your Internet Package: If your internet package is not fast enough to handle online gaming, upgrading to a faster package can help reduce latency and packet loss.
Advanced Troubleshooting of STORK Error Code
If you have tried optimizing your connection and are still experiencing the STORK error code in Destiny 2, it may be time to try some advanced troubleshooting techniques. Three common techniques are UPnP, port forwarding, and NAT types. In this article, we will discuss what UPnP, port forwarding, and NAT types are, their impact on your connection, and how to use them to troubleshoot the STORK error code.
UPnP
Universal Plug and Play (UPnP) is a network protocol that allows devices to automatically discover and configure each other. In the case of online gaming, UPnP can automatically forward the necessary ports to improve your connection. To enable UPnP, follow these steps:
- Open your router’s configuration page.
- Look for UPnP settings and enable it.
- Save your changes and reboot your router.
Port Forwarding
Port forwarding is a manual process that involves opening specific ports on your router to allow incoming and outgoing traffic. This can help improve your connection by bypassing firewalls and other network obstacles. To port forward for Destiny 2, follow these steps:
- Find the ports used by Destiny 2. Bungie provides a list of ports used by Destiny 2 on their website.
- Open your router’s configuration page.
- Look for port forwarding settings and add the ports used by Destiny 2.
- Save your changes and reboot your router.
NAT Types
Network Address Translation (NAT) is a technique that allows multiple devices to share a single IP address. There are three types of NAT: Open, Moderate, and Strict. Open NAT allows for the best connectivity, while Strict NAT can cause connectivity issues. To check your NAT type and change it if necessary, follow these steps:
- Open your router’s configuration page.
- Look for NAT settings and check your NAT type.
- If your NAT type is Moderate or Strict, try enabling UPnP or port forwarding to improve your connection.
Conclusion
In conclusion, the STORK error code is a common connectivity issue that Destiny 2 players may encounter. The error code can occur due to network connectivity issues, Firewall or Antivirus software, Destiny 2 server issues, or corrupted game files. To fix the STORK error code, players can try checking their network connection, disabling Firewall or Antivirus software, checking the Destiny 2 server status, verifying game, optimizing your connection, UPnP, port forwarding, and NAT types can help troubleshoot the issue. Enabling UPnP, port forwarding for Destiny 2, and checking and changing your NAT type, if necessary, can all help improve your connection and reduce the likelihood of experiencing the STORK error code.
Awill Guru is a technology enthusiast with degrees in VLSI Engineering (B.Tech, M.Tech) and Android Development. Their passion for education drives them to teach and share knowledge through their blog. He also hold qualifications in Sociology (M.A.) and Education (B.Ed), along with NIELIT O and A Level certifications.


