As a computer user, you may have encountered the frustrating ‘CPU over temperature error’ message. This issue can lead to performance problems, system crashes, and even hardware damage. But worry not! We’ve put together a comprehensive guide to help you understand the causes of this error and provide you with the necessary steps to fix it. By following these recommendations, you can safeguard your computer’s performance and extend its lifespan.
What Causes CPU Over Temperature Error?
1: Insufficient or Failing Cooling System
The primary reason for a CPU over temperature error is an inadequate or failing cooling system. This could be due to a malfunctioning fan, a clogged air vent, or a lack of thermal paste between the CPU and heatsink. A properly functioning cooling system is essential to prevent overheating and maintain the CPU’s performance.
2: Overclocking and Overvolting
Overclocking, the process of increasing the CPU’s clock speed beyond its factory setting, can generate more heat than the cooling system can handle. Overvolting, which increases the voltage supply to the processor, can also cause the CPU to overheat. Both of these practices may lead to an over temperature error if not done carefully and within safe limits.
3: Dust and Debris Build-up
Dust accumulation and debris can obstruct airflow and impair the efficiency of the cooling system. This build-up can cause the CPU to overheat and trigger an over temperature error.
How to Fix the CPU Over Temperature Error?
Fix 1: Clean and Maintain Your Cooling System
To effectively clean and maintain your cooling system, follow these detailed steps:
Step 1: Power off and unplug your computer
Before starting, turn off your computer and disconnect it from the power source to prevent electrical hazards.
Step 2: Open the computer case
Carefully remove the side panel of your computer case, following the manufacturer’s instructions. This typically involves unscrewing or unlatching the panel.
Step 3: Assess the cooling components
Identify the cooling components in your system, including air vents, fans, and heatsinks. Look for any visible dust, debris, or signs of wear.
Step 4: Clean the air vents
Using a can of compressed air, blow out dust and debris from the air vents. Hold the can at a safe distance and angle to avoid damaging components. Alternatively, use a soft brush to remove dust gently.
Step 5: Clean the fans
Carefully clean the fan blades and housing using the compressed air or a soft brush. Hold the fan steady while cleaning to prevent it from spinning excessively, which could damage the bearings.
Step 6: Inspect and clean the heatsinks
Check the heatsinks for dust and debris, especially between the cooling fins. Use compressed air or a soft brush to clean them thoroughly. If necessary, you can remove the heatsink for more efficient cleaning, but be prepared to reapply the thermal paste (see Subheading 2.2).
Step 7: Check the fan functionality
Once you’ve cleaned the components, examine the fans for any signs of wear or damage, such as wobbling, grinding, or unusual noise. Replace any malfunctioning fans.
Step 8: Reassemble your computer
Carefully reattach the side panel and secure it according to the manufacturer’s instructions. Plug your computer back into the power source.
Step 9: Monitor temperatures
After cleaning and maintaining your cooling system, power on your computer and monitor the CPU and system temperatures using software like HWMonitor or Core Temp. temperatures remain within safe limits, the cleaning process was successful.
Step 10: Schedule regular maintenance
To prevent future overheating issues, schedule regular maintenance for your cooling system. Aim to clean and inspect the components every three to six months, depending on your environment and usage. Regular maintenance can help extend the life of your computer and maintain optimal performance.
Fix 2: Reapply Thermal Paste
Reapplying thermal paste is a crucial step in ensuring optimal heat transfer between the CPU and heatsink. Follow these steps to reapply the thermal paste:
Step 1: Power off and unplug your computer
Before starting, turn off your computer and disconnect it from the power source to prevent electrical hazards.
Step 2: Open the computer case
Carefully remove the side panel of your computer case, following the manufacturer’s instructions. This typically involves unscrewing or unlatching the panel.
Step 3: Locate the CPU and heatsink
Find the CPU and heatsink within your system. The heatsink is usually attached to the CPU with a fan mounted on top.
Step 4: Remove the heatsink
Detach the heatsink from the CPU by unscrewing or unlatching the mounting mechanism, as per the manufacturer’s guidelines. Carefully lift the heatsink, avoiding any damage to the CPU pins or socket.
Step 5: Clean the CPU and heatsink surfaces
Using a lint-free cloth or paper towel and isopropyl alcohol (90% or higher), gently clean the surfaces of both the CPU and heatsink to remove any residual thermal paste. Ensure that both surfaces are completely clean and free of debris.
Step 6: Apply the new thermal paste
Apply a small, pea-sized amount of high-quality thermal paste to the center of the CPU. Do not spread the paste, as the pressure from the heatsink will spread it evenly when reattached.
Step 7: Reattach the heatsink
Carefully align the heatsink with the CPU and secure it using the mounting mechanism. Ensure that it sits flush with the CPU and has even pressure across the surface.
Step 8: Reconnect the fan
If the heatsink fan was disconnected during removal, reconnect it to the appropriate motherboard header.
Step 9: Reassemble your computer
Carefully reattach the side panel and secure it according to the manufacturer’s instructions. Plug your computer back into the power source.
Step 10: Monitor temperatures
Power on your computer and monitor the CPU and system temperatures using software like HWMonitor or Core Temp. If the temperatures are within safe limits, the thermal paste reapplication was successful.
Fix 3: Monitor and Adjust Overclocking and Overvolting Settings
Monitoring and adjusting your CPU’s overclocking and overvolting settings can help prevent overheating and temperature errors. Follow these steps to ensure your CPU operates within safe limits:
Step 1: Install temperature monitoring software
Download and install reliable temperature monitoring software, such as HWMonitor or Core Temp. These tools provide real-time data on your CPU temperature, allowing you to track any changes during overclocking or overvolting.
Step 2: Familiarize yourself with BIOS/UEFI settings
Access your computer’s BIOS or UEFI settings during startup by pressing the designated key (usually F2, F10, F12, or DEL). Familiarize yourself with the available settings related to CPU frequency, voltage, and temperature controls.
Step 3: Record default settings
Before making any adjustments, note your CPU’s default clock speed and voltage settings. This information is essential for reverting to factory settings if needed.
Step 4: Increase clock speed and voltage gradually
To overclock or overvolt your CPU, make incremental adjustments to the clock speed and voltage settings. Increase the settings in small steps, leaving ample time for stability testing between changes.
Step 5: Monitor CPU temperature
During the overclocking or overvolting process, keep an eye on your CPU temperature using the monitoring software. Ensure that temperatures remain within the manufacturer’s recommended limits.
Step 6: Stress test your system
Use stress testing software, such as Prime95 or AIDA64, to assess your system’s stability at the new settings. Run the stress test for an extended period (e.g., a few hours) to ensure that your CPU can handle the increased workload without overheating.
Step 7: Adjust settings as needed
If your CPU temperature exceeds the safe limit or your system becomes unstable during stress testing, lower the clock speed or voltage settings. Continue adjusting until you find the optimal balance between performance and temperature.
Step 8: Save and exit BIOS/UEFI settings
Once you have determined the optimal settings for your CPU, save the changes, and exit the BIOS/UEFI settings. Your computer will reboot, and the new settings will take effect.
Step 9: Continue monitoring temperatures
Regularly check your CPU temperature using the monitoring software, even after finding stable overclocking or overvolting settings. This practice helps identify any potential issues before they escalate.
By carefully monitoring and adjusting your CPU’s overclocking and overvolting settings, you can optimize your system’s performance while avoiding the risk of overheating and CPU over temperature errors.
Fix 4: Upgrade Your Cooling System
Upgrading your cooling system can significantly improve heat dissipation and prevent CPU over temperature errors. Follow these steps to select and install an upgraded cooling solution:
Step 1: Assess your current cooling system
Determine the type and effectiveness of your current cooling system. If you’re experiencing CPU over temperature errors despite cleaning and maintenance, consider upgrading to a more advanced cooling solution.
Step 2: Choose the right cooling solution
Select a cooling solution that fits your needs and budget. The two main types of cooling systems are air coolers and liquid coolers:
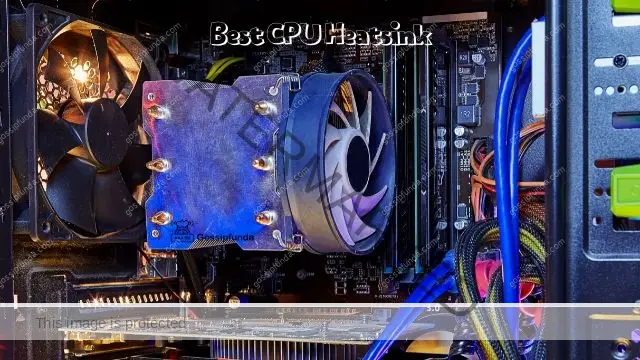
Air coolers: High-performance air coolers are affordable and easy to install. They consist of a heatsink with copper heat pipes and one or more fans. When selecting an air cooler, consider its size, compatibility with your CPU socket, and noise levels.
Liquid coolers: Also known as all-in-one (AIO) coolers, liquid cooling solutions circulate coolant through a closed loop system, transferring heat from the CPU to a radiator, where it is dissipated by fans. Liquid coolers generally provide better cooling performance but can be more expensive and challenging to install. Ensure the cooler is compatible with your CPU socket and that your case can accommodate the radiator size.
Step 3: Power off and unplug your computer
Before starting the installation process, turn off your computer and disconnect it from the power source to prevent electrical hazards.
Step 4: Open the computer case
Carefully remove the side panel of your computer case, following the manufacturer’s instructions. This typically involves unscrewing or unlatching the panel.
Step 5: Remove the old cooling system
Detach your current cooling system from the CPU by following the manufacturer’s guidelines. Be careful not to damage the CPU or motherboard during removal.
Step 6: Clean the CPU surface
Using a lint-free cloth or paper towel and isopropyl alcohol (90% or higher), gently clean the CPU surface to remove any residual thermal paste.
Step 7: Install the new cooling system
Follow the installation instructions provided by the cooling system’s manufacturer. This process may vary depending on the type of cooler (air or liquid) and the specific model.
Step 8: Apply thermal paste
Apply a small, pea-sized amount of high-quality thermal paste to the center of the CPU. Do not spread the paste, as the pressure from the heatsink or water block will spread it evenly when attached.
Step 9: Secure the cooling system
Attach the new cooling system to the CPU and motherboard, following the manufacturer’s instructions. Ensure it sits flush with the CPU and has even pressure across the surface.
Step 10: Reassemble your computer
Carefully reattach the side panel and secure it according to the manufacturer’s instructions. Plug your computer back into the power source.
Step 11: Monitor temperatures
Power on your computer and monitor the CPU and system temperatures using software like HWMonitor or Core Temp. If the temperatures are within safe limits, the cooling system upgrade was successful.
By upgrading your cooling system, you can effectively prevent CPU over temperature errors, enhance your computer’s performance, and extend its lifespan.
Fix 5: Reseating the CPU and Heatsink
If you suspect improper contact between the CPU and heatsink, reseating them can resolve temperature issues. Follow these detailed steps:
Step 1: Power off and unplug your computer
Before starting, turn off your computer and disconnect it from the power source to prevent electrical hazards.
Step 2: Open the computer case
Carefully remove the side panel of your computer case, following the manufacturer’s instructions. This typically involves unscrewing or unlatching the panel.
Step 3: Remove the heatsink
Detach the heatsink from the CPU by unscrewing or unlatching the mounting mechanism, as per the manufacturer’s guidelines. Carefully lift the heatsink, avoiding any damage to the CPU pins or socket.
Step 4: Release the CPU
Unlock the CPU retention mechanism, usually a lever or latch on the motherboard’s CPU socket. Gently lift the CPU out of the socket, taking care not to bend any pins.
Step 5: Inspect the CPU and socket
Check the CPU and socket for any visible damage, debris, or bent pins. If you find bent pins, carefully straighten them using a small, flat tool like a credit card or plastic spudger.
Step 6: Reinsert the CPU
Carefully place the CPU back into the socket, aligning the notches or marking on the CPU with the corresponding features on the socket. Lock the CPU in place using the retention mechanism.
Step 7: Clean the CPU and heatsink surfaces
Using a lint-free cloth or paper towel and isopropyl alcohol (90% or higher), gently clean the surfaces of both the CPU and heatsink to remove any residual thermal paste.
Step 8: Apply new thermal paste
Apply a small, pea-sized amount of high-quality thermal paste to the center of the CPU. Do not spread the paste, as the pressure from the heatsink will spread it evenly when reattached.
Step 9: Reattach the heatsink
Carefully align the heatsink with the CPU and secure it using the mounting mechanism. Ensure that it sits flush with the CPU and has even pressure across the surface.
Step 10: Reassemble your computer
Carefully reattach the side panel and secure it according to the manufacturer’s instructions. Plug your computer back into the power source.
Step 11: Monitor temperatures
Power on your computer and monitor the CPU and system temperatures using software like HWMonitor or Core Temp. If the temperatures are within safe limits, the reseating process was successful.
Fix 6: Optimize System Settings and Background Processes
High CPU usage from demanding applications or background processes can cause overheating. Follow these detailed steps to optimize your system settings:
Step 1: Update drivers and software
Ensure that your system drivers and software are up to date. Outdated drivers or software can cause compatibility issues and increase CPU usage.
Step 2: Adjust power settings
Navigate to your computer’s power settings and select a balanced or power-saving plan. This will prevent the CPU from running at maximum performance all the time, reducing the risk of overheating.
Step 3: Close unnecessary background processes
Open the Task Manager by pressing Ctrl+Shift+Esc and look for any unnecessary background processes consuming high CPU resources. Close these processes by right-clicking and selecting “End task.”
Step 4: Disable startup programs
In the Task Manager, navigate to the “Startup” tab. Disable any non-essential programs that start automatically when your computer boots. This will reduce the initial CPU load and help prevent temperature spikes.
Step 5: Perform a malware scan
Run a comprehensive malware scan using reputable antivirus software. Malware infections can cause high CPU usage and overheating.
Fix 7: Improve Airflow and Cable Management
Proper airflow and cable management within your computer case can significantly reduce temperature issues. Follow these detailed steps to optimize airflow:
Step 1: Power off and unplug your computer
Before starting, turn off your computer and disconnect it from the power source to prevent electrical hazards.
Step 2: Open the computer case
Carefully remove the side panel of your computer case, following the manufacturer’s instructions. This typically involves unscrewing or unlatching the panel.
Step 3: Inspect cable management
Examine the interior of your computer case and identify any tangled or obstructing cables that may be impeding airflow.
Step 4: Organize and secure cables
Use cable ties, Velcro straps, or cable management channels to neatly organize and secure the cables within your computer case. Ensure that cables are routed away from fans and other cooling components.
Step 5: Ensure proper fan orientation
Check that all case fans are installed in the correct orientation, with intake fans at the front and bottom of the case and exhaust fans at the rear and top. This configuration promotes optimal airflow.
Step 6: Install additional case fans (optional)
If your case has unused fan mounting points, consider installing additional case fans to enhance airflow and cooling performance.
Step 7: Reassemble your computer
Carefully reattach the side panel and secure it according to the manufacturer’s instructions. Plug your computer back into the power source.
Step 8: Monitor temperatures
Power on your computer and monitor the CPU and system temperatures using software like HWMonitor or Core Temp. If the temperatures are within safe limits, improving airflow and cable management was successful.
Fix 8: Configure BIOS/UEFI Fan Settings
Adjusting your computer’s fan settings in the BIOS/UEFI can help maintain lower temperatures. Follow these detailed steps:
Step 1: Access the BIOS/UEFI settings
Restart your computer and enter the BIOS/UEFI settings during startup by pressing the designated key (usually F2, F10, F12, or DEL).
Step 2: Navigate to fan settings
Locate the fan settings within your BIOS/UEFI menu. The exact location varies depending on your motherboard’s manufacturer and model.
Step 3: Adjust fan speed profiles
Adjust the fan speed profiles to ensure that your fans are operating at higher speeds when your CPU temperature increases. Many BIOS/UEFI interfaces offer predefined profiles, such as “Performance” or “Silent,” or allow you to create custom fan curves.
Step 4: Enable fan monitoring (if available)
If your BIOS/UEFI supports fan monitoring, enable this feature to receive warnings if any fans malfunction or stop working.
Step 5: Save and exit BIOS/UEFI settings
Once you have adjusted the fan settings, save the changes and exit the BIOS/UEFI settings. Your computer will reboot, and the new settings will take effect.
Step 6: Monitor temperatures
Power on your computer and monitor the CPU and system temperatures using software like HWMonitor or Core Temp. If the temperatures are within safe limits, adjusting the fan settings in the BIOS/UEFI was successful.
Preventing CPU Over Temperature Errors
1: Ensure Proper Airflow
To maintain optimal cooling, ensure that your computer’s case has proper airflow. Position your PC in a well-ventilated area, away from direct sunlight or heat sources. Additionally, cable management plays a crucial role in maintaining good airflow, so keep cables neatly organized inside the case.
2: Keep Your System Dust-Free
Regularly clean your computer’s interior to prevent dust and debris from building up. This simple maintenance step can significantly reduce the risk of overheating and CPU over temperature errors.
Conclusion
In conclusion, addressing CPU over temperature errors requires a comprehensive approach, including cleaning and maintaining cooling systems, reapplying thermal paste, monitoring overclocking settings, and upgrading the cooling solution. Additionally, reseating the CPU, optimizing system settings, improving airflow, and adjusting BIOS/UEFI fan settings can contribute to a stable, efficient, and cool-running system. By implementing these measures, you’ll enhance your computer’s performance, extend its lifespan, and prevent overheating issues.
FAQS
Q: What causes a CPU over temperature error?
A: Overheating due to inadequate cooling, high CPU usage, poor airflow, overclocking, and improperly applied thermal paste can cause CPU over temperature errors.
Q: How do I check my CPU temperature?
A: Use temperature monitoring software like HWMonitor or Core Temp to check your CPU temperature in real-time.
Q: What is the ideal CPU temperature range?
A: The ideal CPU temperature range is 45-65°C under load, though this may vary depending on your specific processor model.
Q: How often should I clean my computer’s cooling system?
A: Clean your cooling system at least once every 6-12 months to maintain optimal airflow and prevent dust buildup.
Q: Can I fix a CPU over temperature error by upgrading my cooling system?
A: Yes, upgrading to a more efficient cooling system, like a high-performance air cooler or liquid cooler, can help resolve CPU temperature issues.
Q: Is it safe to overclock my CPU?
A: Overclocking can be safe if done carefully, but it may increase the risk of overheating. Always monitor temperatures and test system stability after overclocking.
Q: How do I optimize my computer’s airflow?
A: To optimize airflow, ensure proper fan orientation, organize cables for unobstructed air circulation, and consider adding more case fans if needed.
Q: Can malware cause CPU overheating?
A: Yes, malware infections can cause high CPU usage and overheating. Regularly scan your system with reputable antivirus software to prevent such issues.
Prachi Mishra is a talented Digital Marketer and Technical Content Writer with a passion for creating impactful content and optimizing it for online platforms. With a strong background in marketing and a deep understanding of SEO and digital marketing strategies, Prachi has helped several businesses increase their online visibility and drive more traffic to their websites.
As a technical content writer, Prachi has extensive experience in creating engaging and informative content for a range of industries, including technology, finance, healthcare, and more. Her ability to simplify complex concepts and present them in a clear and concise manner has made her a valuable asset to her clients.
Prachi is a self-motivated and goal-oriented professional who is committed to delivering high-quality work that exceeds her clients’ expectations. She has a keen eye for detail and is always willing to go the extra mile to ensure that her work is accurate, informative, and engaging.